|
Summary
|   |
The Summary page is displayed by default when the document details window is opened. The Summary page gives you an at-a-glance view of the status of a document and information on attachments added to the document.
The top of the page displays options to download attachments and display attachments.
NOTE: This tab can be displayed or hid depending upon your preference. When origin wise filtering is enabled, User Name, Comments, Workflow operations will be masked for the specific stages.
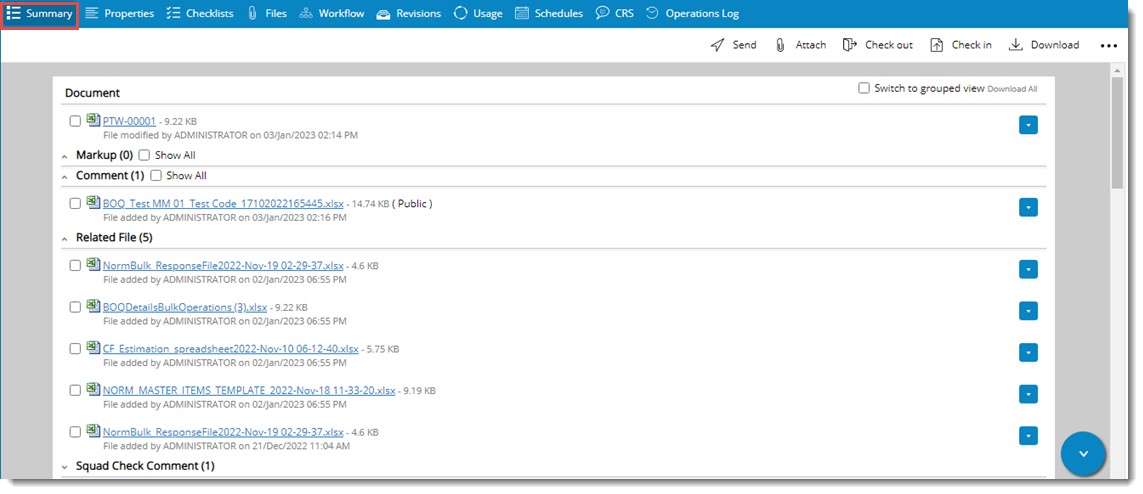
Figure: Summary Page
Switched to grouped view: In some projects, many drawings are detailing the parts of a huge item like a naval vessel. When a drawing is uploaded and workflow is initiated, some stage users might hold the documents for clarification, but they need to route the same through the workflow. The records of reasons for holding the drawings are usually stored in a reference file. Also, if there are minor changes in the drawing, a separate folder is maintained to track them. On selecting the checkbox next to this option, reference documents, client comments, and squad check comments are grouped based on genealogy. This will improve the identification and access of the reference documents. If the option is selected documents are grouped as shown in the following figure.
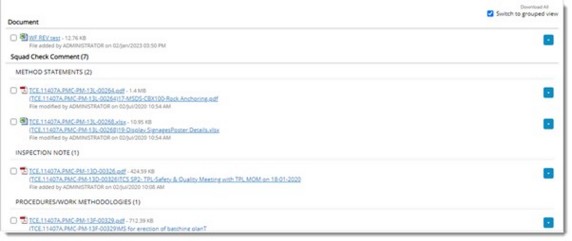
Figure: Grouped View
An option to view the workflow assigned to the document and log of Workflow operations is also available here. On clicking the Workflow tab, workflow assigned to the document is displayed.
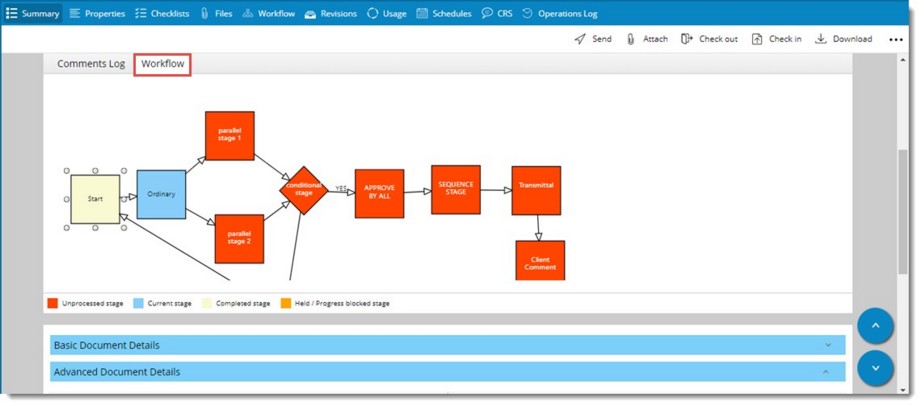
Figure: Summary Page - Workflow Information
On clicking Comments Log tab, log of workflow operations when workflows are sent from one stage to another is displayed. The list of recipients to which the workflow was sent is also listed in the window. Log of reassign operation is displayed separately as shown in the following figure.
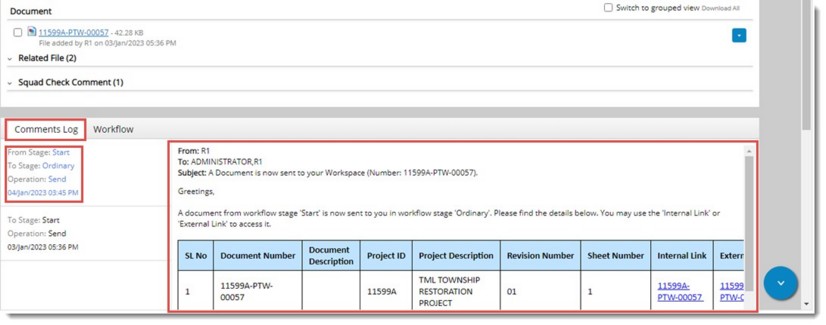
Figure: Log of reassign operation
Send operation details will also be available. If multiple reassign operations are carried out, they are displayed separately as shown in the following figure.

Figure: Send operations log
Different operations can be carried out on an attachment displayed in the summary page. Click the down-arrow next to an attachment and different operations that can be carried out is displayed.

Figure: Operations from the summary page
Operations possible depends on the type of attachment. Type of attachments and operations possible are mentioned in the following table.
|
# |
Attachment Type |
Operations |
|
1 |
Specter |
Download, View, Replace, Delete, Details. Rename. |
|
2 |
Markup |
Download, View, Delete, Details, Rename. |
|
3 |
Comment |
Download, View, Replace, Delate, Details, Rename. |
|
4 |
Related File |
Download, View, Replace, Delate, Details, Rename. |
|
5 |
Squad Check Comment |
Download, View, Show Details, Check Out, Check In, Replace, Delete, Detach, Rename. |
|
6 |
Client Comment |
Download, View, Show Details, Check Out, Check In, Replace, Delete, Detach, Rename. After selecting the document on clicking Delete from the menu, a warning message is displayed. Click OK to remove the document from all associated documents and WRENCH. After selecting the document on clicking Detach from the menu, a warning message Do you want to detach the selected file is displayed. |
|
7 |
Reference Document |
Download, View, Show Details, Detach, Replace, Rename |
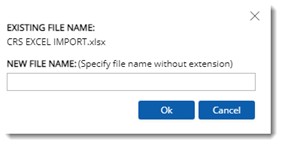
To rename files
Rename window is displayed.
Entire attachments added to the document can be downloaded or displayed. Also attachments can be selected and downloaded.
To download all attachments

Figure: Managing attachments
Attachments are downloaded one after another.
To view and download attachments
Documents and its attachments are displayed.
If you want to download only selected attachments, select the check box next to the attachment and click Download Selected.
NOTE: When the comments are displayed in the Summary tab, only the comments of the latest version of the main document is displayed. To display comments of all the versions of the latest revision of the main documents select the checkbox next to the option Show All. On selecting the checkbox next to this option, comments of all versions of the latest revision is displayed.
There are scenarios where users will upload all additional supporting documents as Related Files. After reviewing, if some of the uploaded files are to be removed, removing the files one by one is a tedious task. Hence an option to remove multiple files will be available in Summary tab and Files tab of the document details window.
For viewing different document details with ease, a menu is displayed on the bottom right side of the document details window. On clicking an item in the menu the corresponding details are displayed in the grid. Depending on the selection you make document details scroll up or down automatically. In addition an arrow button is provided to move between different sections.
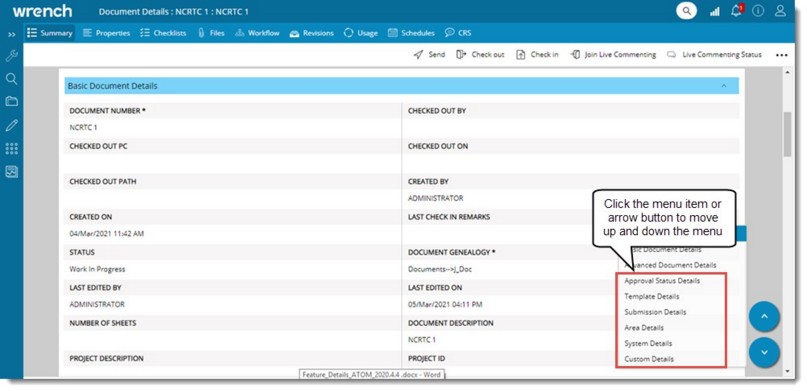
Figure: Viewing document details
Viewing and editing comment and markup details
Details of the Comments and Markups added to a document are displayed in a separate details window. For the remaining attachments, Document Details window is displayed.
 To view and attachment details for comments and markups
When creating consolidated files, since most of the file naming conventions use document number or description, long file names are created. When the vault path is also few levels deep, the effective length of a file when consolidating comments gets very large and often exceeds permitted limits.
In such cases, the consolidate comments operation fails and leaves the user with no options to recover.
In addition, when files are received from external agencies, it may not adhere to the organization’s file naming conventions and hence may be very long. Such files may get successfully added to SmartProject, but subsequently when users try to download to their workstations, it may fail due to the large length of the target folder. In such cases, the original file name needs renaming.