Wrench provides the facility to add single documents to wrench. This topic deals with the addition of single documents. The main topics discussed in this section can be accessed using this navigation table.
Navigation Table
Prerequisites
Only a user who is assigned "Add Right" in the specific Document genealogy can carry out this operation. User or User Group Security can be assigned at the Control Panel>>Security Center. For more information on assigning security right refer Control Panel>>Settings>>Security Center in the Administrator's manual.
NOTE: Documents can be added under the leaf-level genealogy.
Opening the document addition window
For adding and registering documents in Wrench, the first step is to open the document addition window.
 To open the document addition window
- In the global menu click Create>>Document>>Single.
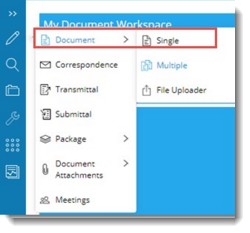
Figure: Opening the document window
NOTE: In this case the document is added to the smart folder My Documents.
Or
- Select a Smart Folder.
- Click More>>Add Document > Single.
If a genealogy is not selected Document Genealogy selection window is displayed.
- Select a genealogy and click OK to continue.
Document Addition window is displayed.
Understanding the document addition window
For ease of use document addition window is divided into different panes. Different operations like selecting a file, assigning a genealogy, assigning document properties and additional operations can be carried out from different panes in the document addition window. The panes are displayed one after the other. The elements that have to be displayed in the pane can be configured and saved in the Server. Different panes in the document addition window are displayed in the following figure.
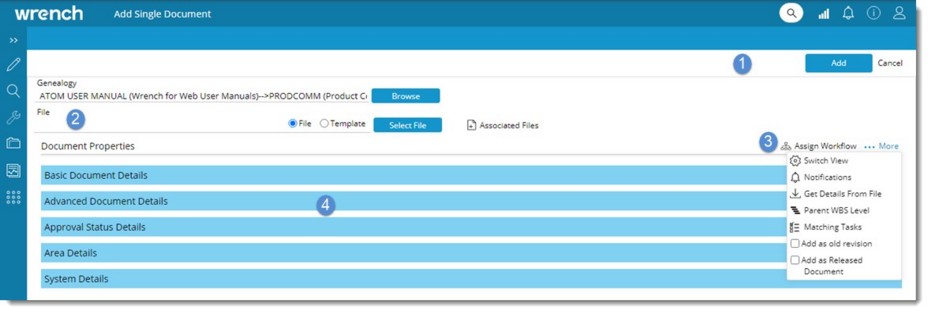
Figure: Document addition window
Different panes in document addition window are briefly explained in the following section.
- Genealogy: A genealogy or folder can be selected under which the document is saved.
- File: Files that is to be added or uploaded to Wrench can be selected here. You can select a file or template. Also Specter files can be added to the document
- Document properties: Basic and Advanced properties, Area Details and Custom Details can be assigned to the document here.
- Tool strip and More options: Additional options like assigning workflows, sending notifications and changing views can be carried out from here.
NOTE: In case a genealogy is not pre-defined for a folder, the genealogy selection window is displayed. Select a genealogy from the list and proceed. For more information on selecting a genealogy see Selecting a Genealogy.
Normally for adding a document to Wrench, the following steps have to be carried out.
Selecting Files
Files or folders stored in specific locations can be browsed and added to Wrench. Files that have to be added to Wrench are selected from the File pane. You can add files or templates as a document in Wrench.
To select a file
- In the file pane click the radio button next to File.
- Click the button Select a file.
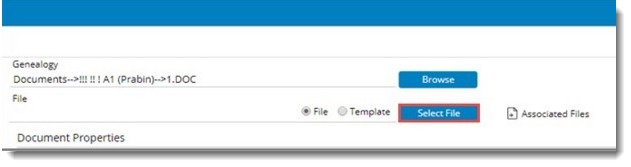
Figure: Selecting a File
File Upload window is displayed.
- Select the file that you want to add to WRENCH and click Open.
You have successfully selected a file and the file is displayed in the File pane.
NOTE: If a template is linked to the selected genealogy, option Template is selected as default.
 Tip!
Tip!
While adding files to WRENCH kindly note the following:
- When you add a document to WRENCH, if the same document number, sheet number combination already exists in Wrench, but the Internal Revision Number of the added document is latest, then the existing document is replaced by the new document and Internal Revision Number is incremented. The existing document is added to the revision history.
- While adding a document with the same document number, sheet number, Internal Revision Number combination of the document that exists in Wrench, adding of the document is not permitted and system displays a warning message.
- If you try to add a document with same document number, sheet number but an old Internal Revision Number, system permits the addition of this document into Wrench to the Revision history of that document.
Selecting Templates
A standard format can be created for certain documents and these formats can be used accordingly while adding new documents. These standard formats are referred to as templates. These formats are saved under different template names.
NOTE: When user selects a genealogy while adding single document, templates assigned exclusively for the selected genealogy is displayed. When user selects a genealogy and project, templates assigned exclusively for the selected project-genealogy combination is displayed. If templates are not available against the combination, templates assigned exclusively for the selected project is displayed. If templates are not available against the selected project, the templates assigned exclusively for the selected genealogy is displayed. When adding single document, if a project is selected, templates assigned exclusively for the selected project is displayed.
For Example: Purchase Order, Invoice etc.
To select a template
- Select the radio button next to Template.
- Click the button Select a Template.
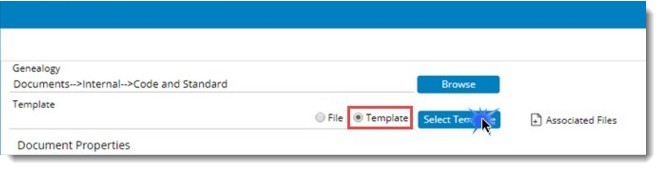
Figure: Selecting a template
Document Template window is displayed. Templates assigned to the genealogy are displayed here. In the Document Template selection window before selecting the template, the template can be viewed by clicking the template name.

Figure: Document Template window
- Select a template and click OK to confirm selection.
Selected Template is displayed in the pane. Clicking on the selected document template a preview of the template is displayed.
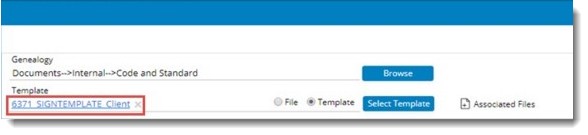
Figure: Selecting template
NOTE: If the genealogy that you have selected does not have any templates linked to it, entire list of templates are displayed. Or else only the templates linked to that genealogy is displayed. If the document is project dependant then templates defined for the project are also displayed here. Project Independent and Project Dependent templates are grouped separately. In addition if the template is linked to a genealogy, the template is selected automatically in the document addition window. When a document template is sent through workflow, edited document properties are updated in the template.
In the case of PDF templates used for managing digital forms, template will get added based on the selected project or genealogy. Updating of template does not take place during adding. Template is updated while document is checked out and checked in. When the document is checked out, document property as well as the custom property is written to the document. When the document is checked in, all system and custom properties marked for writing is written to the document.
Attaching Specter files and Related files
After the originator creates a document or drawing, the PDF version of the document is created. While adding a document into WRENCH, the main document and the specter file is available with the user.
When the originator creates a document or drawing, the originator creates additional input files. These additional input files that are used to create the document or drawing have to be attached along with the document or drawing. Since the input files are attached as related files to the main document, a facility to add related files while adding and uploading the subsequent revisions of the document into WRENCH is also available.
Hence a provision to attach related files and specter files is available in the document addition window.
To attach specter files
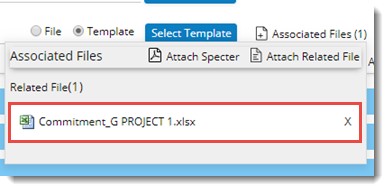
- In the document addition window click Associated Files.

Associated Files window is displayed.
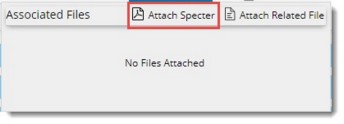
Figure: Associated File window
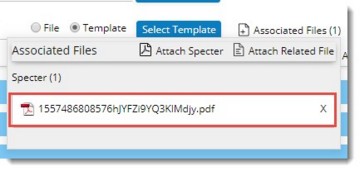
- Click Attach Specter. File selection window is displayed.
- Select the files. Selected files will be displayed in the window.
To attach related files
- In the document addition window click Associated Files.
Associated Files window is displayed.
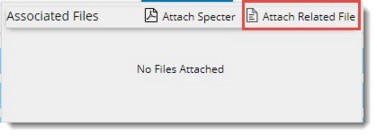
- Click Attach Related File. File selection window is displayed.
- Select the file. Selected file will be displayed in the window.
Selecting Genealogy
In WRENCH, files are usually stored under a specific folder or genealogy. Hence you have to choose a genealogy under which the selected files will be added.
To select a genealogy
- In the Genealogy pane click Browse button next to Select Genealogy.

Document Genealogy selection window is displayed.
- Select the genealogy under which you want to store the document.
- Click OK to confirm selection.
Once the genealogy is assigned the Document Properties pane slides in. Document properties pane constitute of Basic Details and Advanced Details pane. Basic Details pane and Advanced Details pane will appear collapsed. Click on the pane header to expand the pane.
Assigning Document Properties
Next step is to assign document properties. A document is identified by various properties assigned to the document. Only document properties that you need will be displayed in the document addition window. These properties can be defined according to the need of the organization and specific users. This operation is carried out by the administrator. Properties are classified to Basic and Advanced document details.
NOTE: The properties displayed under basic and advanced details are the properties defined in the UI customization window in the server.
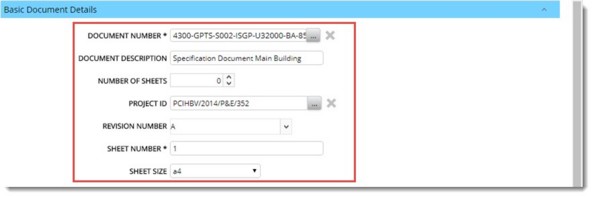
Figure: Basic Document Details
Basic document details
Basic document details are basic document properties like document number and description that are assigned to a document. Usually the following properties are grouped under the basic document details.
|
#
|
Item
|
Description
|
|
1
|
Document Number
|
Document number is the unique identifier for the document that is added to Wrench. A document number can be entered manually or generated automatically using a numbering template. For more information on automatic number generation refer Automatic Number generation.
NOTE: If a project is specified, when user is typing in a document number, list of document numbers reserved in the tasks, to which documents are not linked already are displayed.
|
|
2
|
Document Description
|
Enter a short description for the document that is being added. This is provided for identification.
|
|
3
|
Number of Sheets
|
Total number of sheets in the document that is being added to Wrench can be entered here.
|
|
4
|
Project ID
|
In case the document is related to a project, you can select a project. Click the browse button to select a project from the project search window.
|
|
5
|
Revision Number
|
Revision numbers are maintained to indicate the number of times a document is revised or edited after its release. The revision numbering sequence maintained by different organization varies. It can be common across the organization or even can be project specific.
Select the revision number from a drop-down list.
|
|
6
|
Sheet Number
|
A number can be entered for each sheet in the document. The value you enter for sheet number should not exceed the number of sheets you have specified.
|
|
7
|
Sheet Size
|
A size can be specified for the sheets in the document. The size depends on the type of sheets your organization is using.
|
Automatic Number generation
Generating and maintaining reference numbers for bulk volumes of documents manually is a complicated task. Document numbering templates can be defined in the masters and numbers can be generated based on these templates.
Each organization follows a separate numbering pattern for drawings prepared by them. If the numbering format is not predefined and automatically set, users who are preparing the documents might have confusion in the numbering pattern that has to be used for their documents. This might end up as errors in numbering. To avoid this confusion, the document numbering can be predefined and automatically set so that the users can add the documents without any difficulties.
A document number can be generated automatically based on pre-defined numbering templates.
 In an organization entire shop drawing submittals have to follow the numbering format ORG/DISC/SD000/. In this format ORG is the organization short name, DISC is the discipline of the document and next comes the serial number which is incremental or needs to be generated in a sequential manner automatically. The different disciplines available are Structural (ST), Architectural (AR), Mechanical, Electrical and Plumbing (MEP).
The field ORG will take the value � XYZ if the company short name is XYZ.
The last serial number will be incremented as SD000, SD001 and so on.
To generate numbers automatically
- In the Basic Document Details pane click the browse button next to Document Number.
Number Template window is displayed.
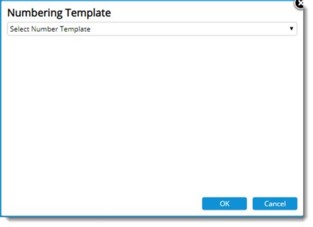
Figure: Number Template window
- Click the down-arrow to select a numbering template from a drop-down list.
The blocks in the numbering template are displayed.
- Enter values for the blocks. Preview of the generated number is displayed.
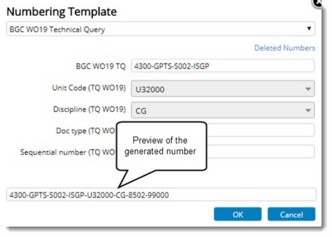
Figure: Generating Number
- Click OK to continue.
When automatically generating numbers without displaying the numbering template window, if there are deleted numbers available for the given combination of values in the numbering blocks, a warning message indicating the availability of unused deleted numbers is displayed. On clicking Yes list of unused deleted numbers is displayed and a number can be selected from a list. On clicking No, new number is generated.
NOTE: Click the hyperlink Deleted Numbers, if you want use the deleted numbers as the document number.
To create list of values for numbering blocks
- In the Numbering Template LOV selection window, Click the hyperlink Manage this list.
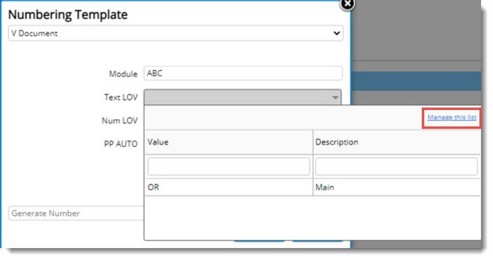
Figure: Numbering Template window
If the current block is dependent on any other blocks in the selected numbering template, and if values are not specified for the blocks, a warning message is displayed. If the current block is not dependent on any other blocks and when current block is not dependent on other numbering blocks, Manage LOV window is displayed.

Figure: Manage LOV window
Dependent blocks and its currently selected values are displayed in the left pane and values defined for the selected blocks are displayed in the right pane.
To create a new value
- In the Manage LOV window Click New.
Create LOV window is displayed.

Figure: Create LOV window
- Enter a Value and Description.
- Click OK to save changes and exit the window.
Created LOV is displayed in the grid.
Facility to edit the LOV and remove the LOV is available in the Manage LOV window.

To edit an LOV,
- After selecting an LOV, click Edit.
Edit LOV window is displayed.
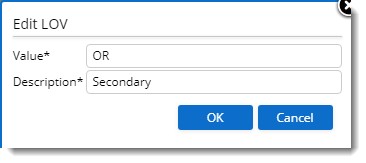
Figure: Edit LOV window
- Modify the values and click OK to save changes.
To remove an LOV
- After selecting an LOV, click Remove. A warning message Are you sure to remove the selected items is displayed.
- Click Yes to remove the LOV and No to cancel the operation.
Advance Document Details
Additional document properties are grouped under the advance document details. These properties are discussed in the following table.
|
#
|
Item
|
Description
|
|
1
|
End of Life
|
You can specify an End of Life period for the document. Once the document reaches the end of life period the document is made obsolete automatically.
|
|
2
|
Life Cycle Status / Issue Purpose
|
A Document after its release will go through an entire life cycle where it is referenced by customer, vendors according to engineering process followed by different industrial verticals. A released document will have its revision updated for every revision it undergoes. This helps the Wrench Users to pinpoint on what phase of the life cycle is the Document at any given time.
|
|
3
|
User Revision Number
|
User revision is used mainly to manage the client revision number.
|
|
4
|
Client Document Number
|
Enter the client document number.
|
|
5
|
Vendor Document Number
|
Enter the vendor document number.
|
|
6
|
Origin Type
|
The origin name is auto-filled with the user's origin name.
The origin name of the current user is assigned to the document or task as they are added. If there is an origin type assigned to the genealogy that is different from that of the current user, the origin name is not assigned.
|
|
7
|
Origin Name
|
Select the origin name. Click the browse button to select an origin name from a list.
|
Custom Details
Custom Characteristics defined are displayed here. Enter the values for custom properties.
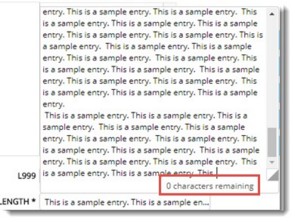
Text type custom property will have text area instead of text box. A user can type in larger contents and jump to next line by pressing Enter key. This allows the user to enter multi line contents.
Typing into the box, simultaneously expands the box. The box expands upto a certain limit, after which a vertical scroll bar appears for navigation as shown in the following figure. Larger box allows the user to have a better view of the typed in content, rather viewing the content in a single line text box.
On exceeding the maximum characters allowed a message 0 characters remaining is displayed at the bottom of the text window as shown in the following figure.
Creating LOV for custom property
When updating custom properties (of LOV type), occasionally it may be required to add a new LOV or edit an existing one.
When the user attempts to select a value for an LOV type custom property, the custom property LOV selection pop-over is displayed. Here a hyperlink MANAGE THIS LIST is available.
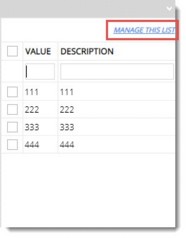
On clicking the hyperlink, Manage LOV window is displayed.

Figure: Manage LOV window
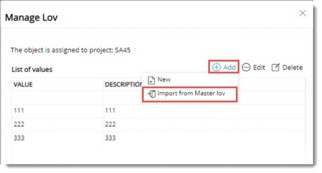
In the window options to Add, Edit and Delete an LOV will be available. If the document is related to a Project, the project number is indicated in the top portion of the windo.
To add a new LOV
- Click Add. A pop-up menu is displayed.
- Click New. Manage LOV window is displayed.
- In the window enter a Value and Description.
- Click Save. Entered values will be displayed in the window.
To import from master lov
- In the menu click the option Import from Master LOV.
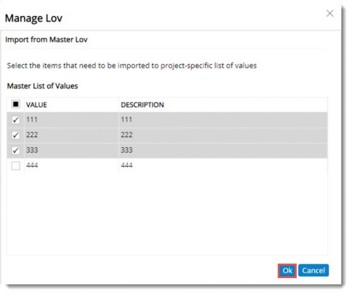
Import from Master LOV window is displayed.
- List of LOV will be displayed here. Select the checkbox next to the LOV’s that are to be imported and click OK.
- Click Edit to update LOV values and Delete to remove a selected LOV value.
If the document is a Project document, in the Add pop-up menu an additional option Import from Master Lov will be available.
On clicking this option, Import from Master Lov window is displayed.
- Select the checkbox next to the LOV’s that are to be imported and click OK.
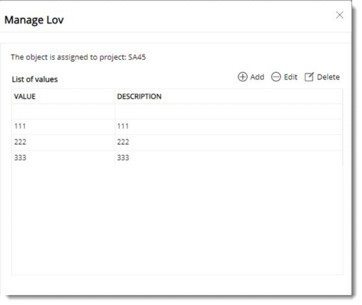
Saved Successfully message is displayed. Selected LOV’s are assigned to the Project as shown in the following figure.
Area Details
Select an Area Code and Area Description for the document.
To select area details
- Open the Area Details pane.

- Click the browse button next to Area Code.
Area window is displayed with a list of areas defined for a project.
- Select an Area and click OK.
Tool strip and More options
In addition to the options mentioned in the preceding sections, more options related to document addition is available. The following options are available in the toolbar and More menu.
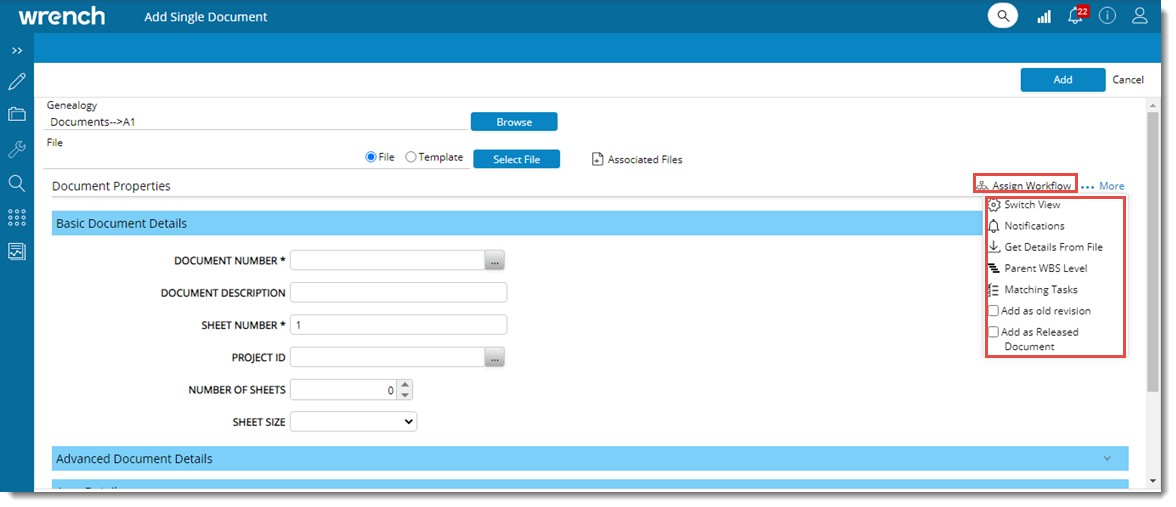
Figure: More Options
Add as Reference
Assign Workflow/Change Workflow
Matching Tasks
Notifications
Switch View
Parent WBS Level
Get Details From File
In addition to the options mentioned above, the following settings are also available.
Add as old revision: If the checkbox next to this option is selected document is added to the old revision of the same document.
Add as Released Document: If the checkbox next to this option is selected, document will be added as a released document.
Other options mentioned above are detailed in the following section.
Adding documents as reference files
After the originator creates a document or drawing, the PDF version of the document is created. While adding a document into WRENCH, the main document and the specter file is available with the user. The main document is added and the Specter file or Reference document is added using Add Attachment option.
To add documents as reference
- In the Add Single Document window click Add as Reference.
Search window is displayed.
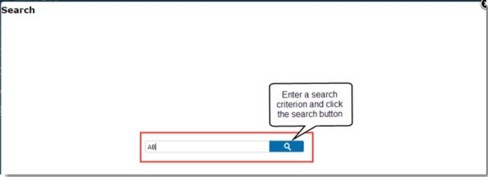
- In the search window enter a search criterion and click the search button.
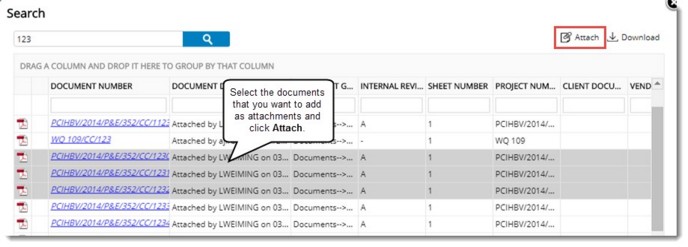
- Search results are displayed. In the search results select the documents that you want to add as reference. Click Attach.
Attached documents are displayed at the bottom of the window.
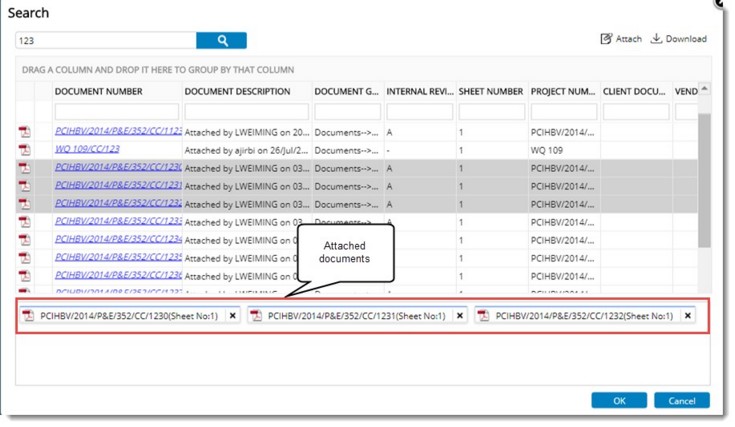
- Click OK to continue.
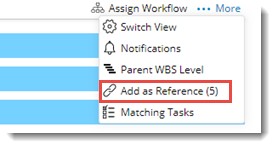
Selected document is attached as reference.
Count of the documents referred is displayed as displayed as shown in the figure.
NOTE: When reference documents are added to Project documents, in the Add Single Document window, Project ID of the main document is mapped to the Project ID column of the referred document.
Get Details From Files
In many engineering scenarios, the draft document is prepared before it is added to the system. Hence before adding, some of the document properties will be available in the document. Since most documents are created from templates, it is possible to read these document properties from the file. It is recommended to do this so that user need not type these details when adding the document to WRENCH.
The facility to read details from documents depend on the following configurations:
- A template is assigned to the project, genealogy or the combination of project and genealogy.
- This operation has no dependency on “Character Updation Mode” setting - as this is a manual operation (on demand).
Option Get Details from the file will be available only when the ‘File’ option is selected. This is available in both single and multiple document addition window.
On clicking this option, system will detect the current template applicable.
If a template is not found assigned to the project, genealogy or the combination, system will display the Document Template window.
Select a Template from the window. Once a template is identified, details as mapped in the template will be read from the file and displayed in the ‘Add documents’ window.
Assigning workflow to documents
The documents in Wrench usually flow through different stages before it is released. This flow of documents through different stages before the work is completed is called work flow. The workflow can be defined stages as in guided workflow or without any definition like in unguided workflow. Guided workflows are used in case of engineering documents as the sequence of work and the stages in which the document will pass is predefined. In the cases like correspondence, the sequence of the stages and the persons required are not clearly know; hence unguided workflows are used. Resources are defined for each stage in a workflow and this workflow is assigned to a document. You can assign an unguided or guided workflow to the document. Guided workflows have pre-defined stages and are readily available, while unguided workflows are created instantaneously.
To assign guided workflows
- In the Tool strip click Assign Workflow.
Assign Workflow window is displayed.
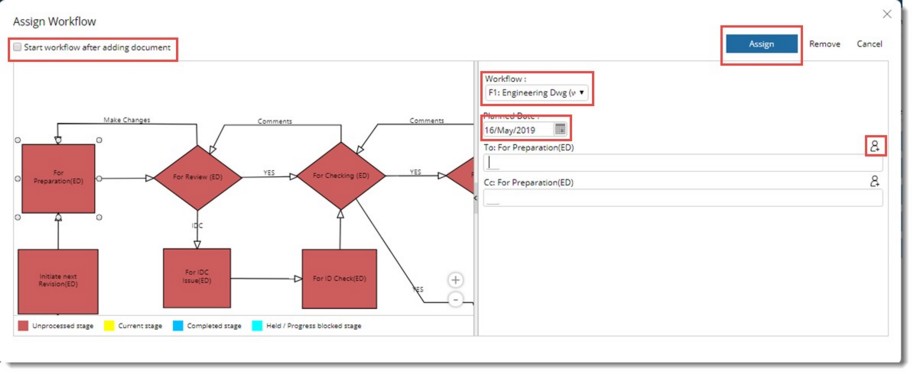
Figure: Workflow window
- Select the workflow from a drop-down list.
The selected workflow is displayed in the preview area.
To assign To.. resources to the workflow
- Select the workflow stage.
- Click user icon
 to assign resources to the workflow stage.
- Search User window is displayed. You can select resources from the list.
Selected users are displayed here.
To assign Cc resources
- Select the workflow stage.
- Click user icon to assign Cc resources to the stage.
- Search User window is displayed. You can select resources from the list.
Selected users are displayed here.
Start workflow after adding document: A document added, before its final approval and release, go through various processes in the organization. A work flow is created defining these processes and this work flow is assigned to the document. On selecting the check box against Start work flow after adding the document, once the document is successfully added the work flow is started.
Planned Completion Date: Select a date on which completion of the document is planned.
- After entering all the details click Assign button to complete assigning of workflow.
- Click Remove button to cancel.
To assign unguided workflow
- In the Workflow window, click the down-arrow next to Workflow.
- In the drop-down list select Unguided workflow.
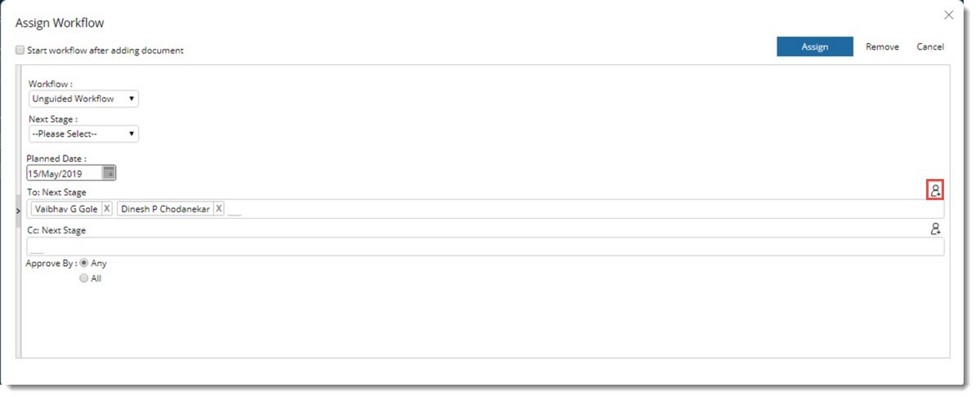
Figure: Selecting Unguided workflow
- Click user icon to select the recipients.
Search User window is displayed.
- Select the users and click OK.
- In the workflow window, click Assign button to confirm the selection of workflow.
Linking Matching Tasks
Based on the matching option provided in Task Linking Matching Option in document genealogy default properties, matching tasks can be linked to the document.
To link matching tasks
- In the tool strip click Matching Tasks.
Matching Tasks window is displayed.
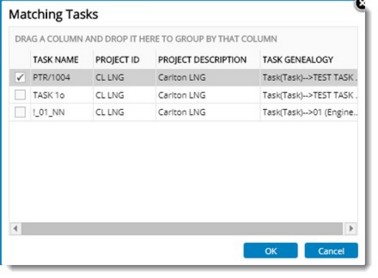
Figure: Matching Tasks window
- Matching tasks are displayed. Select the tasks that you want to link to the document.
- Click OK to continue.
NOTE: Matching Tasks window is also displayed if there is only a single task satisfying the condition. If there are no tasks satisfying the condition, a message No matching tasks available is displayed. Matching Tasks window is displayed only if the option Manage Auto Task on Linking on Document Addition is selected in Control Panel>>Performance and Utilities>>Documents window.
Sending Notifications
Notifications are automatically generated mails notifying the occurrence of an event. The notifications can be generated on events like documents getting added, documents getting revised, documents getting routed to another stage and on delays. Mails can be sent to selected users notifying the addition of a document.
To configure notifications
- In the Tool strip click Notifications.
Notification window is displayed.
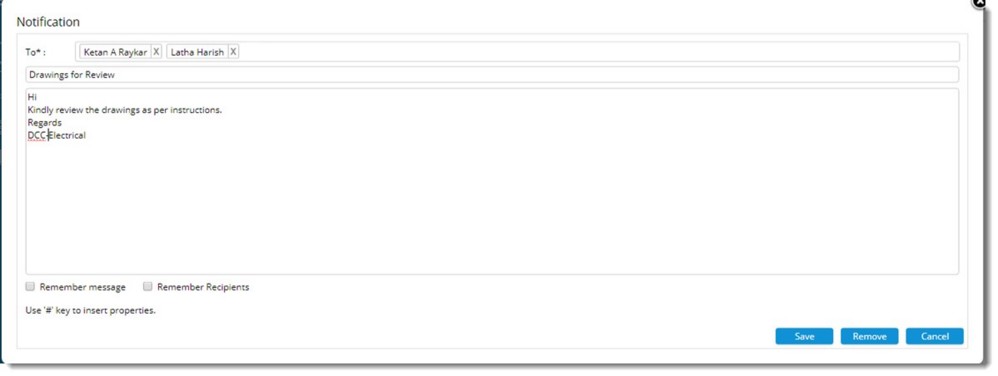
Figure: Notifications window
- Click To..to select the recipients for the notification.
User List window is displayed.
- Select the check box next to the users whom you want to add to the recipient list.
- Enter a title or subject for the notification.
- Enter the message that has to be included in the notification.
- Click Save to store changes and continue.
NOTE: If the settings Remember messages and Remember Recipients is selected, latest message and list of users is cached. Notifications will be sent for all future documents automatically even if the used does not visit the �Notifications� page during document addition. In case you want to insert document properties in the message press # key and a list of document properties are displayed. You can select the property you want to insert from the list.
Assigning a Parent WBS Level
In the document default properties, if task linking is configured and for the option Auto Attach Documents to Task, value selected is Link; on clicking this option, a window for selecting Parent WBS Level is displayed. WBS Level can be selected from this window.
NOTE: Selection of a Project is mandatory for this feature to function.
In the Import template generated from Multiple Document Addition window, a new column Parent WBS Level is available. If a property set is defined, all the WBS levels of the specified Project in property set is exported.
Adding document
After entering all the properties final step is to add the document.
To add document
- In the document addition window click Add.
If all the required values are entered document is added successfully and a message is displayed.
NOTE: If one user adds a document and if the document number is already used (For example let Doc NO:21) then a validation message saying that the document number is already used; Do you want to use the next available Document number (says Document number :22). On clicking YES new document number is generated and the document is added. On clicking No, operation is cancelled.
Switching Views
Different views can be configured for the document addition in the Masters. These views can be selected from here depending upon your requirement.
To select a different view
- In the Tool strip click Switch View.
Switch View window is displayed. A list of pre-defined views is displayed here.
- Choose the view you need from the list.
- Click Select button to confirm view selection.
- Once all these properties are defined for a document, click Add button to upload the document to Wrench.
NOTE: Click the check box next to Add as Released if you want to release the document simultaneously with document addition.
Dragging a document to the smart folder
A document can be dragged to a smart folder, attributes can be assigned to the document and the document is saved.
To drag a document to the smart folder
- Select the smart folder to which you want to add the document.
- Select the document and pressing the left mouse key gradually drag the document to the drop zone that is displayed.
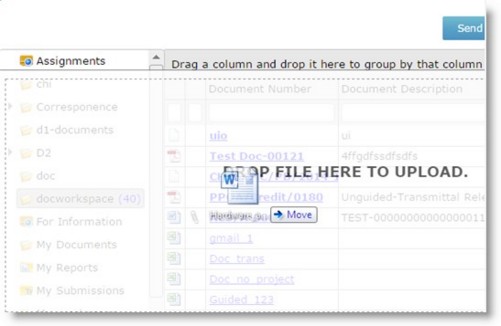
Figure: Dragging document to a folder
- Release the mouse button. A message box is displayed.
- In the message box click Add button.
The document is successfully dropped into the folder.

