|
Creating WRENCH account for external users
|   |
|
Creating WRENCH account for external users
| |
In scenarios like bidding, RFI (Request for Information) documents are to be sent to a number of potential vendors for receiving quotations. Such vendors may not have user accounts in Wrench. Details about the vendor such as their organisation name, communication address etc. are ideally furnished by vendors themselves. Also, it is not appropriate to create login credentials and send it to users by email. Hence a facility for potential users to register themselves is introduced in WRENCH for WEB.
For this facility to be available, certain settings has to be defined in WRENCH Enterprise server.
NOTE: A user group can be configured in WRENCH Enterprise server and all vendors or bidders who register in WRENCH using the facility are saved under this group.
Registering new users
An email containing the link to access user registration window is sent to potential vendors. When user opens the link User Registration window is displayed.
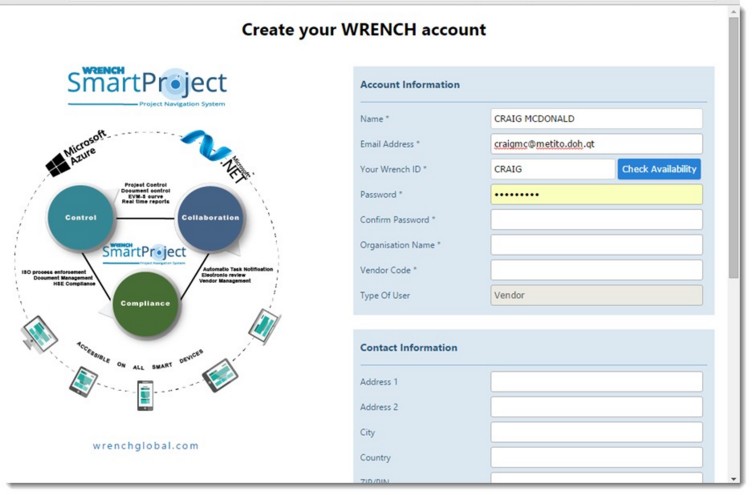
Figure: User registration window
User registration window consists of the following three panes.
Details that has to be entered are described in the following sections.
Account information is the preliminary details required to register a user.
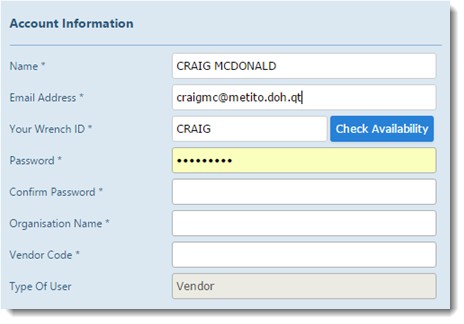
Figure: Entering account information
Enter the following details in this window.
|
# |
Property |
Description |
|
1 |
Name |
Enter the vendor name. |
|
2 |
Email Address |
Enter vendor email id. |
|
3 |
Your Wrench ID |
Enter the unique login name in wrench user master. After entering Wrench ID click the button Check Availability to confirm availability of the ID entered. If the entered name is available, a message Specified Name can be used is displayed. |
|
4 |
Password |
Enter the password defined in WRENCH user master. |
|
5 |
Confirm Password |
Enter the same password to confirm. |
|
6 |
Organization Name |
Enter the organization name of the vendor. |
|
7 |
Vendor Code |
Enter the Vendor Code. |
|
8 |
Type of User |
This is set to Vendor by default. |
Enter contact information of the vendor here.
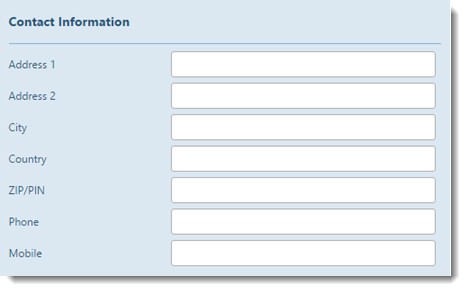
Figure: Entering contact information
|
# |
Property |
Description |
|
1 |
Address 1 |
Enter the address |
|
2 |
Address 2 |
Enter the address |
|
3 |
City |
Enter City name |
|
4 |
Country |
Enter Country name |
|
5 |
ZIP/PIN |
Enter Postal Code |
|
6 |
Phone |
Enter telephone number |
|
7 |
Mobile |
Enter mobile number |
Agreeing to terms of use and submitting user details
In this pane terms of usage of this facility is displayed. If you want to continue with the registration process select the checkbox next to I Agree, enter the verification code shown in the box and click Submit button.
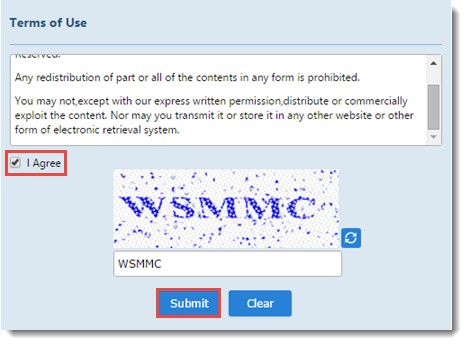
Figure: Terms of Use
On clicking the submit button a vendor master entry is created with details as specified in the preceding tables. User Created Successfully message is displayed. An email notifying the user on successful registration is received. A sample notification mail is shown below.
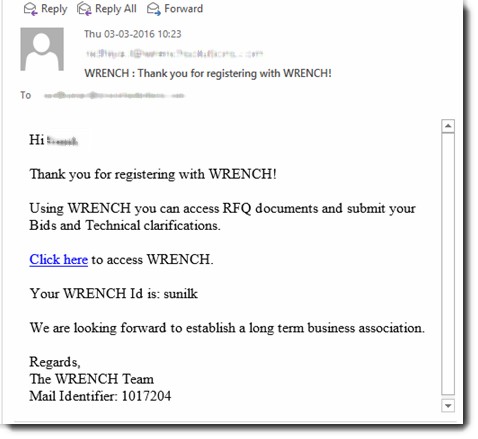
Figure: Notification mail