|
Sending multiple objects
|   |
|
Sending multiple objects
| |
It is possible to send multiple objects provided they have the same workflow and are in the same workflow stage.
To send multiple objects
Multiple Send window is displayed.
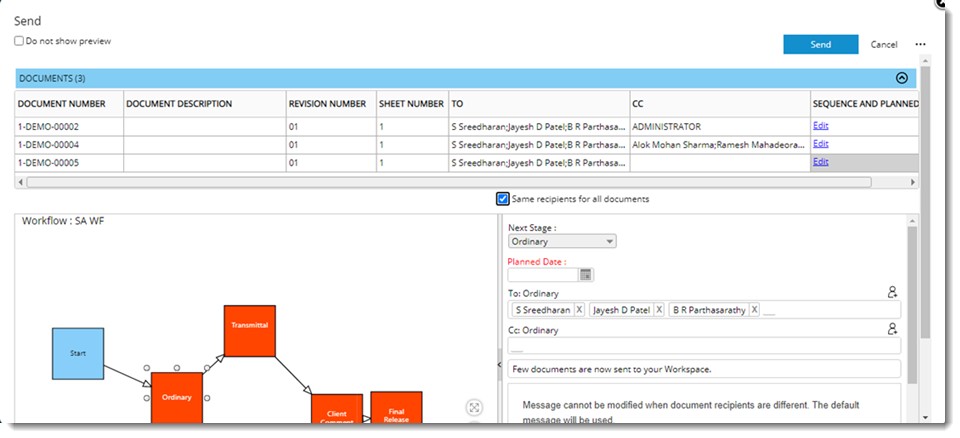
Figure: Multiple Send window
In the window, the selected documents are listed in the top grid along with their related details. If the recipients are configured for the next stage, their usernames are displayed in the ‘TO’ and ‘CC’ columns of the grid. If the next stage users are not the same for all the selected documents, this can be changed from the grid.
Same recipients for all documents: If the checkbox next to this option is selected, same recipients are assigned for all the documents in the window.
If the lead time for the next stage is configured, then the planned date of the fields is auto-filled as the sum of the current date and the lead time.
When notifications are sent, instead of individual notifications for each document, all the documents having the same set of recipients will get a single notification.
Defining sequencing and planned dates
Users can specify specific planned dates and sequences against each document.
To define sequence and planned dates
The sequencing and Planned Date window are displayed.
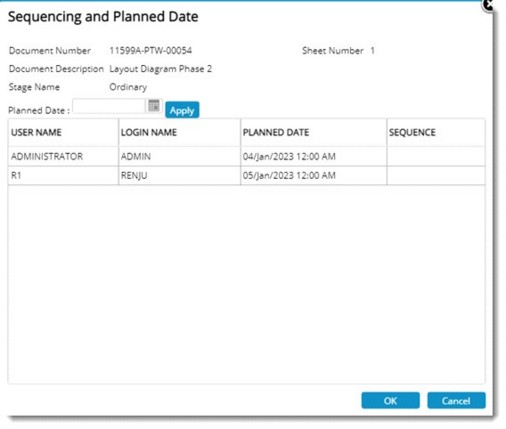
Figure: Sequencing and planned date
Details of the document, username, and login name of the stage resources and planned date are displayed in the window. The sequence field will only be editable if the stage to which the documents are being sent is sequenced.
If the sequence is already defined, then they are displayed by default in the window. If the lock sequence option is defined in the stage properties, then the user is restricted from changing the sequence.
The sequence and planned date are applied to the document and the window is closed.
Importing resources
It is possible to specify the recipients from a distribution list.
The option Import Resources is displayed only if the selected documents are of the same project and if the checkbox next to the option “Override recipient list” is selected.
To specify recipients from a distribution list
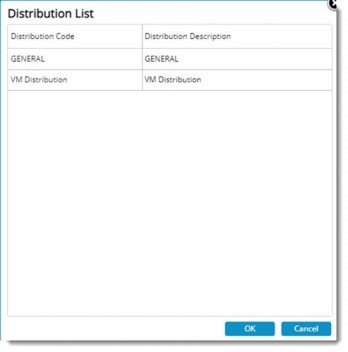
Figure: Distribution List window
Available distribution lists are displayed in the window.
To and Cc recipients are populated based on the selected recipient list.
Documents are sent to the selected stage.
NOTE: When the user has defined a custom property during the send operation and if the user proceeds to send multiple documents using the send option, a window for updating custom properties is displayed. Here user can select multiple documents and update its custom property in a single instance.