|
Creating and Submitting Overtime Request
|   |
|
Creating and Submitting Overtime Request
| |
There are scenarios where a user works for more than the specified normal time. The duration where the user works beyond the normal duration is called Overtime hours. There are organisations where a user is required to get the approval of superiors if the users need to work for overtime hours. Hence a facility to handle overtime booking is available.
For enabling Overtime hours approval, a setting Approval required for logging overtime is available in Project Settings window. If this setting is selected the request for approval of overtime entry will be mandatory, if this setting is disabled overtime can be entered without overtime request approval.
To create overtime request
Overtime Request Details window is displayed.
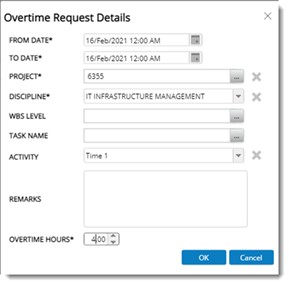
Figure: Overtime Request Details window
|
# |
Property |
Description |
|
1 |
FROM DATE |
Select the ‘From date’ for the overtime request. This is mandatory. |
|
2 |
TO DATE |
Select the ‘To date’ for the overtime request. This is mandatory. |
|
3 |
PROJECT |
Click the browse button to select a Project. Combination of projects for which the setting ‘Approval required for logging overtime’ is enabled and the projects which are accessible to the user are displayed in the list of projects. Select a Project from the list. This is mandatory |
|
4 |
DISCIPLINE |
Select a discipline from a drop-down list. This is mandatory |
|
5 |
WBS LEVEL |
Click the browse button to select the WBS level of the Project. WBS level is displayed as a hyperlink. |
|
6 |
TASK NAME |
Select the required task against which the overtime has to be entered. The tasks will be filtered based on the project and WBS level selected. Task name is displayed as a hyperlink. On clicking the hyperlink task details window is opened in a new tab. |
|
7 |
ACTIVITY |
Select the activity from a drop-down list. |
|
8 |
REMARKS |
Enter remarks if any. |
|
9 |
OVERTIME HOURS |
Enter the total number of hours required for overtime. |
NOTE: If value for overtime hours entered exceeds value for overtime specified in Calendar master a warning message is displayed and the operation is cancelled.
NOTE: If time sheet approvers are not assigned in the project for the user, a warning message is displayed, and the operation is aborted.
After entering the request next step is to submit the overtime request.
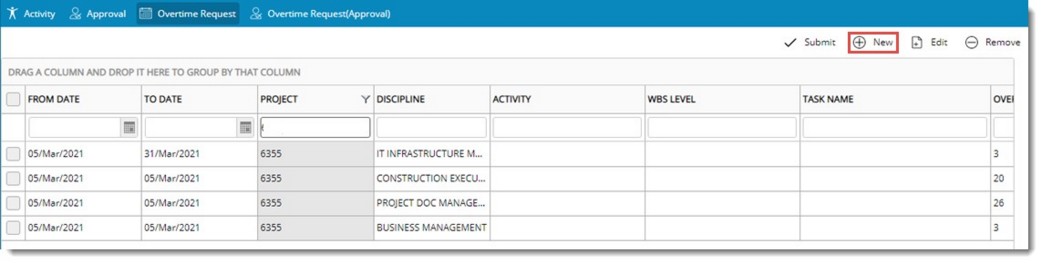
To submit a request
In the window select the request that is to be submitted and in the tool bar click Submit.

Figure: Submitting overtime request
Overtime request submitted successfully message is displayed.
NOTE: Only overtime requests in Create or Reject status can be submitted. Or else a warning message is displayed.