In customer sites, sometimes large number of projects are created in Wrench. When new projects are created, majority of the information and metadata are to be inherited from an existing project. Hence facility to create single or multiple project from existing project is available in WRENCH.
 To create a project from existing project
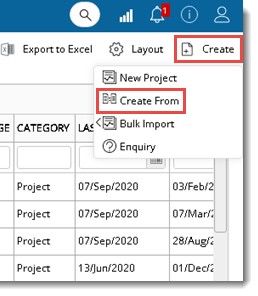
- On the Project module window click Add.
- On the menu displayed click Create From .
Create Project window is displayed.
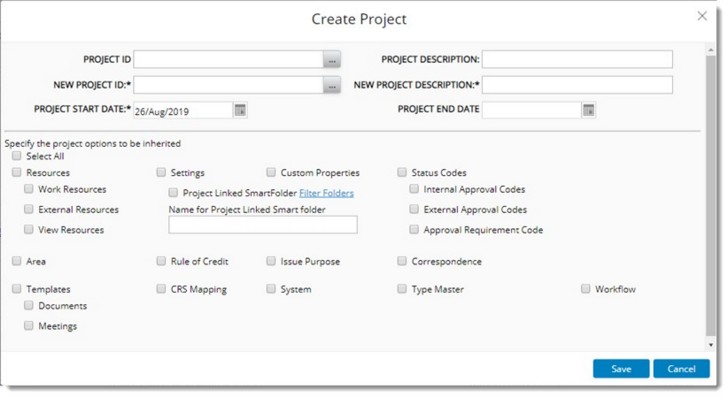
Figure: Create Project window
- Enter the source Project and Project Description and new Project ID and Project Description.
- Select the Project Start Date and Project End Date from a date picker.
Different properties that can be inherited is displayed. Select the checkbox next to the properties that can be inherited.
- Click Save to create the project. Project Created Successfully message is displayed.
- Click OK to continue.
Project Properties window of the newly created Project is displayed.
Auto creating Project Linked SmartFolder
It is possible to auto create the project linked smart folder on creating a project from an existing project.
NOTE: Ensure the smartfolders are selected In the Project Settings window.
 To auto create smartfolders
- On the Project Creation window click Create and in the menu click Create From.
- On the Create Project window select the checkbox next to Settings.
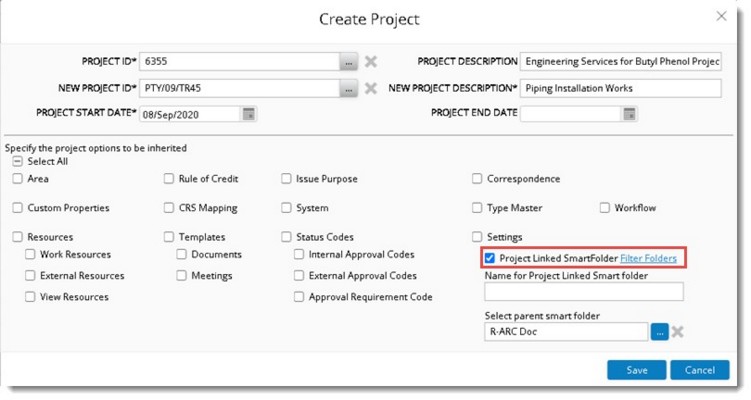
Figure: Create Project window
Option Project Linked Smart Folders will be selected and the hyperlink Filter Folders will be enabled.
- Click the browse button next to Select parent smart folder. Smart folder selection window is displayed.
Select Smart Folders window is displayed. Smart folder (parent and its child) linked to the source project will be displayed as shown in following figure.
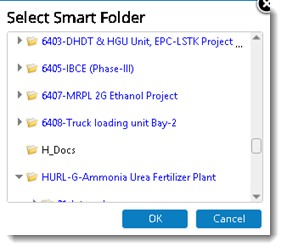
- Select the folder which need to be copied while creating the project and click on ‘OK’ to save.
- Specify the Name for the Project Linked Smart Folder so that on copying the smart folder, the parent folder name will be replaced with name given in the create project from existing window.
- Click Save.
If the setting Create project linked smart folder is enabled and the project linked smart folder is entered in settings of source project, on successful creation of project, system will create a copy of the smart folder (all the child folders of the selected smart folder) will also be copied) and rename the parent smart folder with name given in the create project from existing window.
Creating multiple projects with Bulk Import option
On the Create menu, option Bulk Import will be available. On clicking this option a pop-up menu is displayed. In the menu options to Generate Template and Import Template will be available. User can generate an import template, enter the project details in the generated excel template and import values from the template to the system.
 To generate an excel template
- On the menu click Generate Template.
Project Import Template window is displayed.

Figure: Project Import Template
- Enter values for different properties and save the excel file.
 To import details from template
- On the menu click Import from Template.
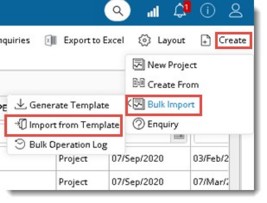
Bulk Import Wizard window is displayed.
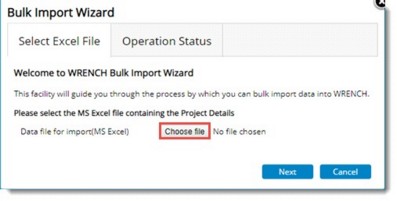
Figure: Bulk Import Wizard window
- On the window click Choose file.
- File Selection window is displayed. Select the saved excel file.
- After selecting the file in the Bulk Import Wizard click Next. Once validated, the import operation will progress asynchronously. The following window is displayed.
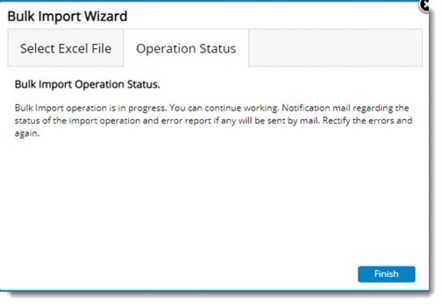
- Click Finish to continue.
Once the import operation is completed, the user will be notified. If there are any failure in the bulk import operation, the original import file will be returned to the user, which will have the failed items highlighted with the reason for failure in a separate column (New column). This file will be attached to the notification email so that the user may correct them in the same excel (the error report) and import again.


 To create a project from existing project
 To import details from template