Manual tender processes can be long and cumbersome, often taking a long time, which is costly for both buyer and supplier organisations.
E-tendering system in SmartProject replace these manual paper-based tender processes with electronically facilitated processes based on best tendering practices to save time and money thus providing the following advantages.
- Ensure fair practice of Bidding
- Automatic Vendor Rate Comparison
- Ensures tender dates and guidelines are strictly followed
- Revision wise Comparison
Opening e-tendering module
Users with appropriate security privileges can open the E-tendering module from Global Menu and Project Module. Tendering can be processed only by ‘internal’ /Customer origin users -as they have procured SmartProject.
To open e-tendering module
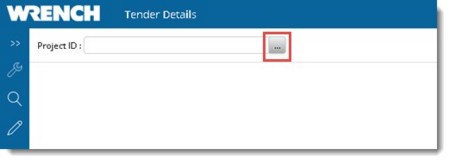
- In the global menu click Tenders. Tender Details window is displayed.

- Click the browse button to select a Project ID.
On selecting a Project ID, if tenders are created for the Project, it is displayed. Or else a blank window is displayed. In the grid different tender details like Status, Reference Number, Description is displayed here. In the tool bar options to carry out different tender related operations is available.

Figure: Tender Details window
Defining Project Settings
Project Settings for the tender can be defined from Tender Details window.
 To define project settings
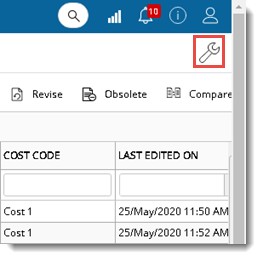
- In the Tender Details window click the Project Settings icon.

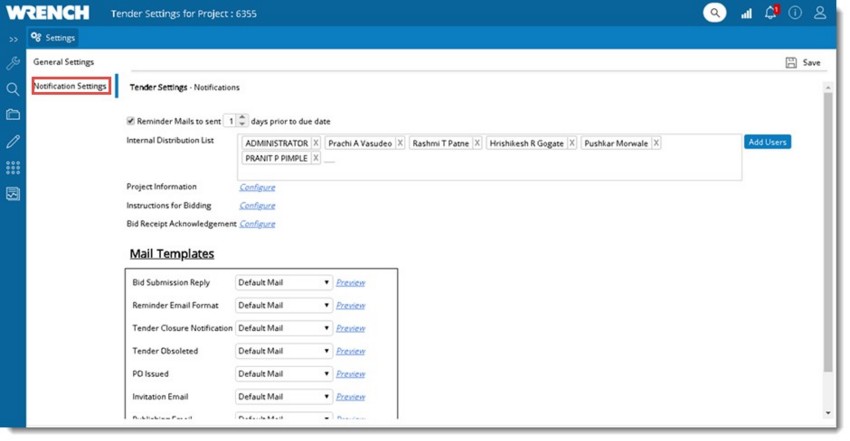
Tender Settings for Project window is displayed. The settings are grouped under two tabs, General Settings and Notification Settings.

Figure: Project Settings window
General Settings
General Settings tab is selected by default. The following settings are available under this tab.
|
#
|
Property
|
Description
|
|
1
|
Allow alternate Make & Model
|
In certain projects, vendors are allowed to offer alternate make and model of items different from what is specified in the bid documents. This setting can be used to allow or disallow this. This option is not selected by default.
|
|
2
|
Bid Invitation is Mandatory
|
In Projects which strictly adhere to procedures, vendors are first invited to tenders and such vendors are to accept tender invitation. Only such vendors will be allowed to submit tenders. On selecting the checkbox next to this setting, tender invitation and acceptance prior to tender submission is made mandatory.
|
|
3
|
Recommendation is mandatory before PO issue
|
Recommendation letter is usually sent to the client when a PMC is appointed to short list the vendors. If the setting is enabled , PO can be issued only to those vendors which are marked as recommended.
|
Notification Settings
Different settings related to notification sent on carrying out tender related operations can be defined here.

Figure: Notification Settings
|
#
|
Property
|
Description
|
|
1
|
Reminder Mails to sent <<days>> prior to due date
|
Enter the number of days before the due date, when reminder mails are to be sent automatically to invitee's for submitting tenders.
|
|
2
|
Internal distribution list
|
In certain scenarios, notification are to be sent to subject matter experts in addition to people involved in the tender. The list of such resources can be specified here. Type in the user names and select from the list of matching users displayed.
|
|
3
|
Project Information
|
Certain organizations include a write-up about the project in the tender.
To create write-up
- Click on the ‘Configure’ option next to the ‘Project Information’.
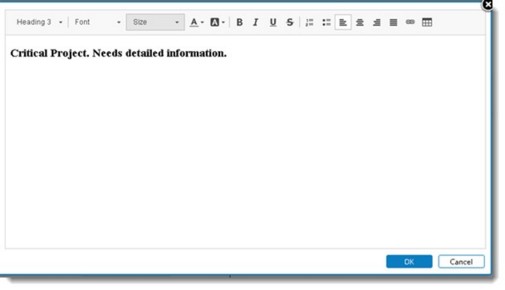
A text formatting window displayed,

- Enter the required text and format the text.
On clicking ‘Configure’, if there are any formatted text already saved, it will be displayed in the window. This can later be inserted into a mail template as well.
|
|
4
|
Instructions for Bidding
|
The instructions to vendors for submitting necessary information along with their submission is an essential part of tender documents.
To create instruction for vendors
- Click the link ‘Configure’ next to Instructions for Bidding.
A text formatting window displayed.
- Enter the required text and format the text.
When clicking on ‘Configure’, if there are any formatted text already saved, it will be displayed in the window. This can later be inserted into a mail template as well.
|
|
5
|
Bid Receipt Acknowledgement
|
Bid acceptance note is different in each project. This is possibly due to non standardization. Here user can prepare the required write-up and put it into a template and link it with the ‘build receipt’ event using a text formatting window which is displayed on clicking the option Configure.
|
|
6
|
Mail Templates
|
Distinct email templates can be assigned to each notification. The list of all available tender notifications will be listed under ‘Mail templates’ option. By default, the ‘System Default Template’ will be linked to all of them. If templates are configured for Tendering module, they can be selected from the drop-down list next to a notification type.
Templates selected here are meant for notification to default assignees or vendors; Internal users will receive only system default mail.
|
After defining the setting click Save to store changes.


