These operations can be carried out by ADMIN user before the CP is Approved or Rejected. The following operations are available in the Change Request menu.
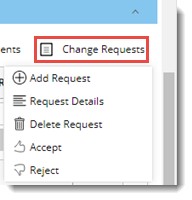
Figure: Change Request operations
Add Change Request
Only a user with ‘Raise change request’ permission in the module can add a request.
 To add a change request
- In the menu click Add Request.
Request Details window is displayed. A status icon indicating the CR is open is displayed on top right corner of the window.
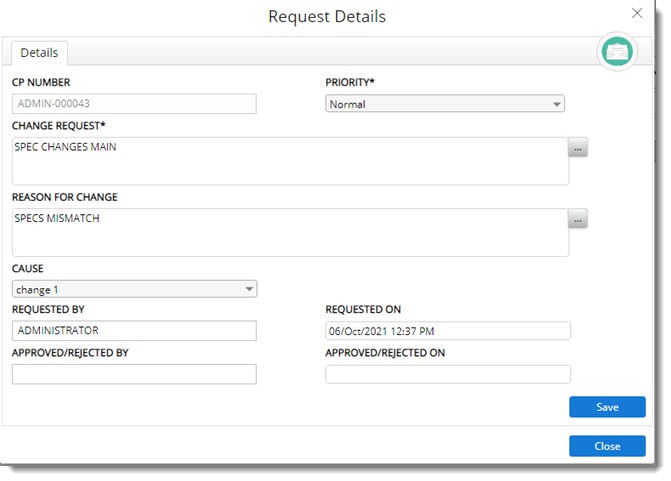
Figure: Request Details window
- In the window enter values for different properties. The properties are mentioned in the following table.
|
#
|
Property
|
Description
|
|
1
|
CP NUMBER
|
Reference number of the selected object is displayed here.
|
|
2
|
PRIORITY
|
Select a priority from a drop-down list. By default, value Normal is selected.
|
|
3
|
CHANGE REQUESTS
|
Select a value from a drop-down list. User can type in a value also.
|
|
4
|
REASON FOR CHANGE
|
Enter the reason for change or select the reason configured in the master from a drop-down list.
|
|
5
|
CAUSE
|
Select a Cause from a drop-down list. The causes defined in the cause code master is displayed in the list.
|
|
6
|
REQUESTED BY
|
Username of the user requesting the change is displayed here.
|
|
7
|
REQUESTED ON
|
Date on which the request was made is displayed here.
|
|
8
|
APPROVED / REJECTED BY
|
Name of the user who accepted or rejected the request is displayed here.
|
|
9
|
APPROVED / REJECTED ON
|
The date and time on which request was approved or rejected is displayed here.
|
- After entering the details click Save.
Created request is added under the document as shown in the following figure. A status icon indicating the CR is open is displayed in the grid.

Figure: Change Proposal Details window
If any changes are made, click Save to store changes.
Accepting a request
Single or multiple requests can be accepted by the user.
 To accept request
- Select single or multiple requests.
- In the menu click Accept.
Comments on Acceptance window is displayed.
- Enter comment and click OK.
Request accepted successfully message is displayed.
NOTE: The comment is added to the selected change request (unlike in documents where the comment is added to all the requests).
Rejecting a request
Single or multiple requests can be rejected by the user.
 To reject requests
- Select single or multiple requests.
- In the menu click Accept.
Comments on Acceptance window is displayed.
- Enter comment and click OK.
Request accepted successfully message is displayed.
NOTE: The comment is added to the selected change request (unlike in documents where the comment is added to all the requests).
Viewing request details
A request can be selected, and details of the selected request can be viewed.
 To view request details
- Select a request and in the menu click Request Details.
Request Details window is displayed.
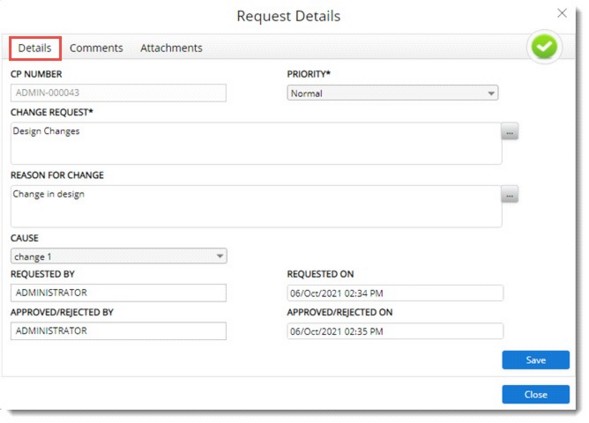
Figure: Request Details window
In the window tab Details is selected by default. Here all details specified for the request is displayed.
Request Details can be edited. In the Request Details window in addition to the tab Details, tabs Comments and Attachments is also available.
Comments tab
Details on comments made on the request can be viewed here.
 To view comments
- Click the Comments tab.
Here comments added by a user is displayed. Options to add new comment, edit an existing comment and remove a comment is available.
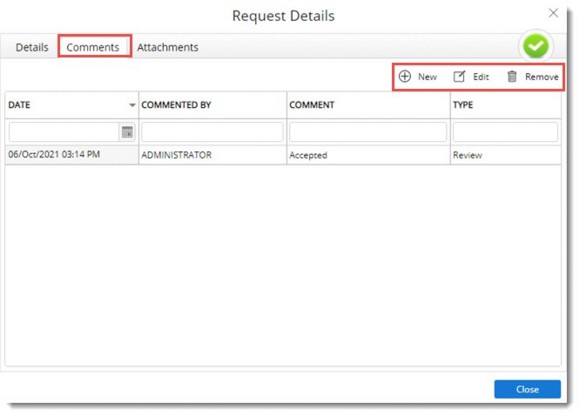
Figure: Comments window
 To add a comment
- Click New to add a new comment.
Comments window is displayed.
- Enter the comments in the window and click Save to store the comments.
NOTE: Only creator of the change request or user to whom the request is submitted can add comments.
 To edit a comment
- Select a comment from the window and click Edit.
Comment window is displayed with the comment.
- Edit the comment and click Save.
NOTE: Editing of a comment is possible only if the status of the CP is ‘Submitted’ or the current user is the creator of the selected comment. Or else the Save button is disabled, preventing the saving of changes.
 To remove a comment
- Select a comment and in the window click Remove.
An alert message Do you want to delete the comments is displayed.
- Click YES to continue.
Comment is removed successfully.
Attachments tab
Attachments can be added to a request from the Attachments tab.
 To add attachments
- Click the tab Attachments. Attachments window is displayed.
In the window options to Add an attachment, View the attachment, download the attachment and remove the attachment is available.
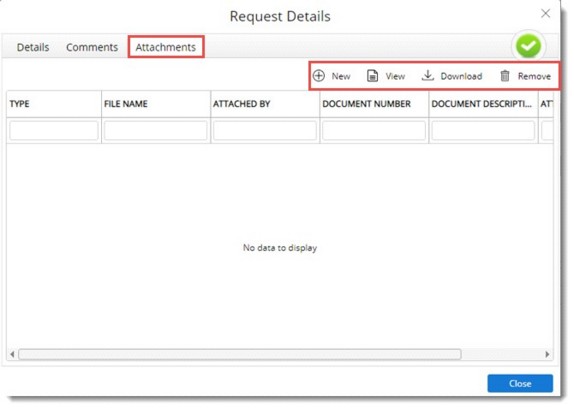
Figure: Attachments window
- Click New. A menu with three different options to add attachment is displayed. These options are explained below.
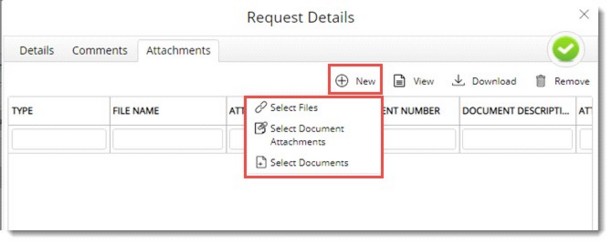
Figure: Request Details window
Select Files: If this option is selected, File selection window is displayed. Select the file from the location where it is saved. The selected file will be added to the list of attachments with ‘Type’ as ‘File’ and document number and description blank.

Figure: Displaying Attachments
Select Document Attachments: If this option is selected, Document Attachments window is displayed.
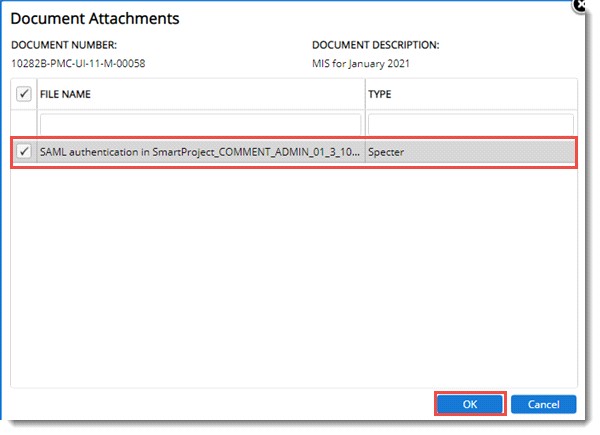
Figure: Document Attachments window
The list of attachments available for the document in the current revision or version for which the change request is made is displayed here.
- Select the document and click OK.
The selected items get attached to the change request and the window is closed. As shown in the following figure, the ‘Type’ of the attachment will be ‘Doc Attachment’ and the document number and description blank.
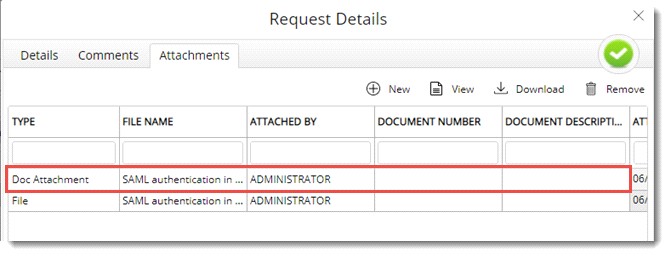
Figure: Request Details window
Select Documents: If this option is selected Document Advanced Search window is displayed. Documents selected after search operation are displayed in the Attachments window grid. The selected items are attached to the change request with type as ‘Document’ and the document number and description as that of the selected documents.
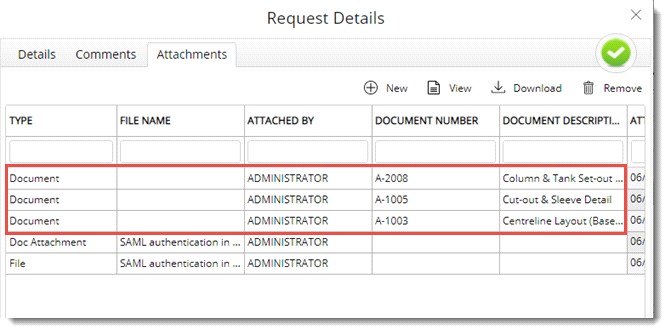
Figure: Displaying attachments


