Before starting to comment in Rasterex viewer, ensure Rasterex viewer is configured as the Viewer.
Configuring Rasterex Viewer
Facility to comment using Rasterex viewer is configured in the Viewer Settings window. In the Viewer Settings window, a viewer type can be assigned to a file type.
 To select a viewer
- Open the Administrative Settings window
- In the window click the tab Configurations.
- In the Configuration window, under Document Settings click the Configure button corresponding to Viewer Settings.

Figure: Opening Viewer Settings
Viewer Settings window is displayed. In this window a viewer is selected for a file type.
- Scroll down and locate the file extension .PDF.
- In the column VIEWER, click the browse button corresponding to the file type PDF.
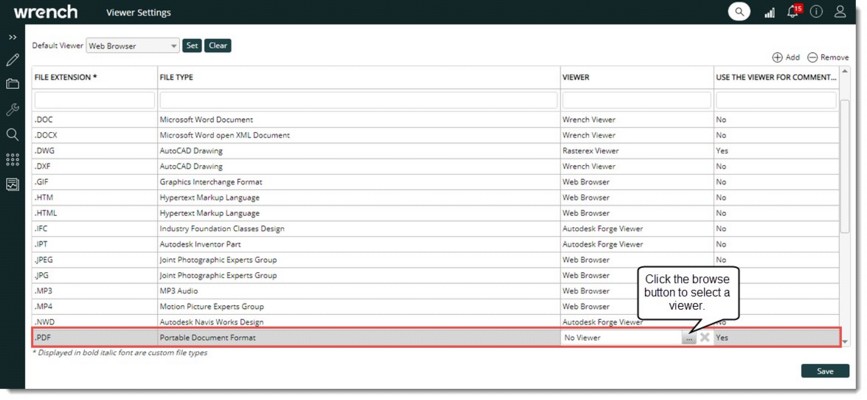
Figure: Viewer Settings window
Viewers window is displayed. Here available viewers are listed.
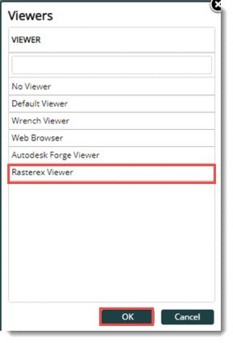
Figure: Viewer selection window
- In the window select Rasterex Viewer and click OK.
Rasterex Viewer is selected as the viewer for PDF files.
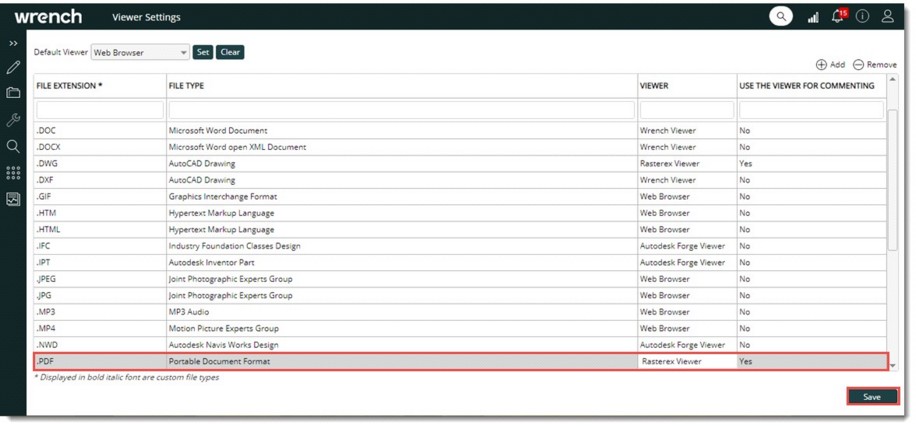
Figure: Assigning Rasterex viewer as default viewer
- In the column USE THE VIEWER FOR COMMENTING, select the value as YES. By default, this value will be NO.
- Click Save to complete the configuration.
Changes are saved successfully. Rasterex viewer is saved as the default viewer for PDF files.
Opening the drawing for commenting
Drawing for commenting can be opened from the document smart folder or document details window.
 To open the drawing for commenting
- In the Smart folder locate the drawing file and click the file, or in the document details window of the file, click Open for Commenting. Drawing is opened in Rasterex Viewer.
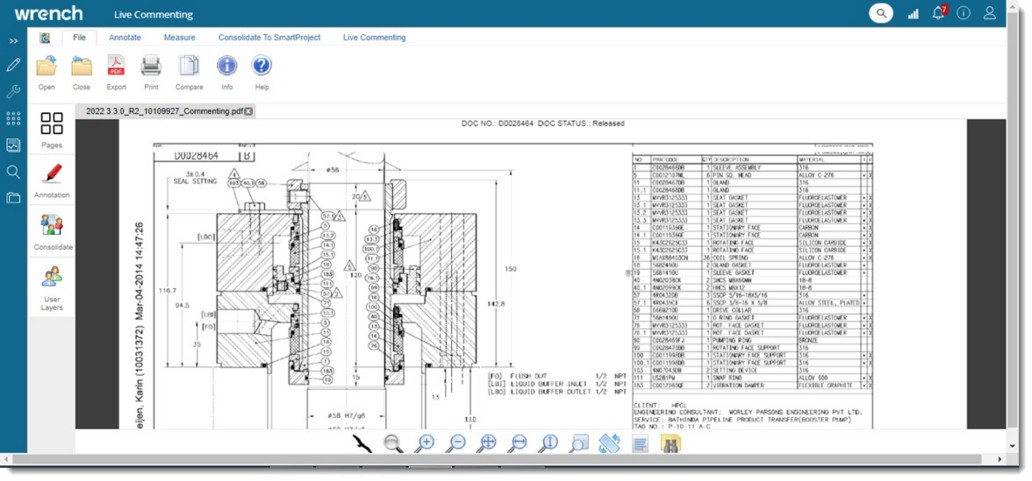
Figure: Rasterex Viewer window
Different tools for commenting are available in the window.
Adding comments to a drawing
Comments are added to the drawing using different commenting tools
 To add comments
- Click the tab Annotate. Commenting tool bar is displayed. Different commenting tools are available here.

Figure: Commenting tools
- Add a comment using the required tool. For Example: In the following illustration a text comment is inserted using the tool Text.

Figure: Adding a comment
NOTE: In addition to adding a text comment, Notes, Callouts, Highlights and Stamps can be added as comment.
In the right pane a box to change the properties of the comment and view details of the comment is available. Properties tab is selected by default. Here you can manage the properties of the comment.
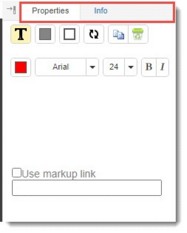
Figure: Properties box
Under the tab Info, details of the comments are displayed.
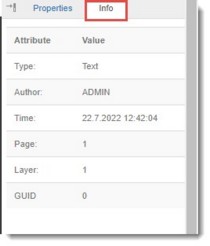
Figure: Info box
- After adding comments click Save to save the added comments. A message Comments added successfully is displayed.
Consolidating comments to SmartProject
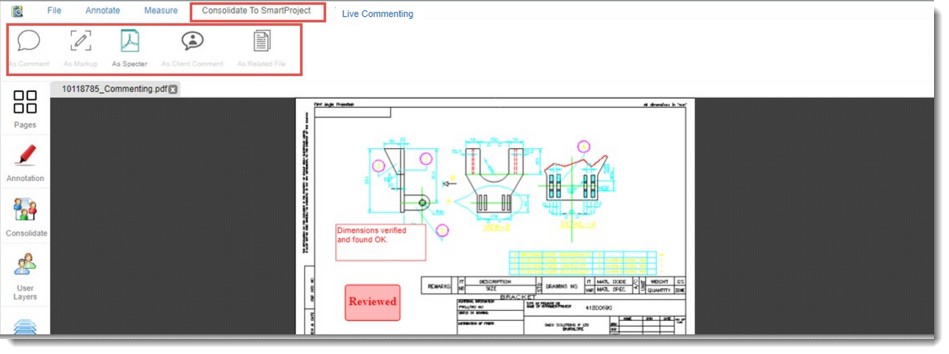
Once different reviewers add their comments to the drawing, the comments are consolidated and added to SmartProject. Consolidated file can be added as Comment, Markup, Specter, Client Comment and Related File.
 To consolidate comments
- Open the drawing file.
File containing comments added by different reviewers is displayed.
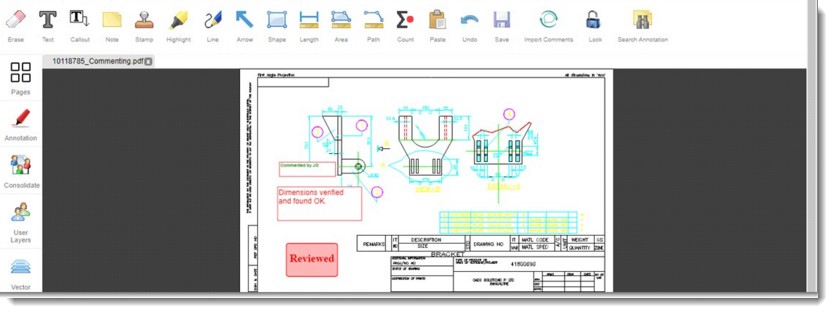
Figure: Drawing file for consolidation
- In the left pane click User Layers, to view the details of different reviewers. Username of Reviewers is displayed. By default, the checkbox next to Username is selected. Comments added by the users is displayed on the drawing. If the checkbox next to a user is cleared, comments added by that user is not displayed on the drawing.
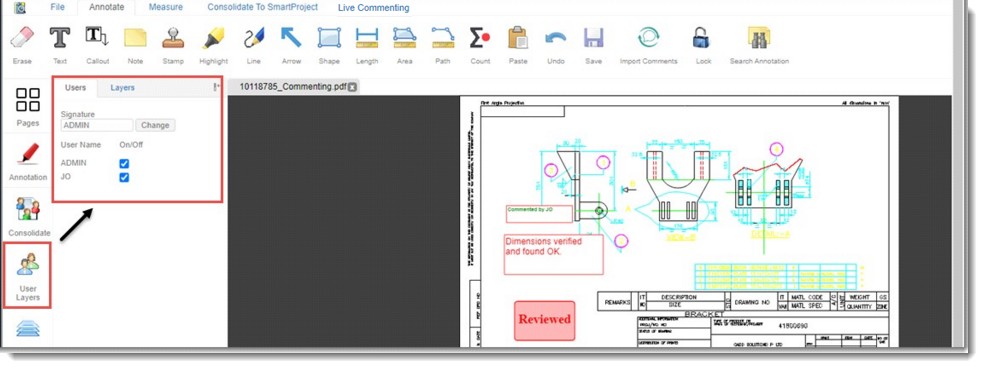
Figure: Viewing reviewer details
- In the window click the tab Consolidate to SmartProject.

Figure: Consolidating to SmartProject
Different consolidate file options are displayed.
- Click a file type from the list.
A message Consolidated file attached successfully is displayed.
- Click OK to continue.
The consolidated file saved as Specter is displayed in the document details window.

Figure: Consolidated file
If consolidated file is already attached to a drawing, on selecting the Consolidated to SmartProject option, only the file type attached earlier is enabled in the file type tool bar.
Recreating Cache folders
RasterX is a different application, and its cache folders are not governed by SmartProject. Due to any user override or malfunction, if the files in the cache folders gets deleted, the comments viewed from SmartProject may not be in synch with what is seen in RasterX. In such scenarios, the view/comment cache is re-created, so that they are in sync with SmartProject again. The option Recreate Cache folder in the File menu provides a solution to this issue.
 To create cache folders
- Place the mouse pointer on the option Recreate Cache Folder.
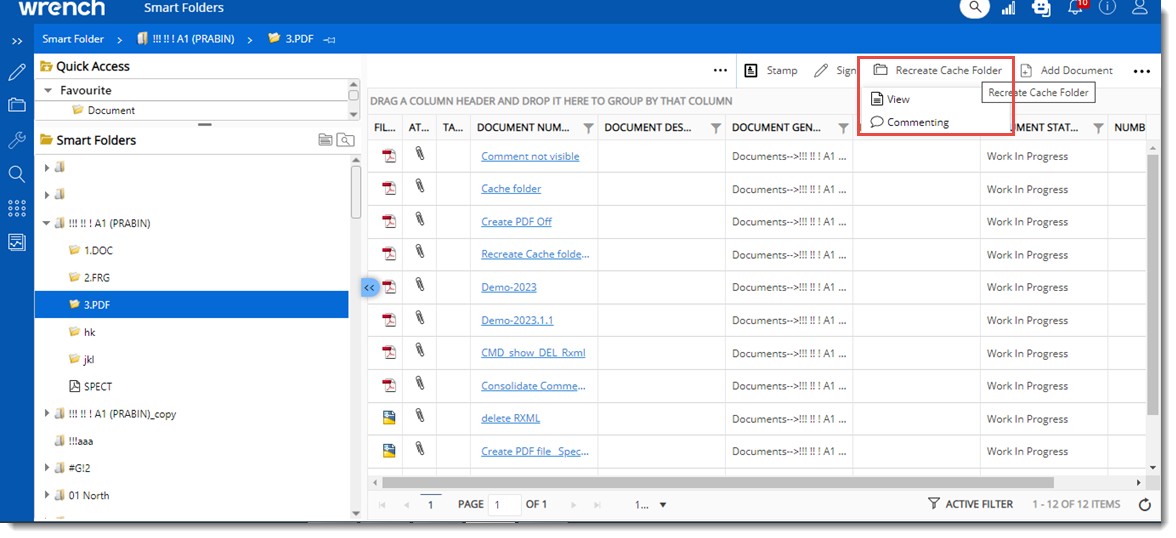
On placing the mouse pointer over this option, a pop-up menu is displayed with option View and Comment.
- Click the option View to recreate a new folder in the logic <<Organization ID_ File ID_ Login Name.>>.
Cache folder is removed, and all relevant files are pushed into the new folder automatically.
- Click the option Comment to recreate a new folder in the logic <<Organization ID_ File ID_ Commenting_ Origin ID.>>. Cache folder is removed, and all relevant files are pushed into the new folder automatically.


 To open the drawing for commenting