When a user logs in to SmartProject all the folders created by the user and folders published for the user are displayed. If the user is logging in for the first time, and if there are no folders published to the user, empty “Smart Folders” folder (root folder) is displayed in the left navigation pane. Smart Folders can be created based on requirements of the user.
NOTE: Only user with Create right for Smart Folders in the security centre can create a smart folder.
 To create a smart folder
- In the global menu click Smart Folders.
If the user is logged in for the first time and there are no folders published to the user root folder is displayed.
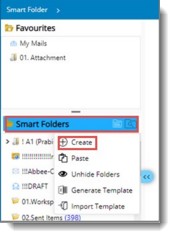
- Click the smart folder button. The following menu is displayed.
- In the menu click Create.
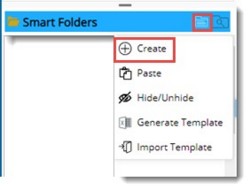
Figure: Creating a smart folder
Smart Folder Creation window is displayed.
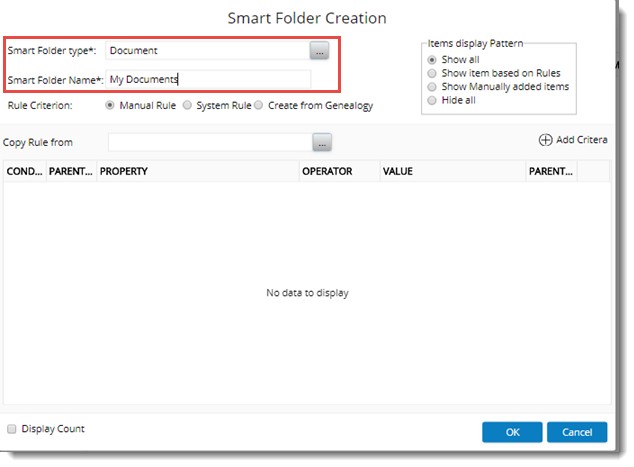
Figure: Smart Folder Creation window
- Enter a name for the Smart Folder.
- A smart folder type has to be selected. Click the browse button to select a smart folder type.
Smart Folder Types window is displayed.
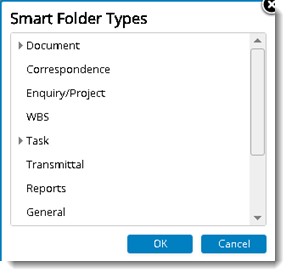
Figure: Smart Folder Types window
Here different Folder Types are listed.
On expanding the type Document, different document types are listed as shown in the following figure. On expanding the type Task, type item Task Resources is displayed.
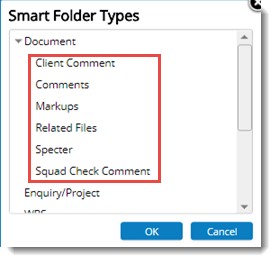
Figure: Different Document Types
- Select a Smart Folder type and click OK.
After entering the basic details for creating a smart folder next step is to assign Rules to the smart folder. There are three types of rules that can be assigned to smart folders. They are:
- Manual Rule
- System Rule
- Create from Genealogy
Option Manual Rule is selected by default while opening the smart Folder creation window.
Creating rules and defining rule criteria is explained in the section Creating rules and defining rule criteria.
Assigning system rules for folders
System Rules are a pre-defined set of rules available for objects in WRENCH. Currently system rules can be assigned to following smart folder types.
- Documents
- Tasks
- Transmittal
- Submittal
- Email and Notifications
- Correspondence
You can create folders and label them according to your need and then assign system rules to the folder.
 To assign system rules
- In the Smart Folder Creation window select the smart folder type and enter a folder name.
- Select the radio button next to the option System Rule.
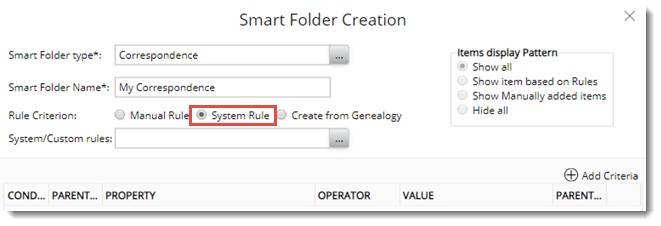
Figure: Creating System Smart Folders
- Click the browse button next to the option System/Custom Rule.
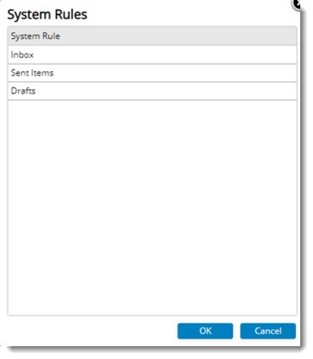
Figure: System Rule Selection window.
- System Rules window is displayed. Here system rules corresponding to the selected folder type is displayed. Select a rule and click OK.
Smart Folder is created successfully and based on the selected rule, items will be available in the smart folder.
Creating folders from genealogy structure
There are cases where personal folders structure has to be created exactly similar to the genealogy structure. In such cases creating folders manually is impractical. To address this scenario, option to create personal folders from genealogy structure is available.
 To create a folder from genealogy structure
- Click the browse button to select a Smart Folder Type.
- Smart Folder Types window is displayed. Only folder types Documents, Enquiry/project and Task is displayed here. Select a folder type.
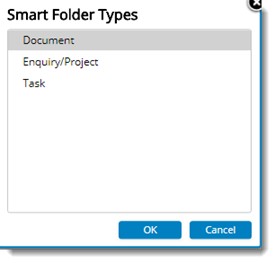
Figure: Selecting smart folder type
- In the Smart Folder Creation window select the radio button next to Create From Genealogy.
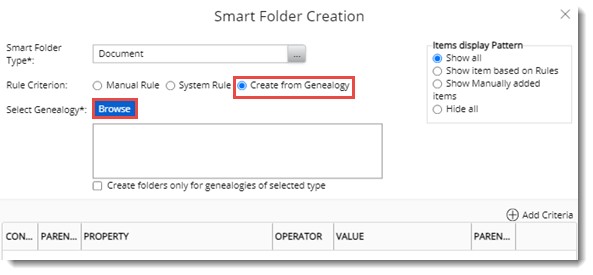
Figure: Selecting create from genealogy option
NOTE: When a smart folder is created using the Create from Genealogy option, the smart folder hierarchy is created as per the selected document genealogy hierarchy. If leaf level smart folder is selected, then in the Items Display Patter radio button next to Show All is selected. For all the parent level smart folder the option selected will be “Show manually added items.”
- Click the browse button next to Select Genealogy.
Genealogy Selection window is displayed.
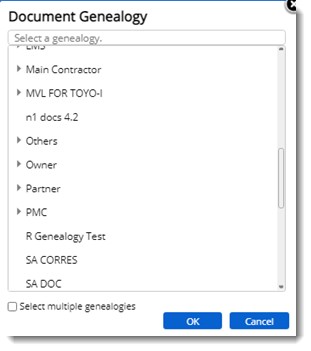
Figure: Selecting Document Genealogy
Select multiple genealogies: If multiple genealogies are to be selected, click the check box next to the option Select multiple genealogies. Checkboxes are displayed next to the folders listed in the window.
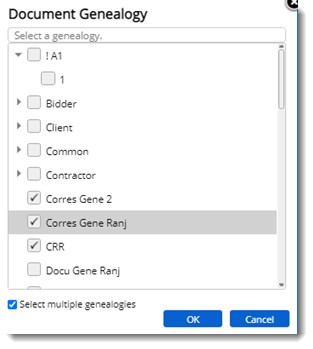
- Select the genealogy structure based on which you want to create the folder structure and click OK.
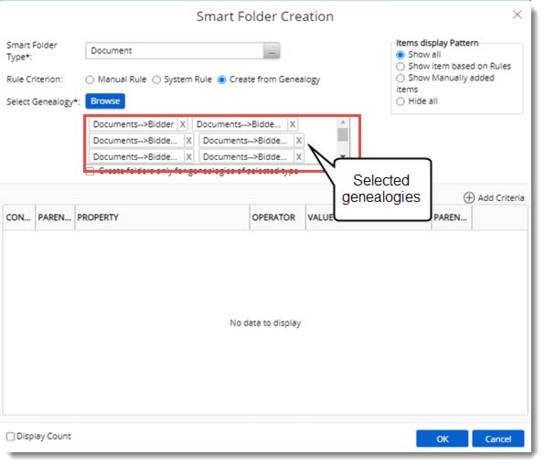
Figure: Displaying selected genealogy
Selected genealogy is displayed in the Smart Folder Creation window.
- In the window click OK.
Smart Folder Structure is created based on the selected genealogy structure.
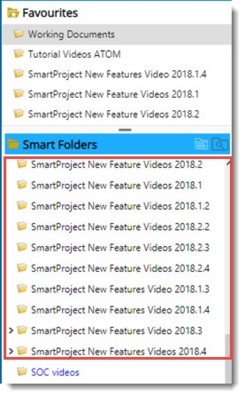
Figure: Smart Folder structure
Creating General Folders
While creating smart folders in addition to object folders user can create a general folder. The general folder is independent of WRENCH objects. You can create multiple general folders under the general folders. Rules can only be defined for object folders created under the general folder.
 To create a general folder
- Open the Smart Folder Creation window.
- In the Smart Folder Types window select the item General.
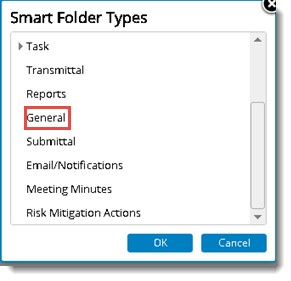
Figure: Select folder types
- Click OK to select the type. Smart Folder Creation window is displayed. Here the necessary details.
- Click Add Criteria to add a rule for the folder
- After entering all the details, on the Smart Folder Creation window click OK.
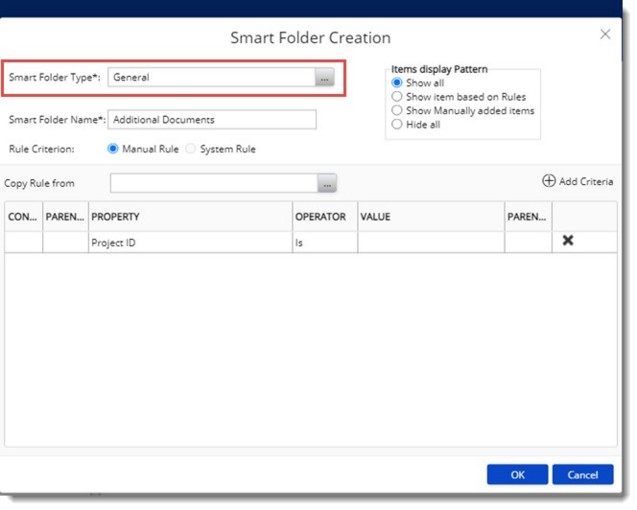
Figure: Creating a general folder
A general folder is created successfully.
NOTE: When the smart folder linked to a project is of type General, and a Project is created using the option Create From, and if the checkbox next to the option ’Project linked smart folder’ is selected then, the smart folder structure created for the destination project is same as that of the source project. The value for Project ID of the parent smart folder of the destination Project is updated with the project ID of the destination project.
Managing attachments using smart folders
Smart Folders can be created to manage attachments. The attachments that can be managed under Smart Folders are:
- Specter
- Related files
- Comments
- Markups
- Client Comment
- Squad check Comment
- Referenced Document
 To create an attachment folder
- In the Smart Folder Creation window click the browse button next to Smart Folder Type. Smart Folder Types window is displayed.
- In the window expand the documents option.
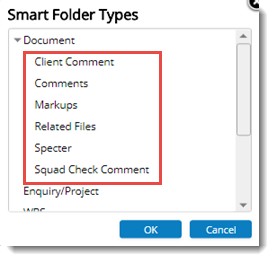
Figure: Selecting folder types
- Select the type of attachment from the list and click OK.
- Enter a name for the folder and assign rules to the folder. For more information on assigning rule refer Creating Rules and Defining Rule Criteria.
Attachment folders can be identified by the unique icons against them as shown in the following figure.
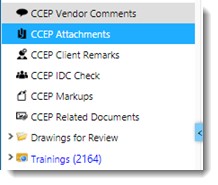
Assigning custom property LOV to smart folders
A set of custom characteristics with a list of values will be assigned to a smart folder. When documents are added to a smart folder, all list of values assigned to the folder will be inherited to the added document. Many times, this is not necessary. Only selected set of custom property values will be required for the added documents. An option to select the custom property list of values is available in the smart folder menu.
 To assign custom property LOV
- Select a smart folder and in the menu click the option Assign LOV Value.
Select Custom Property LOV window is displayed.
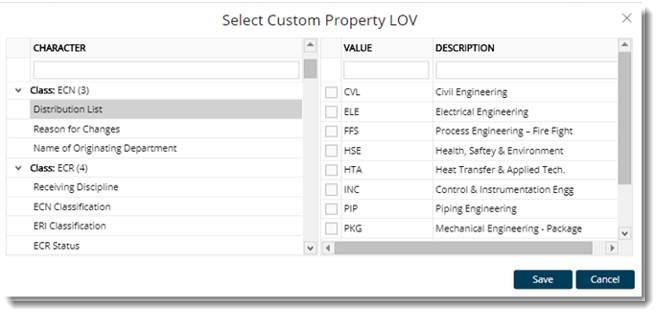
Figure: Select Custom Property LOV window
On selecting a class, List of Values assigned the selected class is displayed.
- Select the checkbox next to the values that you want to assign to the Custom Property for the selected folder.
- Click Save to store changes.
Creating notification smart folders
A smart folder type Notifications, to handle notifications will be available while creating smart folders. This folder is meant for handling Transmittal Release Mails, Workflow Routing Mails and Documents send using send mail option.
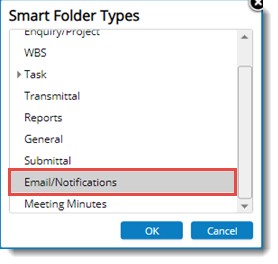
Figure: Notification Smart Folders
Rules can be assigned to these folders.
Following rule criteria are available for this folder.
Project ID: On selecting a project, notification mails related to this project will be listed in the folder.
Direction: Here you can select the direction of the notification mail. Options Received by current user’s origin and Sent by current user’s origin are available here. Notification mails based on the direction selected will be available in the folder.
Send On: Here you can select a date or a range of date staring from the current date. Notifications based on the selected dates will be displayed.
Type of notification/mails: If Type of notifications is selected as PROPERTY, values available will be Document sent using send mail , Transmittal Acknowledgement mail, Transmittal delete mail, Transmittal release mail and Workflow routing mails.
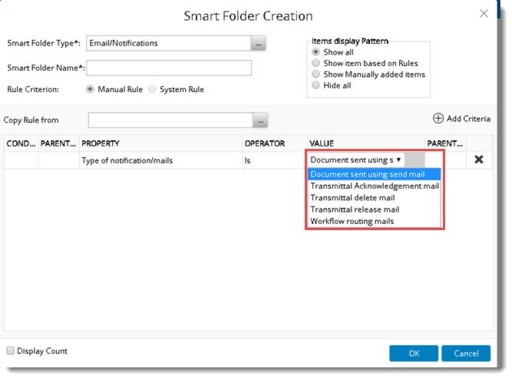
Based on the rule criteria selected, notification smart folder is created.

In the smart folder grid operations will not be available for notification type smart folders.
Creating Correspondence Smart Folders
In certain scenarios, document smart folders are created and rules are assigned to display WRENCH correspondences. Since the document smart folders are used, the smart folder can contain a mixture of documents and correspondence based on the rules provided. Moreover, all the document related operations are available to the smart folder which are not applicable to correspondences which requires additional configuration.
Hence, a dedicated smart folder type for Wrench correspondence is available, which will contain only correspondence related properties to create rules. Only correspondence related operations will be available for the smart folder thus created.
 To create correspondence smart folder
- Select the root smart folder and in the menu click Create.
- Smart Folder Types window is displayed. Select the folder type as Correspondence and click OK.
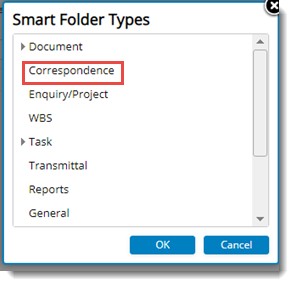
Figure: Smart Folder Types window
Smart Folder Creation window is displayed.
- Select the radio button next to the option System Rule, System Rules window is displayed.
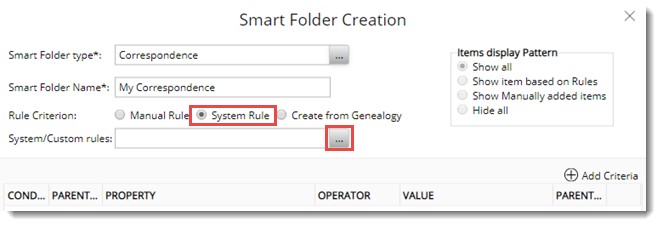
Figure: Smart Folder Creation window
- Click the browse button next to System/Custom Rules.
System Rules window is displayed.
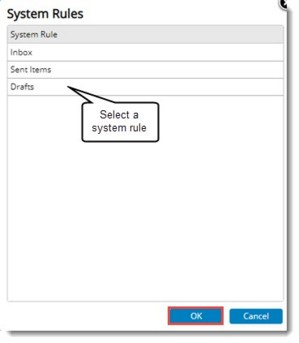
Figure: System Rules window
- Select a System Rule and click OK to complete selection.
- In the Smart Folder Creation window click OK.
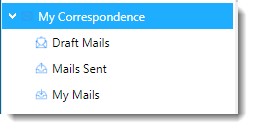
Correspondence type folder is created based on the assigned rule. Correspondence folders created based on different rules are distinguished from other folder by the icons corresponding to the folder as displayed in the following figure.


 To create a folder from genealogy structure
 To create an attachment folder


 To create correspondence smart folder