|
Workflow Block Purposes
|   |
|
Workflow Block Purposes
| |
When an item is forwarded to another user with any of the ‘Block Progress’ option enabled, then the sender should be able to mention the reason for performing forward operation with block progress. Even though the document is forwarded to a user with block progress, the receiver might not understand the urgency, that the workflow is blocked, and may not respond to it quickly. Also, most Project sites, consultants who receive the forwarded documents are not allowed to see the workflow tab; hence they should have a facility for noticing that the workflow is blocked. Also, there is no indication in the workspace folder to indicate that an item is blocking the progress. Hence a provision to define Workflow Block Purpose is available.
To create a workflow block purpose
In the Masters select Others.
In the list of master types listed click Workflow Block Purposes. PURPOSE OF BLOCKING PURPOSE WINDOW is displayed. If there are any blocking purposes created, it is displayed here.
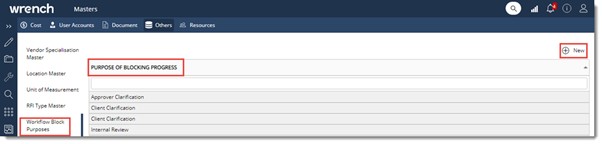
Figure: Purpose of blocking progress window
Add Details window is displayed.
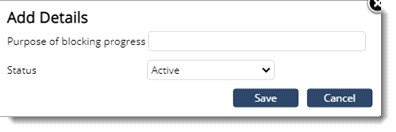
In the window enter the purpose of blocking progress.
Select the status from a drop-down list. Options available are Active and Inactive. If the selected status is ‘Active’, the ‘purpose of blocking progress’ can be used by the users in the forward window with block progress.
If the selected status is ‘Inactive’, the purpose cannot be used by the users. However, if the purpose is used earlier, then it will be displayed. The purpose will no longer appear in the drop-down in the Forward operation window.
Editing and removing a purpose of blocking progress
A purpose that is saved can be edited or removed.
To edit a blocking progress purpose
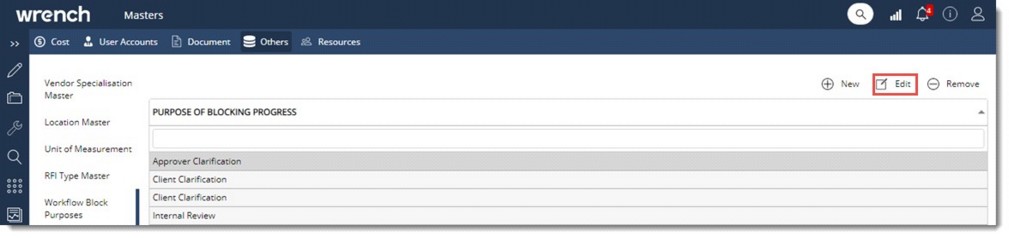
Figure: Editing purpose of blocking progress
Edit Details window is displayed.
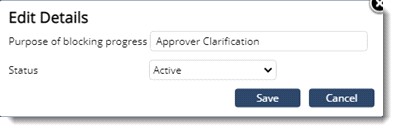
Figure: Edit Details window
Changes are saved successfully.
To remove a purpose
A message Do you want to remove the selected items is displayed.