|
In a typical work day user may use multiple websites and applications to get their work done. This means that they may have to remember multiple login credentials which may be difficult for them. To tackle this issue single sign-on facility can be specifically configured for Vendors.
To configure authentication
1.On Vendor Management window click the tab Certified Vendors.
2.On the toolbar click Configure Authentication.
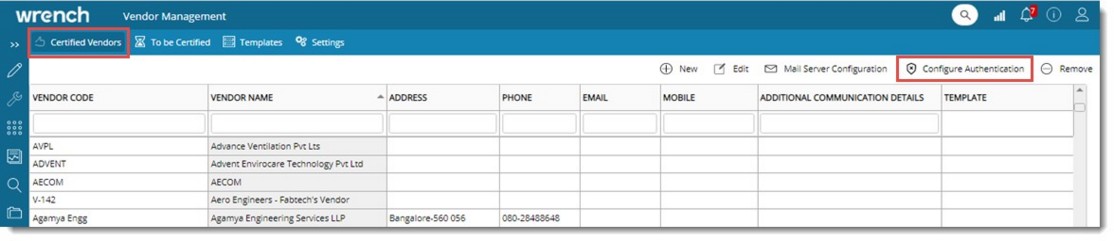
Figure: Vendor Management window
Configure Authentication window is displayed.
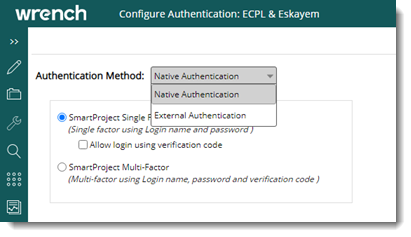
Figure: Configure Authentication window
SmartProject supports both Native Authentication and External Authentication. In the case of Native Authentication, option to authenticate using single factor and multi factor is available. In the case of External Authentication, option to authenticate using MS Office and OKTA is available.
To configure native authentication
1.Click the tab Configure Authentication. Configure Authentication window is displayed.
2.Select the Authentication Method as Native Authentication.
The elements in the window are explained in the following table.
|
#
|
Item
|
Description
|
|
1
|
Native Authentication
|
This option is selected by default. This will help to select the native sign on mode for the user.
|
|
2
|
SmartProject Single Factor
|
If the radio button next to this option is selected, single factor login using username and password is enabled.
On selecting this option, the Verification Code delivery mode selection option is displayed. This option is displayed on the window.
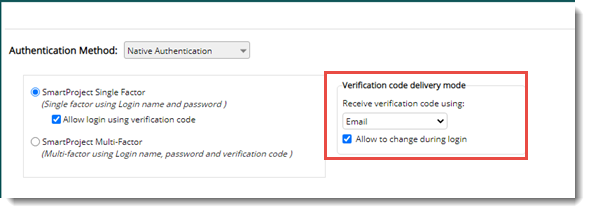
Select a verification code delivery method from a drop-down list. Options Email, Mobile App and SMS is displayed on the list. By default, Email is selected. If the checkbox next to the option Allow to change during login is selected, the user is permitted to change the verification code delivery method during login.
|
|
3
|
SmartProject Multi Factor
|
If the radio button next to this option is selected, multi-factor authentication using username, password and OTP is enabled. A drop-down list with multi factor options Email, Mobile App and SMS is enabled. By default, Email is selected.
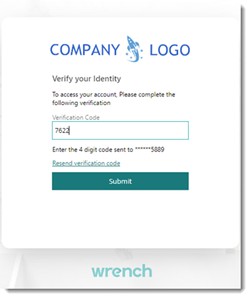
If the checkbox next to the option Allow to change during login is not selected, users are restricted from changing the method of receiving OTP during login. Also user is restricted from changing the OTP receiving method in personal settings. The following window is displayed if OTP authentication method selected is email.
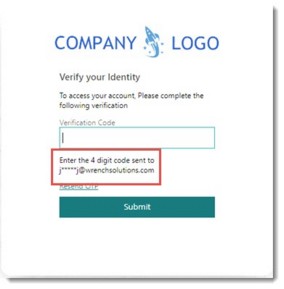
If the authentication method selected is mobile app, text displayed is Enter the 4 digit code sent to mobile app.
The following window is displayed if OTP authentication method selected is SMS.
|
|
4
|
Single Sign On
|
Select the checkbox next to this option, to enable Single sign on, using single set of credentials to access multiple service. It can be either Active Directory, Office 365 or Okta.
|
3.After selecting the required options, click OK to save changes.
When saving user details, if ‘SmartProject Multi Factor’ is the only sign-in option and ‘email’ is the means of OTP or Microsoft Office 365 is the only sign-in mode selected with authentication attribute as Email address, all users should have a unique email address. Hence the email address must be specified and it must be unique.
Configuring External Authentication
Option to login to SmartProject using Office 365 or OKTA credentials and Active Directory Services credentials will be available.
A integration between SmartProject and Office 365 or Okta can be defined here.
To configure external authentication
1.On the Configure Authentication window select Authentication Method as External Authentication.
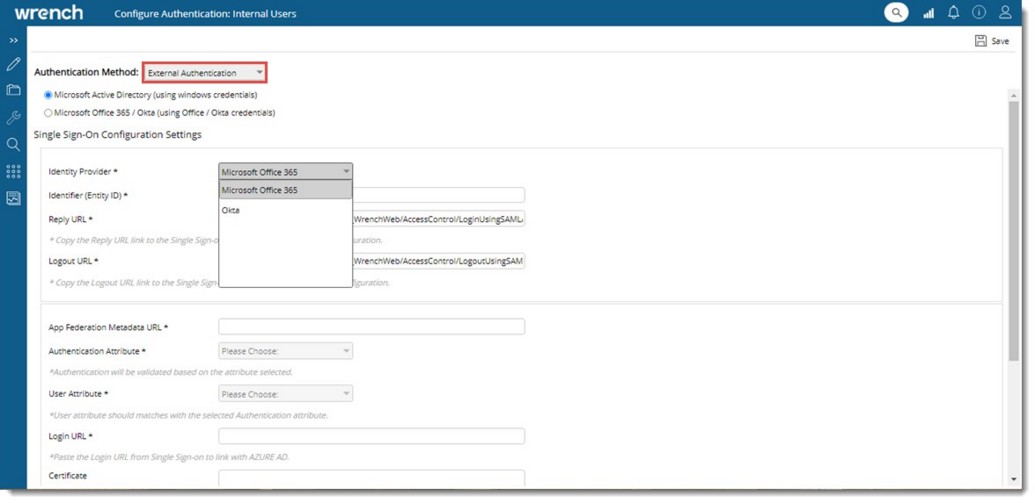
Figure: Configuring Single Sign On
Single Sign On Configuration Settings window is displayed. Configuration can be defined for Microsoft Active Directory and Microsoft Office/Okta.
2.Enter values for the following fields.
Identify Provider: Select an Identity Provider from a drop-down list. Options available in the drop-down list are Microsoft Office 365 and Okta.
By default option Microsoft Office 365 is selected. If there are any saved configuration it is displayed in the window.
NOTE: When the Identity Provider is changed from the drop-down list, a warning message Do you wish to clear the existing configuration is displayed. On clicking Yes, existing configuration of the currently selected identity provider is removed, and the fields are cleared. On clicking No, existing configuration values are not cleared.
Identifier (Entity ID): This URL is unique and identifies the application. Copy-paste the same URL from Active Directory. Login URL from AD only contains the base URL path. Append the encrypted request using the reply URL and Identifier (Entity ID) while login.
Reply URL: This url specifies where the application expects to receive the SAML token. The reply URL is also referred to as the Assertion Consumer Service (ACS) URL.
Logout URL: This URL is used to send the Single Sign On Logout responses back to the application. This is mandatory if the selected identity provider is Microsoft Office 365. For Okta this URL is not mandatory.
App Federation MetaData URL: Specify this URL to allow user to access the metadata specific to the application.
Authentication Attribute: Specify the authentication attribute, which helps SmartProject to validate the user. Options Email ID and Login Name is available in the drop-down list. By default, Email Address is selected.
User Attribute: Specify the field name corresponding to the Authentication Attribute in the Federation MetaData XML retrieved using ‘App Federation MetaData URL. Once user pastes the metadata URL, corresponding attributes in the XML file will be listed in User Attribute drop down. User should select the right attribute relative to the authentication attribute.
Login URL: Specify the login URL. When a user opens this URL, the service provider redirects to Azure AD to authenticate and sign on the user. Azure AD uses the URL to start the application from Microsoft 365 or Azure AD My Apps.
Certificate: Enter the trust key to decrypt the response from Identity provider.
2.After entering the values click Save to store changes.
Configuring Okta SAML Settings
To enable Okta single sign on configuration, user has to configure SAML setting in Okta administration page.
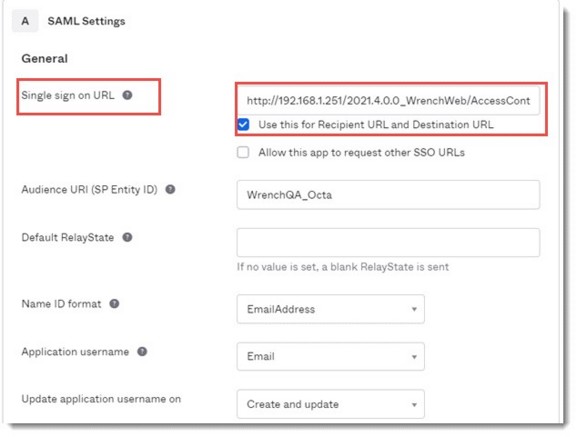
Figure: Configuring Okta SAML Settings
To Integrate SSO
1.Copy the Reply URL from Single Sign-on plug-in configuration in SmartProject and paste it to the SAML Setting fields in Create SAML Integration window.
2.When the configuration is completed, SSO will generate the Login URL to link with Okta.
3.Copy the Identity Provider Single Sign-On URL (i.e Login URL in SmartProject) , X.509 Certificate , Identity Provider Metadata URL (i.e App Federation Metadata URL in SmartProject) from SSO and paste it in the SmartProject Plug in.
4.Save the SAML plug-in configuration to complete the configuration.
If the authentication mode is configured for Okta sign on, user will be redirected to Sign on URL which will be the login page of Okta. Once successfully logged in with Okta, user will be redirected to the ‘Reply URL’ defined, where the ‘email address’ or the ‘Login Name’ (as configured) will be available. SmartProject will use this Okta login credentials to identify the corresponding SmartProject user account.
|