|
In any organisation, work allocation is dynamic in accordance with the change in availability of people. Even though there are pre-approved work schedules, often people may need to go off work (on leave etc.) and hence work needs to be temporarily delegated to others. Delegation module in SmartProject hosts all relevant functionality to make such temporary changes to work assignments.
Opening delegation module
Delegation module is opened from the global menu.
To open delegation module
1.On the Global menu click Utilities>>Delegation.
Delegation window is displayed.
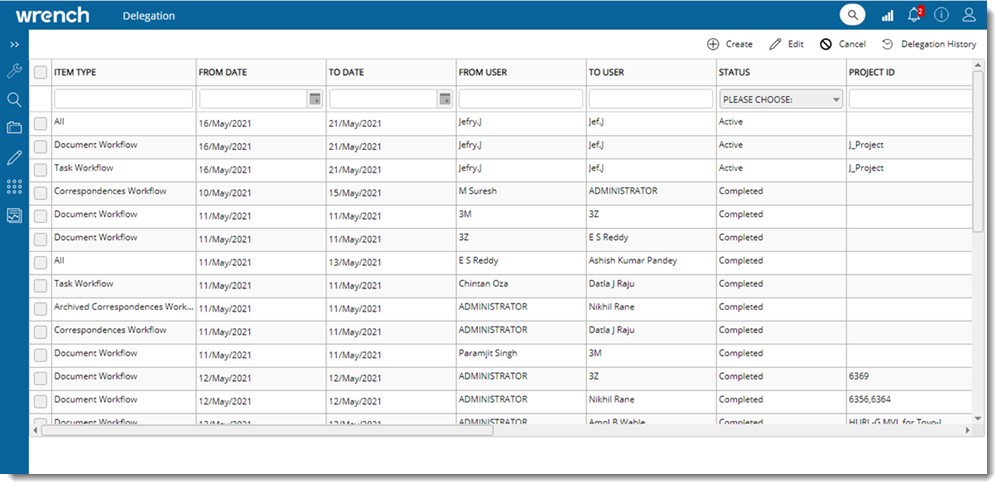
Figure: Delegation window
In the window all delegation requests created by the logged in user is displayed. If delegation request is not created, the window will be blank.
NOTE: When ‘ADMIN’ user open the delegation request window, system displays all delegation request created in the system. If ADMIN raised a delegation on behalf of a user, this request is not displayed for the actual delegator.
Active delegations are displayed on the top of the grid and Inactive one are displayed at the bottom. Sorting is done based on the delegation creation date among the active and inactive (Cancelled and Completed) requests.
Creating a delegation
All users with ‘Delegation module’ configured are permitted to raise delegation request. ADMIN user can raise delegation request on behalf of other users also.
To create a delegation
1.On the Delegation window click Create.
Delegation Details window is displayed.
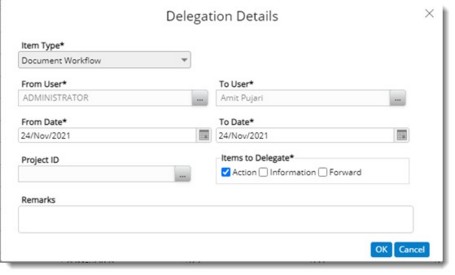
Figure: Delegation Details window
On the window different properties are displayed.
2.Enter values for the properties mentioned in the following table.
|
#
|
Property
|
Description
|
|
1
|
Item Type
|
Select the type of item that is to be delegated from a drop-down list. By default value displayed is All. Following items are available in the drop-down list.
•Archived Correspondences Workflow
•Correspondences Workflow
•Document Workflow
•Task Workflow
•Time log Approval
|
|
2
|
From User
|
Name of logged in user is displayed by default. The browse button is enabled only for ADMIN user.
|
|
3
|
To User
|
Click the browse button to select the delegate user. On clicking the browse button Search User window is displayed. Search and select the delegate from the search window.
|
|
4
|
From Date
|
By default, current date is displayed. Date can be changed by selecting a date from the date picker. Only current date and future date can be specified.
|
|
5
|
To Date
|
By default, current date is displayed. Date can be changed by selecting a date from the date picker. Only current date and future date can be specified.
|
|
6
|
Project Id
|
Click the browse button to specify a Project. On clicking the browse button Projects window listing the Projects are displayed. Select a Project from the list.
|
|
7
|
Items to Delegate
|
Select the items to be delegated while routing. Options Action items, Information items, Forwarded items or all these together can be selected. If Item Type, Time log Approval is selected, only Action can be selected as Items to Delegate.
|
|
8
|
Remarks
|
Enter your comments or remarks.
|
3.After entering the details click Save.
On clicking Save button, a delegation request is created and the status of the delegated request will be active. When a delegation is created, an internal and external notification mail is sent to the Delegatee. If the delegation is created by the Administrator on behalf of other user, notification mail is sent to the delegator and delegatee. Format of the external mail sent is displayed in the following figure.
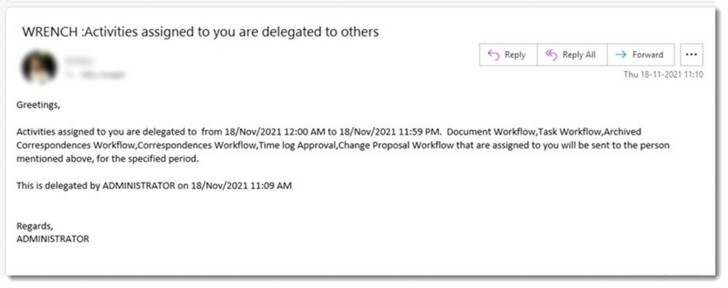
Figure: Delegation creation notification
When an item is sent via workflow to a user, if the recipient has an active delegation, the item will be sent to the delegatee instead of the designated user. Similarly, when a user submits time logs, if the designated timesheet approver has an active delegation, the request is submitted to the delegatee instead of the designated user. When meeting minutes are assigned to a user having active delegation,it is assigned to the delegatee instead of the designated user.
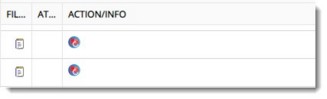
The delegated items will be available in the workspace of the delegatee and is identified by a separate icon. For action’ items delegated are displayed in the workspace of the delegatee as shown in the following figure.
Editing a delegation
Changes can be made to the delegation request which is in Active status.
To edit a delegation request
1.Select the checkbox next to a Delegation and in the toolbar click Edit.
Delegation Details window is displayed.
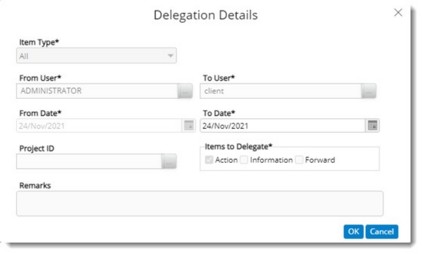
Figure: Delegation Details window is displayed
All the details can be edited, only when the ‘From Date’ is greater than current date. If the ‘From Date’ is earlier than current date, ‘To Date’ can be modified. Remaining fields will be disabled.
2.Click OK to save the values. Notification will be sent on modifying a delegation request.
Cancelling delegations
Delegations can be cancelled by the person who created the delegation or administrator any time before the delegation end date elapses. When delegations are cancelled before the delegation start date, the entry will be removed. When cancelled is carried after the delegation start date, status of the delegation will change to Cancelled.
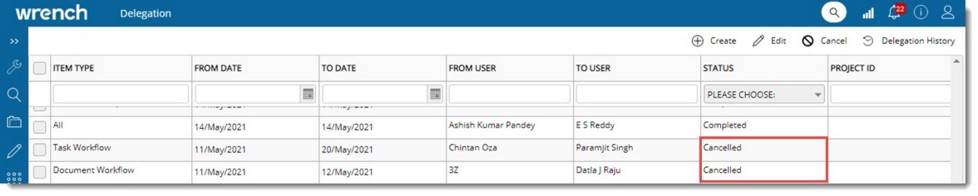
Figure: Cancelling delegation requests
Notification will be sent when an active request is cancelled. Format of the external mail sent is displayed in the following figure.
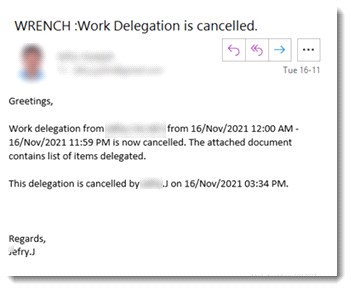
Figure: Delegation canceled notification
Completing delegations
A delegation request is completed once the ‘To date’ is elapsed. Status of the request is changed to ‘Completed’.

Figure: Completed deletion requests
A notification mail is sent when the delegation request is completed. Format of the external mail sent is displayed in the following figure.
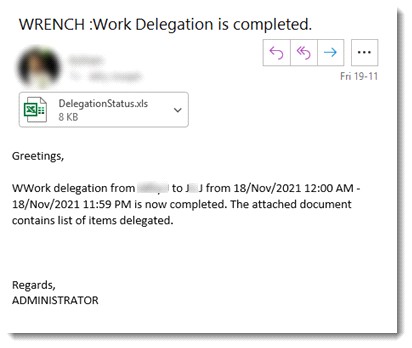
Figure: Delegation completed notification
Viewing delegation history
Delegator can view the series of events or action items delegated during the period of delegation request. ADMIN can view the history of all delegation request, but other users can only view the history of requests created by them.
To view delegation history
1.On the Delegation window select the checkbox next to a delegation.
2.On the toolbar click Delegation History. Delegation History window is displayed.
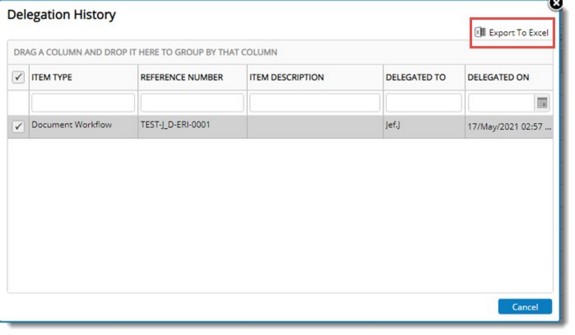
Figure: Delegation History window
If a user click this option without selecting any delegation request from the grid or selecting multiple requests, an alert message is displayed.
Delegator or Admin can export the delegation history to an MS Excel file.
To export delegation history
1.Select the checkbox next to the entries.
2.On the toolbar click Export to Excel.
Selected entries are exported to an MS Excel file.
|