|
Wrench SmartProject enables efficient Project Management and Data management by ensuring that all the processes are translated into a management perspective. This is achieved through "Custom Reports" module from which a number of reports that are critical to project management and data management can be derived. Wrench SmartProject has formulated these reports where tasks belonging to specific levels and the current status of the documents linked or referred to each selected task is made available in a customizable format where you may select only the required fields and export them to Excel, PDF, Wrench screen or CSV format. The "Custom Reports" module offers you enhanced parameter selection to narrow down on specific reports and the option to view reports.
Configuring a custom report
Configuring a new report is the process of saving a report view with defined report input parameters. This saved configuration can be reused by the user at any point of time.
Custom reports are configured from Custom Reports module. Custom Reports module can be opened from the Utilities option, on the global menu.
Pre-requisites: Only a user with 'Create and Manage' rights can configure or create a new report.
To configure a custom report
1.On the global menu click Utilities. A pop-up menu is displayed.
2.On the menu click Custom Reports.
Custom Reports window is displayed. Reports already configured are listed here.
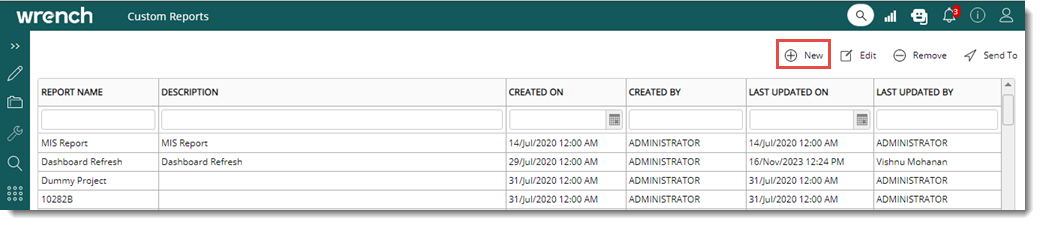
Figure: Custom Reports
3.On the window click New.
Report Properties window is displayed. The window conisists of two tabs, Basic Details and Advanced Details. By default the tab Basic Details is selected.
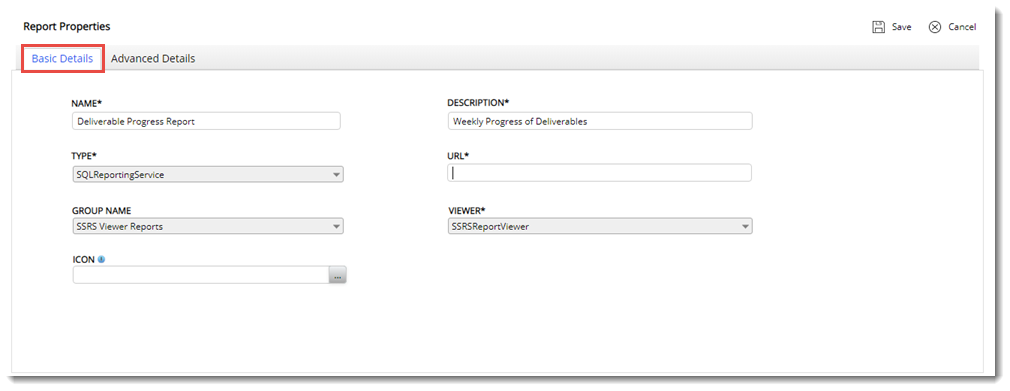
Figure: Report properties window
4.Enter values for the properties mentioned in the following table.
|
#
|
Property
|
Description
|
|
1
|
NAME
|
Enter a unique name for the report
|
|
2
|
DESCRIPTION
|
Enter a description for the report
|
|
3
|
TYPE
|
Based on the requirement, different types of reports can be generated. This can be selected from a drop-down list. The following options are available on the drop-down list.
SQL Reporting Service: Select this option if you want to configure the report generation based on SQL reporting service. SQL reporting service uses the powerful data management capabilities of SQL server to generate real time information. The report is configured in SQL report builder and the configured report is opened in SmartProject.
URL: Entr the report URL here. The report is generated based on this URL.
Embedded Power BI: Select this option if the Microsoft Power BI application is to be userd for preparing or viewing reports, SmartProject permits the user to access an embedded Power BI application in a native viewer. The organization may choose to use the common account, in which they will be assigned a separate workspace for this purpose, or they can configure their own Power BI account.
Report ID: Enter the ID of the report here. The report is generated based on this ID.
|
|
4
|
GROUP NAME
|
Here groups already created can be selected from a drop-down list. Also a group can be created.
To create a group
1.Click the field Group Name. A drop-down list is displayed.
2.On the list click New Group. Customized Group window is displayed. Here available groups are listed.
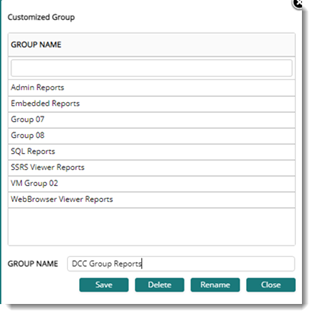
Figure: Customised Group window
3.On the field GROUP NAME, enter a name for the new group.
4.Click Save to create the group. A group is created successfully.
Also options to rename a group and delete a group are also available on the window.
|
|
5
|
VIEWER
|
This property is displayed if the report type selected is SQL Reporting Service.
Select a viewer from a drop-down list. Options available are SSRS Report Viewer and Web Browser.
|
|
6
|
ICON
|
An icon to identify the report can be selected. Click the browse button to select an icon from the location where it is strored.
|
After entering the basic details, advanced details can also be entered.
To enter advanced details
1.On the Custom Reports window click the tab Advanced Details.
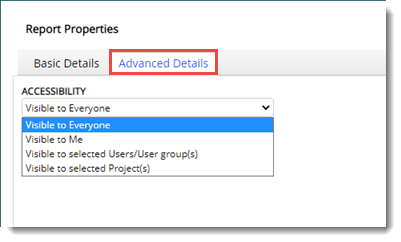
Figure: Advanced Details window
Various report accessibility options can be selected from a drop-down list. The following options are available for selection.
Visible to Everyone: Select this option if this report is to be made visible to everyone
Visible to Me: Select this option if this report is to be made visible to only to the user who created it.
Visible to selected Users/User groups(s): Select this option if this report is to be made visible to the selected users or user groups. On selecting 'this option, the browse button is enabled. Click the browse button to select a user or user group.
Visible to selected Project(s): Select this option if this report is to be made visible to resources in selected Projects. On selecting this options a browse button to select a Project is displayed. Click the browse button to select a Project form the Projects Search windown. Single or multiple project can be selected.
2.After entering all the configuration parameters, click Save to complete and save the configuration.
Sending the configured reports
After configuring the reports, the reports can be send to the SmartProject home page or smart folder. User can open the report from here.
To send the configured report
1.On the custom reports window, select the report.
2.On the tool bar place the mouse pointer over the option Send To. A pop-up menu is displayed.

Figure: Sending configured reports
3.On the menu click Home Page to send the report to the home page. The report will be available in the Reprots pane in home page.
4.On the menu click Smart Folder to send the report to a smart folder. On clicking this option Pin to Smart Folder window is displayed. Here the smart folders available in your system is listed.
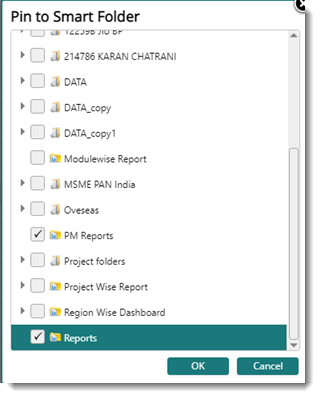
Figure: Selecting smart folders
5.Select the required smart folders and click OK. A message Item pinned successfully is displayed.
The configured reports will be available in the selected smart folders.
|