|
It is a common practice in the engineering industry, especially the AEC industry to store design files in shared network folders so that multiple people may access them from the shared location and relationship between files can also be maintained. However, the accessibility of such shared folders is confined to the boundaries of their local area networks. But, in a typical construction project, people from many organizations needs access to such central repositories of files.
Many businesses work around this using FTP servers, between which files are moved when required. However, this is an error prone and inefficient way of working with files as large files may take very long time and lot of bandwidth for transfers; also, manual intervention is required for moving files between different stake holders at appropriate time. Failing this will give access to the wrong versions of designs to people, leading to catastrophic errors in construction or manufacturing.
Since moving such legacy repositories of files to WRENCH is an arduous process, a file explorer in WRENCH is introduced using which users can be given controlled access to file repositories from across different geographies.
Opening the file manager
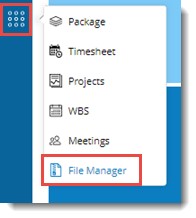
File Manager can be opened from the Modules section On the Global menu.
To open file manager
1.Click Modules. On the options displayed click File Manager.
File Manager window is displayed.
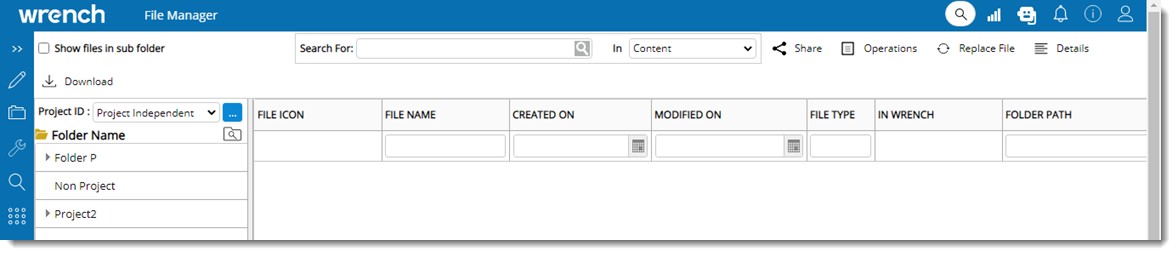
Figure: File Manager window
On the left pane, shared folder for the selected project is displayed.
2.Select a folder. Files in the folder are displayed.
Following properties of the file will be displayed in the window.
|
#
|
Property
|
Description
|
|
1
|
FILE ICON
|
The icon corresponding to the file is displayed.
|
|
2
|
FILE NAME
|
Name of the file
|
|
3
|
CREATED ON
|
Created date as read from the folder details
|
|
4
|
MODIFIED ON
|
Modified date as read from the folder details.
|
|
5
|
IN WRENCH
|
If the file is registered in WRENCH, a green tick mark is displayed. Or else the column is left blank.
|
|
6
|
FOLDER PATH
|
Path where the files are located is displayed here.
|
Searching for folders
Facility to search for folders is available in the folder section of the file manager.
To search for folders
1.Click the Search icon. Search field is enabled.
2.On the search field enter the folder name
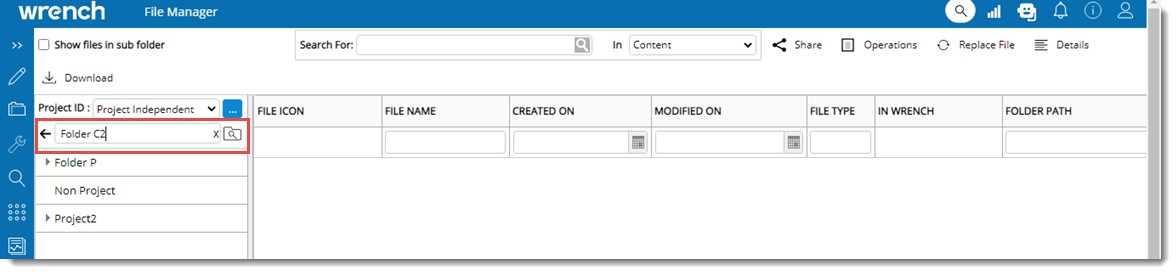
Figure: Searching for folders
3.Click on the Search button or press the Enter key to start the search.
If the matching folder exists, that folder is selected and highlighted.
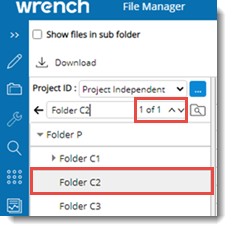
Figure: Displaying matching folders
4.Click the up arrow and down arrow to move between matching folders.
5.Click the x icon to clear the search criteria.
Facility to display the files in sub-folders is also available.
To display files in sub folders
1.Click the checkbox next to Show files in Subfolders.
2.Select a the parent folder.
Files in the sub folders of a parent folder are displayed.
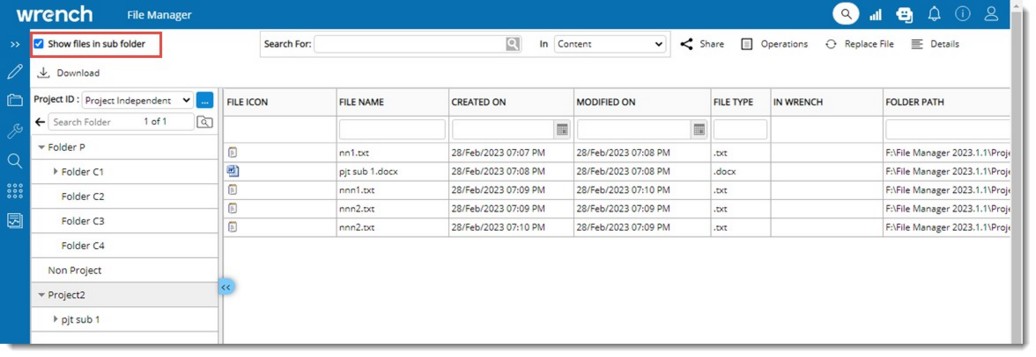
Figure: Displaying files in sub folders
Option to search for files based on content is also available.
On the drop-down box next to In, if the option Content is selected, system displays the file containing the value entered in Search For field.
On the drop-down box next to In, if the option File Name is selected, system displays the files with the name as specified in Search For field.
Operations from the file manager
Different operations can be carried out on files in the file manager. All the operations can be carried out only on files that are not added to SmartProject..
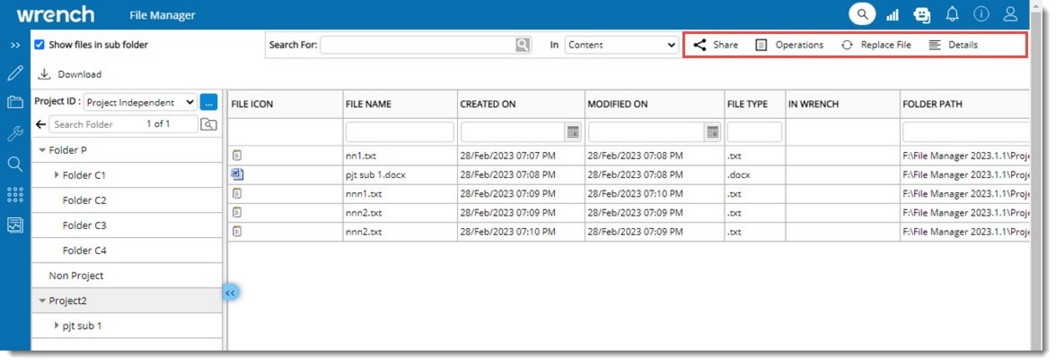
Figure: File manager operations
Searching files
Search facility in File manager can be used to search the files based on file properties and file contents. If the Configured Drive/Folder is Indexed in ‘Windows Search’ and is available to WRENCH Server machine, users can search for file content by typing in the search field.
To search for files
1.On the Search area enter a search criterion.
2.Click the search icon.
Once search results are available, it will be displayed in the same place where the list of files is displayed. If no files are found, the result will be displayed as “No data to display.”
Sharing files
Share option in the file manager helps in sharing large file through a hyperlink sent through an email.
To share a file
1.Select the file that is to be shared and On the tool bar click Share.
Send Mail window is displayed. In the mail content File Name, File Path and Internal and External link to download the files will be available.
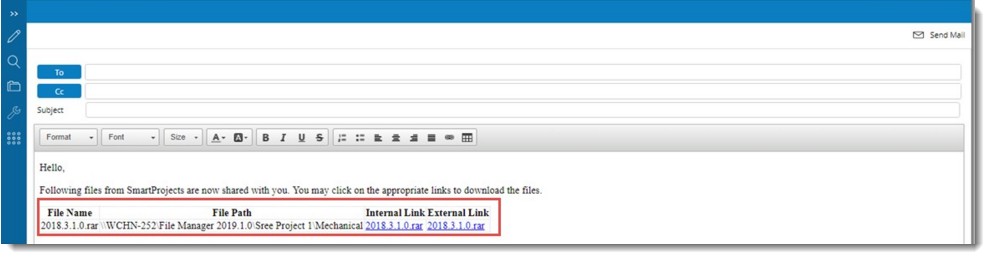
Figure: Send Mail window
2.Enter recipients for the mail and click Send Mail.
3.On receiving the email, click on the link to first authenticate with WRENCH and then download the file.
Operations
In certain scenarios, the users of SmartProject may need to add new documents, replace current revision documents, replace older revisions of documents, or import associated files (Spector, related files, comments, Client comments) from their local system or the server. Single or multiple files can be selected and added to WRENCH. Files once added cannot be added again.
On placing the mouse pointer over the option Operations, a pop-up menu is displayed.
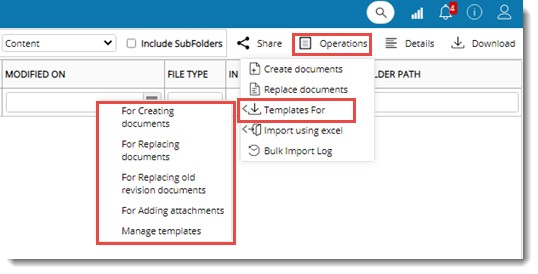
Figure: Operations Menu
The following operations can be carried out from the menu.
1.Create Documents
2.Replace Documents
3.Templates For
a.For Creating documents
b.For Replacing current revision documents
c.For Replacing old revision documents
d.For Adding attachments
e.Manage Templates
4.Import Template
These options are explained in the following sections.
Creating Documents
Using this option, a selected document can be added to SmartProject
To add files to SmartProject
1.Select single or multiple files.
2.On the menu click Create Document.
Add to Wrench window is displayed.
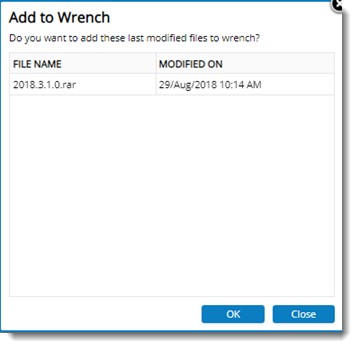
Figure: Add to Wrench window
3.Click OK to add the files to WRENCH.
For a single document WRENCH Single Document Addition window and for multiple documents, Multiple Document Addition window is displayed.
4.Add the document to WRENCH using single or multiple document addition window.
Replacing Documents
Using this option files of existing documents can be replaced. On clicking this option after selecting the documents, the Bulk Upload Document window is displayed. For more information on working with bulk document upload window refer Bulk Update of Documents.
Creating Templates
Templates can be generated for creating documents, replacing documents, replacing old revisions of documents, adding attachments, and managing templates. On placing the mouse pointer over the option Templates For, a pop-up menu with different options is displayed.
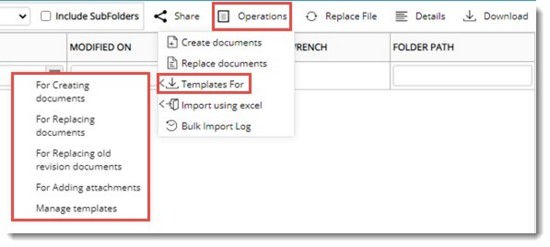
Figure: Creating Templates
The option in this menu is explained in the following section.
For Creating Documents: Using this option template for adding documents to SmartProject can be generated and documents can be added using the template. On clicking, this option Download Template wizard is displayed. Here different options for generating an import template is available.
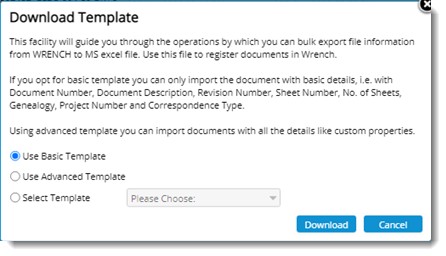
Figure: Downloading Template
For Replacing Documents: Using this option a template that can be used for replacing the documents can be generated.
For Replacing old revision documents: Using this option a template that can be used to replace old revisions of existing documents can be generated. On clicking this option, the following template is generated.
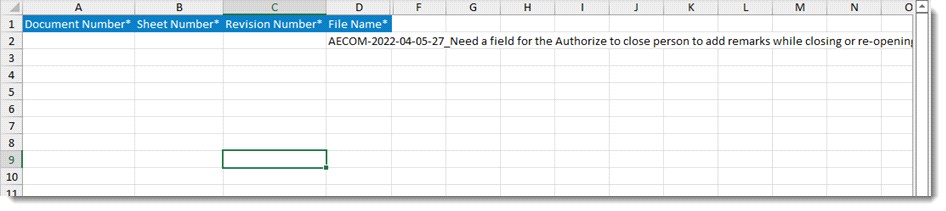
Figure: Template for replacing old revisions
On the template enter values for the following columns.
•Document Number: Specify the document number to which the file is to be replaced.
•Sheet Number: Specify the Sheet number of the document to which the file is to be replaced.
•Revision Number: Specify the revision number of the document to which the file is to be replaced.
•File Name: Specify the path of the selected file.
After entering values in different columns save the file.
For Adding attachments: Using this option an excel template for importing attachments against specified documents in SmartProject can be generated. The generated template is shown in the following figure.

Figure: Template for adding attachments
On the template enter values for the following columns.
•Main Document Number: Specify the document number to which the file is to be attached.
•Main Document Sheet Number: Specify the Sheet Number of the document to which the file is to be attached.
•Main Document Revision Number: Specify the Revision Number of the document to which the file is to be attached.
•Association Type: Specify the association of the file to the document. This can be selected from a drop-down list. Options available are Spector, Related file, Comments, and Client comments.
•File Name: The name of the selected file is displayed here.
After entering values in different columns save the file.
Manage Templates: Using this option custom template that can be used for the ‘Creating Document’ option can be generated. On clicking this option Document Templates-Import window is displayed.

Figure: Document Template for Import
On the window options to create a template, edit a template, remove a template and publish a template is available.
Importing Using Excel
Different option to import the values in generated excel template is available here. On placing the mouse pointer over this option, a pop-up menu is displayed.
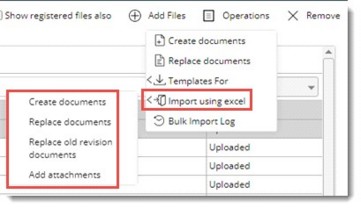
Figure: Importing using excel
Different options in the menu are described in the following section.
•Create Documents: Click this option to import the documents in bulk using the generated template. On clicking this option Bulk Import Wizard is displayed. The procedure for importing the files using the wizard is the same as before.
•Replace Documents: Click this option to replace the current revision of documents using the generated template. On clicking this option Bulk Import Wizard is displayed. The procedure for importing the files using the wizard is the same as before.
•Replace old revision of documents: Click this option to replace the old revision of documents f using the generated template. On clicking this option Bulk Import Wizard is displayed. The procedure for importing the files using the wizard is the same as before.
•Add attachments: Click this option to attachments to documents using the generated template.
Bulk Operations Log
The bulk operations provide the status of the import processes.
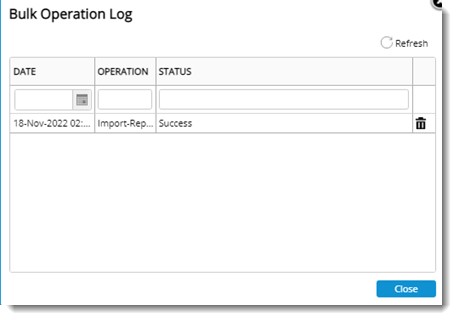
Figure: Bulk Operations log window
Replacing files
File in the file manager can be replaced with a new version when required. This operation is not available for file that are added to Wrench.
To replace files
1.Select the file that you want to replace.
2.On the tool bar click Replace File.
File Selection window is displayed.
3.Select a file with the file name as same the file selected in file manager.
File in the file manager is replaced by the selected file.
Downloading files
Files in the file manager except files added to WRENCH can be downloaded.
To download files
1.On the file manager select the file that is to be downloaded.
2.On the tool bar click Download.
If Wrench Desktop Connector is installed, file is downloaded directly. Downloaded file is opened.
NOTE: If the opened file is edited and saved, changes are reflected in the source file also
|