|
Receivables, also referred to as accounts receivable, are debts owed to a company by its customers for goods or services that have been delivered or used but not yet paid for. Receivables can be managed from the same window.
To create a receivable
1.On the Cost Management window, click the tab Commitments/Receivables.
2.Select the Category as Receivable.
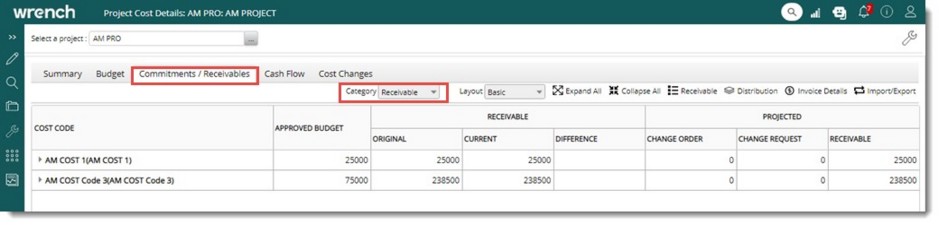
Figure: Creating a receivable
3.On the tool bar click Receivable and in the menu click Create.

Receivable Details window is displayed. On the Receivable Details window, Cost information is arranged under two different sections, Budget Details and Receivable Details.

Figure: Receivable Details window
1.On the Budget Details window enter values for the following fields. Additional information can be viewed by expanding the section Additional Budget Details.
|
#
|
Item
|
Description
|
|
1
|
COST CODE
|
Click the browse button to select a Cost Code. On clicking the browse button, all the codes assigned in the project will be listed in the Cost Code window. Select a code from the list.
|
|
2
|
CATEGORY
|
Category is displayed as Receivable.
|
|
3
|
LINE ITEM NO
|
Click the browse button to select a Line Item Number. Line Items filtered based on Cost Code is displayed here. Select a Line Item.
|
|
4
|
LINE ITEM DESCRIPTION
|
Based on the Line Item selected, value for this field is filled in. This property is displayed under the section Additional Budget Details.
|
|
5
|
BUDGET QUANTITY
|
Quantity in the budget line item is displayed. This field is non-editable. Based on the Line Item selected, value for this field is filled in. This property is displayed under the section Additional Budget Details.
|
|
6
|
BUDGET RATE
|
Rate defined for the budget line item is displayed here. This field is non-editable. Based on the Line Item selected, value for this field is filled in. This property is displayed under the section Additional Budget Details.
|
|
7
|
BUDGET TOTAL
|
Total amount of Budget Line Items is displayed here. This field is non-editable. Based on the Line Item selected, value for this field is filled in. This property is displayed under the section Additional Budget Details.
|
2.On the Receivable Details section enter values for the following fields. Additional details can be viewed by expanding the section Additional Receivable Information.
|
#
|
Item
|
Description
|
|
1
|
REFERENCE NUMBER
|
The value for this field is generated automatically.
|
|
2
|
TYPE
|
Select a value from the drop-down list. In the list types available are PO and Sub Contracts. By default the value displayed is PO.
|
|
3
|
RECEIVED FROM
|
Click the browse button to select the origin of the receivable. Origin window is displayed. On selecting an origin list of vendors is displayed. Select the vendor from the list.
|
|
4
|
CHANGE ORDER
|
A receivable may be created newly or based on an Approved Receivable change order.
To create a receivable from a change order
1.Click the ellipse button.
Search Change Order window is displayed.
All the Approved Change Orders filtered by Project and the selected Line item will be displayed.
2.Select an approved change order based on which a receivable is to be created.
|
|
5
|
RECEIVABLE DESCRIPTION
|
Enter a description for the receivable
|
|
6
|
PO NUMBER
|
Enter the PO Number of the receivable.
|
|
7
|
PAYMENT DAYS
|
Enter the number of days after which a payment will be released after the approval/certification. This is a mandatory field.
|
|
8
|
QUANTITY
|
Enter a value for the quantity of receivable created. Quantity in the receivable may be greater or lesser than the quantity specified in the Budget Line Item. This is because the receivables quantity is the actual quantity. This will have no impact on the Budget Line Item but will have impact only on the actuals (profitability of the Project).
|
|
9
|
RATE
|
Rate of the Quantity of the Receivable. By default this value will be the value provided in the Budget Rate and user may modify this value
|
|
10
|
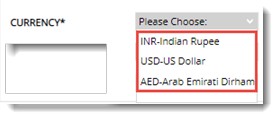
CURRENCY
|
The PO/ sub contracts may be in a currency different form that of base currency (Project currency), in such case the receivables are created in the currency on which the PO/ Sub Contracts are issued.
Select a currency from a drop-down list.
|
|
11
|
CONVERSION RATE
|
Enter a conversion rate for the currency. This property is displayed only when the section Additional Receivable Details is expanded.
|
|
12
|
CONVERSION DATE
|
Current date is displayed here. This can be modified. This property is displayed only when the section Additional Receivable Details is expanded.
|
|
13
|
PR VALUE
|
PR value specified in the budget line item against which the receivable is created is displayed here. This value will be displayed only when the budget line item is selected. If no such value exist user may type in a value. This property is displayed only when the section Additional Receivable Details is expanded.
|
|
14
|
PR NUMBER
|
PR also has a unique number generated in format followed by organizations. This unique number is used to identify the PR. Type in a value. This field is editable, and user may modify this value if required. This property is displayed only when the section Additional Receivable Details is expanded.
|
|
15
|
CREATED BY
|
Name of the user (logged in user) who created the receivable cost is displayed here. This property is displayed only when the section Additional Receivable Details is expanded.
|
|
16
|
CREATED ON
|
Current date is displayed here. The date can be modified by the user. Date greater than current date is not permitted here. This property is displayed only when the section Additional Receivable Details is expanded.
|
|
17
|
TOTAL AMOUNT
|
Total amount in project currency is displayed here. The value can be modified. Currency is also displayed alongside with the currency. This property is displayed only when the section Additional Receivable Details is expanded.
|
|
18
|
AMOUNT (BASE CURRENCY)
|
Here product of total amount and conversion rate is displayed. This field is not editable. This property is displayed only when the section Additional Receivable Details is expanded.
|
3.After entering the values click Save.
4.Receivable created successfully message is displayed. Click OK to continue.
Created receivable is displayed under the Commitments/Receivables tab.
Updating Receivables
Commitment values can be edited. Editing is entirely different from change request operation.
To edit a receivable
1.Select a receivable and in the menu click Update.
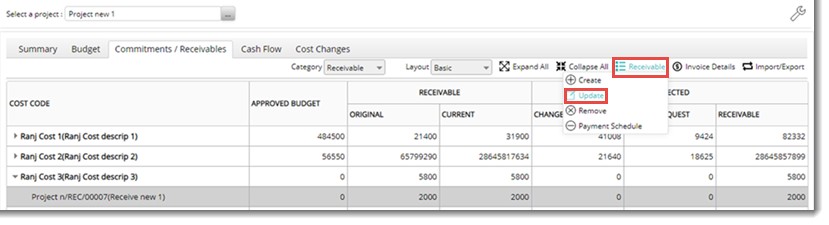
Figure: Editing receivable details
Receivable Details window with entered values is displayed.
2.Edit the values and click Save.
The updated value will be reflected in the Commitments/Receivables, Summary and Budget tab.
NOTE: Receivables do not have statuses, therefore those users having Edit commitment/receivable permission can Edit the receivable any time.
Defining payment schedule
The amount specified against each PO is not spent at once; but paid as per the “payment schedule specified in the PO. Facility to define Payment Schedule is available. Payment Schedule can be defined from the Receivables menu
To define payment schedule
1.On the Receivables tab select the receivable for which you want to define payment Schedule.
2.On the menu click Payment Schedule.
Payments Schedule window is displayed. If there any payment terms created, they are displayed here.
3.On the tool bar click New.

Figure: Creating Payment Schedule
4.On the menu displayed click Payment Schedule.
Payment Schedule Details window is displayed.
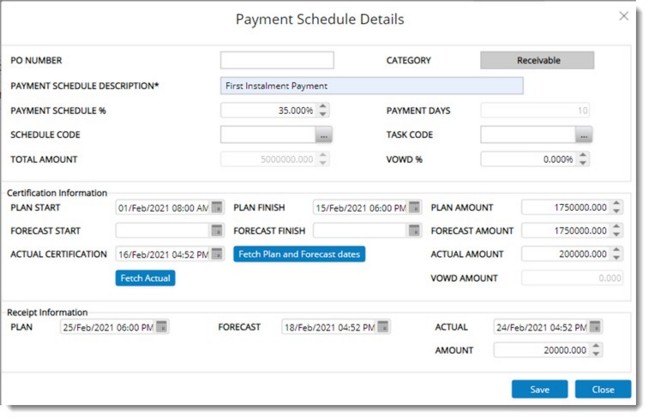
Figure: Payment Details window
5.Properties displayed in the window is explained in the following table. Enter values for properties, wherever it is required.
|
#
|
Property
|
Description
|
|
1
|
PO NUMBER
|
PO Number available in the selected receivable is displayed here. This field is non-editable.
|
|
2
|
CATEGORY
|
Here category is displayed as Receivable.
|
|
3
|
PAYMENT SCHEDULE DESCRIPTION
|
Enter a description for the payment schedule.
|
|
4
|
PAYMENT SCHEDULE %
|
Enter a value. The maximum value permitted is 100. If sum of the percentage value exceeds 100% a warning message is displayed.
|
|
5
|
PAYMENT DAYS
|
Payment days available in the receivable is displayed here. This field is non-editable.
|
|
6
|
SCHEDULE CODE
|
Click the browse button to select a Schedule Code. Search Task window is displayed. All the tasks having schedule codes available in the rules will be displayed. Select a task.
|
|
7
|
TASK CODE
|
Click the browse button to select a Task Code. Search Task window is displayed. All the tasks with task codes are displayed. Select a task from the list.
|
|
8
|
TOTAL AMOUNT
|
Total Amount is displayed here. The value displayed here cannot be edited.
|
|
9
|
VOWD %
|
Specify the VOWD% or conversion factor.
|
After entering values for the properties mentioned in the previous table, enter certification details. Certification denotes that an activity is completed, and payment may be released. But the payments release is based on the payment days stipulated on which the payment will be made.
6.Enter Certification Information Values which is explained in the following table.
|
#
|
Property
|
Description
|
|
1
|
PLAN START
|
Enter the plan start date and time.
|
|
2
|
PLAN FINISH
|
Enter the plan finish date and time.
|
|
3
|
FORECAST START
|
Enter the forecast start date and time.
|
|
4
|
FORECAST FINISH
|
Enter the forecast finish date and time.
Fetch Plan and Forecast dates: Plan and Forecast dates can also be fetched.
On clicking the option ‘Fetch Plan and forecast date’, then depending on the Task code or Schedule code assigned to the payment schedule, the Planned start, planned finish, forecast start and forecast finish dates will be fetched to the corresponding planned start, planned finish, forecast start and forecast finish date of the payment terms.
If Schedule codes are assigned against the Rules of a Rule set assigned to the tasks and value is provided in Schedule code, then dates will be fetched from the rules instead of the schedules. However, for a rule with no finish dates, only planned and forecast finish date will be fetched and the Planned and forecast start date will remain blank.
If user has selected a rule and a task in the fields Schedule code and task code respectively, and then click on ‘Fetch plan and forecast date’, then system fetches the dates from rules instead of task schedule and update the plan and forecast dates of the payment term. This is because, the dates in rules are the further break down of the dates provided in the schedules, hence rule date may be more appropriate.
|
|
5
|
PLAN AMOUNT
|
Enter the plan amount.
|
|
6
|
FORECAST AMOUNT
|
Enter the forecast amount.
|
|
7
|
ACTUAL CERTIFICATION
|
Actual certification date is the date on which the payment terms is completed. Enter actual certification date.
This value may also be fetched from the task based on the task code assigned to the Payment term or the schedule code. On clicking the button Fetch Actual, the actual finish date from the task will be fetched and the date will be updated against the ‘Actual Certification date’.
|
|
8
|
ACTUAL AMOUNT
|
Enter the actual amount.
|
|
9
|
VOWD AMOUNT
|
This is a system calculated value.
|
Spent Information: Certification details of a payment schedule do not imply that the actual payment is done. The actual payment will be done after the days mentioned in the payment days.
7.Enter certification information values, which is explained in the following table.
|
#
|
Property
|
Description
|
|
1
|
PLAN
|
Plan Finish Date is displayed here. If any payment days is defined in the commitment, this will be added to the Plan Finish Date.
|
|
2
|
FORECAST
|
Forecast Finish Date is displayed here. If any payment days is defined in the commitment, this will be added to the Forecast Finish Date.
|
|
3
|
ACTUAL
|
Actual Finish Date is displayed here. If any payment days is defined in the commitment, this will be added to the Actual Finish Date.
|
|
4
|
AMOUNT
|
Enter the amount.
|
8.After entering the values click Save.
9.Payment Schedule created successfully message is displayed. Click OK to continue.
Created Payment Schedule is displayed in the Payment Schedule window.
Distributing Payment Schedules
Payment schedule created for the receivable may be distributed across a specified time period.
To distribute payment Schedules
1.Select a single payment schedule.
2.On the tool bar click Distribute.

Figure: Distributing payment schedule
Payment Schedule Distribution window is displayed.
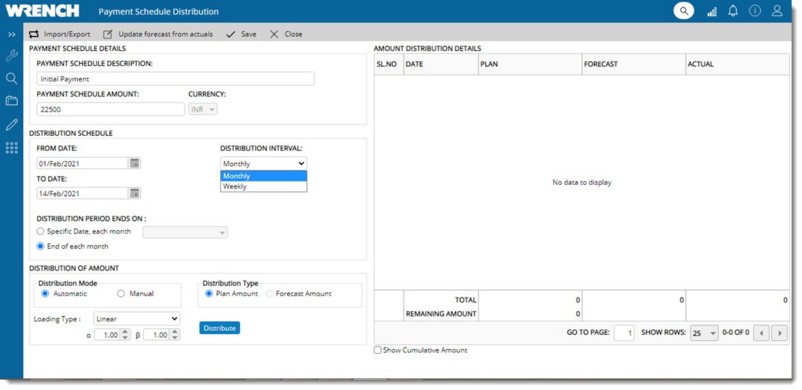
Figure: Distribute Payment Schedule window
Elements in the window is explained in the following sections.
Details regarding the payment schedule can be entered in PAYMENT SCHEDULE DETAILS section, they are explained in the following table.
|
#
|
Property
|
Description
|
|
1
|
PAYMENT SCHEDULE DESCRIPTION
|
Payment schedule description is displayed here.
|
|
2
|
PAYMENT SCHEDULE AMOUNT
|
Payment schedule amount is displayed here.
|
|
3
|
CURRENCY
|
Currency is displayed here.
|
Distribution dates can be entered under the section DISTRIBUTION SCHEDULE, they are explained in the following table.
|
#
|
Property
|
Description
|
|
1
|
FROM DATE
|
Enter the starting date of the payment schedule.
|
|
2
|
TO DATE
|
Enter the starting date of the payment schedule.
|
|
3
|
DISTRIBUTION INTERVAL
|
Select the interval to be used for constructing the payment schedule. Options available are Weekly and Monthly. Since most organizations process payments monthly, default values is Monthly.
|
|
4
|
DISTRIBUTION PERIOD ENDS ON
|
A time frame for ending the distribution period can be defined. The following options are available.
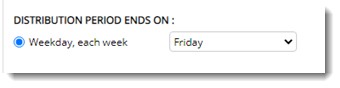
If the interval selected is Weekly the following option is displayed.
Week day, each week: Select this option to specify a week day such that each row in the ‘payment schedule’ will end on the specified week day. A day can be selected from a drop-down list.
If the interval selected is Monthly the following options are displayed.
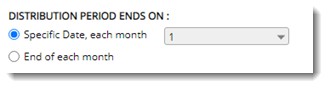
Specific Date, each month: Select this option to specify a specific date, such that each row in the ‘payment schedule’ will end on the specified date of each month.
End of each month: Select this option to specify the month-end such that each row in the ‘payment schedule’ will end on the last day of each month.
|
Distribution parameters can be defined in the section DISTRIBUTION OF AMOUNT, they are explained in the following table.
|
#
|
Property
|
Description
|
|
1
|
Distribution Mode
|
Distribution types available are Manual and Automatic. By default radio button next to Manual is selected.
|
|
2
|
Loading Type
|
Select a loading type from a drop-down list. Values available are:
Linear: (Alpha =1 , Beta = 1)
Front Loaded: (Alpha = 1, Beta = 5)
Back Loaded: (Alpha = 5, Beta = 1)
Based on the selected loading type, Alpha and Beta values will be automatically selected. The values can be modified and should be always greater than one.
|
|
3
|
Distribution Type
|
This option is displayed only when distribution mode selected is Automatic. The following settings are available.
Plan Amount: Select this option to distribute plan amount automatically.
Forecast Amount: Select this option to distribute forecast amount automatically
|
1.After entering the values click Distribute. Payment Term is distributed based on the settings provided. A message Distributed successfully. Please save the distributed details is displayed.
2.Click OK to continue.
A sample distribution is displayed in the following figure.
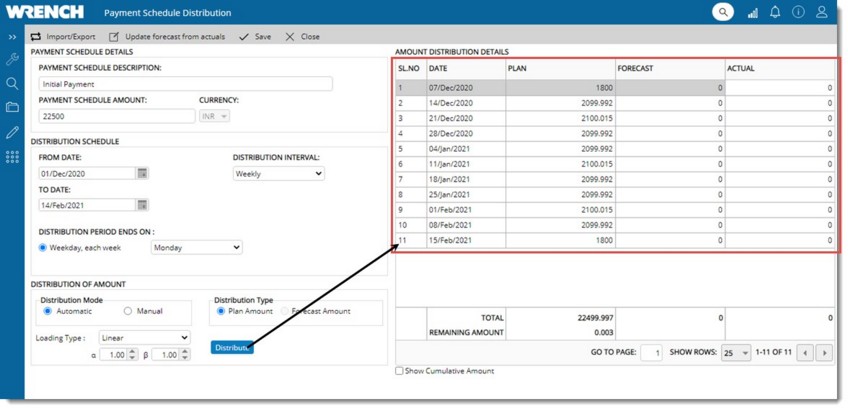
Figure: Distribution Details
Depending on the Distribution Dates, PLAN DATE and PLANNED AMOUNT or FORECAST DATE and FORECAST AMOUNT is displayed.
3.Click Save to save the distribution.
Distributing payment schedules manually
In some cases payment terms are distributed manually.
To distribute payment schedules manually
1.On the Payment Schedule distribution window select the radio button next to Manual.
2.Select a Distribution Interval from a drop-down list. Options available are Monthly and Weekly.
3.Define the period in which the distribution ends. Options available are This day each month/week, This date each month and Month End.
4.After selecting the options click Distribute. Distribution table is created. Enter the PLAN amount manually.
5.Click Save to save the payment schedule distribution
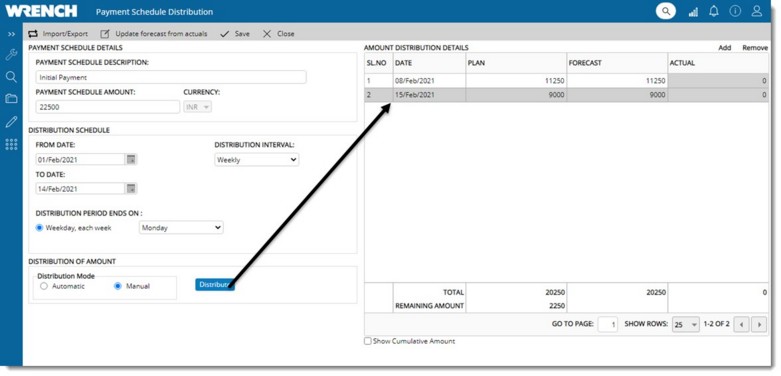
Figure: Distributing Manually
Managing Invoices
It is desired to register the invoices created against a receivable. This information may be used for cost analysis such as ‘Total receivable’ vs ‘Invoiced ‘and ‘Invoiced’ vs ‘Payment Receipt’.
Generating Invoices
Vendors submit invoices for payments. Normally the invoices are raised based on the payment terms specified in the PO. Invoice can be registered from the Receivables window.
To register an invoice
1.On the Cost Management click Commitments/Receivables tab.
2.Select a receivable from the window.
3.On the tool bar click Invoice Details and, in the menu, displayed click Register Invoice.
Register Invoice window is displayed.
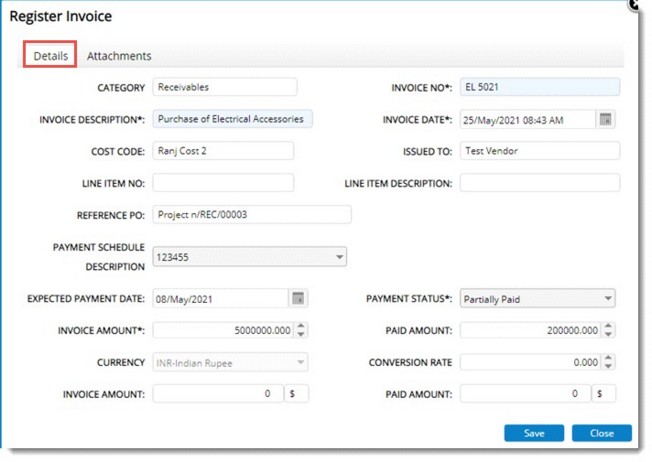
Figure: Register Invoice window
The window will have two tabs, Details and Attachments. By default, the tab Details will be selected. Enter values for the fields mentioned in the following table.
|
#
|
Item
|
Description
|
|
1
|
Category
|
Here category of the invoice is displayed. For receivables the category displayed is Receivables.
|
|
2
|
Invoice Number
|
Enter an invoice number.
|
|
3
|
Invoice Description
|
Enter invoice description.
|
|
4
|
Cost Code
|
Cost Code assigned to the selected receivable is displayed. This field is non-editable.
|
|
5
|
Line Item Number
|
Line Item number based on the Cost Code assigned to the selected receivable is displayed here. This field is non-editable.
|
|
6
|
Line Item Description
|
Line Item Description based on the Cost Code assigned to the selected receivable is displayed here. This field is non-editable.
|
|
7
|
Reference PO
|
Value is displayed automatically based on the receivable selected. This field is non-editable.
|
|
8
|
Payment Schedule Description
|
List of payment schedules created in the given receivable, will be listed in the drop-down.
|
|
9
|
Payment status
|
Select a payment status from a drop-down list. Values available are:
•Fully Paid
•Partially Paid
•Not Paid
By default the value “Not Paid” will be selected.
Once payment status change to ‘Fully Paid’ invoice amount is filled automatically to paid amount.
|
|
10
|
Expected Payment Date
|
Enter a date.
|
|
11
|
Invoice Amount
|
Enter the invoice amount.
|
|
12
|
Paid amount
|
Enter the amount paid.
Once payment status change to ‘Paid’ invoice amount is filled automatically to paid amount. User can change the amount if needed.
|
|
14
|
Currency
|
Currency specified in the selected receivable will be displayed.
|
|
15
|
Conversion Rate
|
Enter a conversion rate
|
|
16
|
Invoice amount (Project Currency)
|
Calculated automatically based on the Conversion Rate. This field is non-editable.
|
|
17
|
Paid Amount (Project Currency)
|
Calculated automatically based on the Conversion Rate. This field is non-editable.
|
Attachments can be added to the invoice.
To add attachments
1.On the Register Invoice window click the tab Attachments.
2.On the window place the mouse pointer over Add . On pointing the mouse over the option Add, a pop menu with options, From SmartProject and From Disk is displayed.
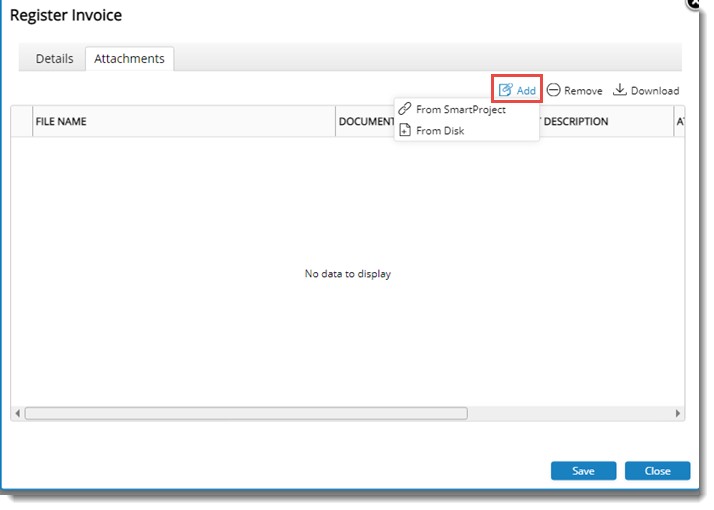
Figure: Adding Attachments
3.Choose the required option to select the file that is to be attached to the invoice.
Attached file is displayed in the window.
4.After entering values click Save.
An invoice is generated. Generated invoice is displayed under Invoice Details.
Invoice Details
List of generated invoices will be listed under Invoice Details.
To open invoice details
1.On the Commitments window click Invoice Details.
2.On the menu displayed click Invoice Details.
Invoice Details window is displayed. All the invoices created under the project for the receivables will be listed here.

Figure: Invoice Details
To update invoice details
1.Select the invoice that you want to edit.
2.On the tool bar click Update.
Update Invoice window is displayed. Details tab is selected by default and Invoice Details are displayed.
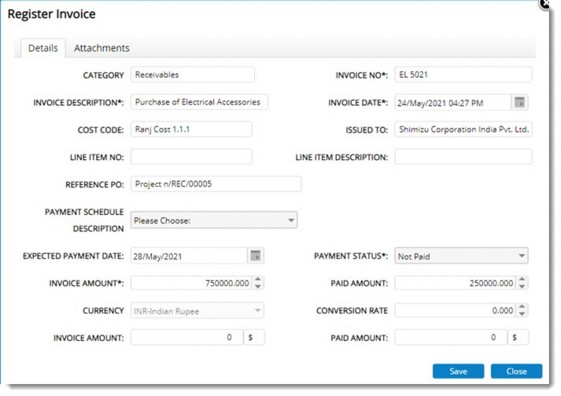
Figure: Update Invoice window
3.Change the invoice information.
4.Click the Attachments tab to add attachments to the Invoice.
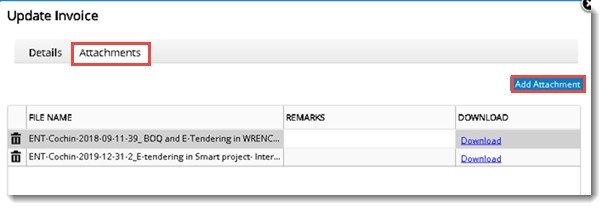
Figure: Adding attachments
4.Click Save to save the modifications.
NOTE: If Payment Status of an invoice is Fully paid then user is restricted from editing the details and a warning message is displayed.
To remove invoices
1.Select the invoice that you want to remove.
2.On the tool bar click Remove.
3.A warning message is displayed. Click Yes to delete the invoice..
NOTE: Only users with “Edit Commitment” permission in Project can remove invoices.
Importing Invoices in bulk
Invoices can be imported in bulk using a MS Excel template. An MS Excel template is generated, invoice details are entered in the template and saved, and the details are imported.
To generate a template
1.On the Invoice Details window click Import Invoice.
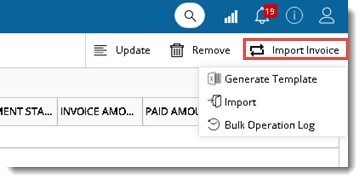
2.On the menu displayed click Generate Template.
3.Import template is generated.
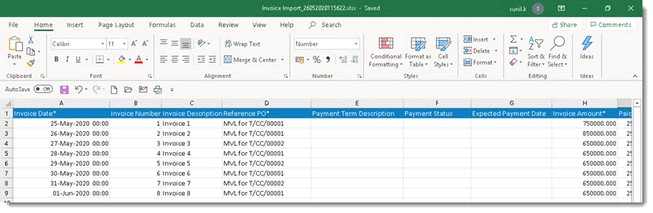
Figure: Import Template
4.Enter values for different columns in the template and save the file.
To import invoice details
1.On the Invoice Details window click Import Invoice.
2.On the menu displayed click Import.
Bulk Import Wizard is displayed.
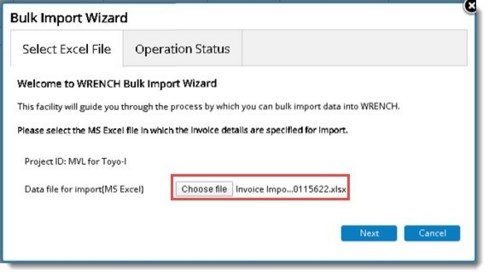
Figure: Bulk Import Wizard
3.Click Choose file to select the import template and click Next.
Bulk Import Operation Status window is displayed. Here status of the import operation is displayed.
4.Click Finish.
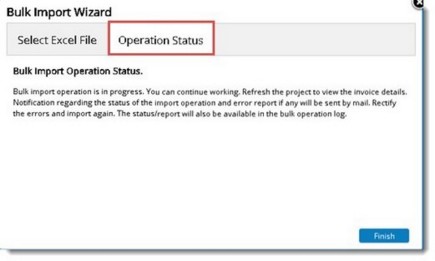
Invoice details are successfully imported.
Importing, Exporting and Updating Receivables
Receivables Summary can be created in an Excel template generated from the system and the details can be imported to the system. These options are available in the menu displayed on clicking Import/Export.

Figure: Import/Export operations
To generate an import template
1.On the menu click Generate Template.
2.An MS Excel template is generated. On the template enter values for creating a Receivable and save the file.
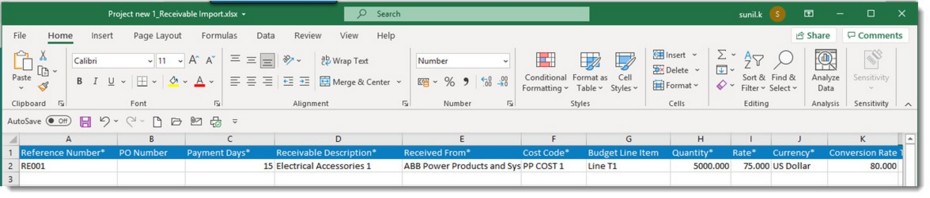
Figure: Generated Excel template
Next step is to import the values to the system.
To import receivable details
1.On the menu click Import.
Bulk Import Wizard is displayed.
2.On the wizard click Choose file to select the import file.
File Selection window is displayed. Select the file from the stored location.
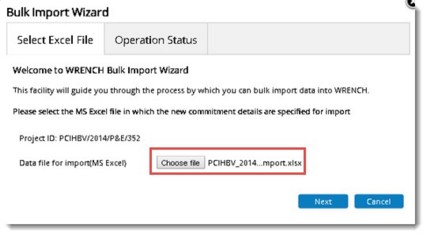
Figure: Bulk Import Wizard
3.Click Next.
The following window is displayed.
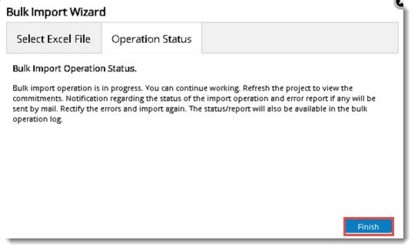
5.Click Finish. Import operation is completed successfully. Status of the operation is displayed in the Bulk Operations Log as shown in the following figure.
Imported details will be available in the Receivables window.
Exporting receivable details
Receivable details can be exported to an MS Excel sheet, values can be edited and the new values can be updated to the system.
To export receivable details
1.On the menu click Export.
2.Bulk Export Wizard window is displayed. Choose the mode of export by clicking the corresponding radio button.
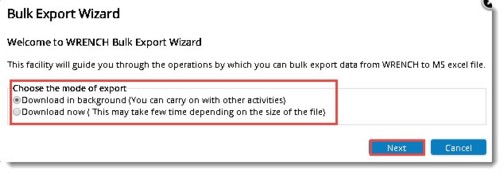
Figure: Bulk Export Wizard window
3.Click Next.
4.Details are exported to an Excel file and the file is opened. Edit the details in the file and save the file.
To update receivable details
1.On the menu click Update.
WRENCH Bulk Update Wizard is displayed.
2.Click Choose file to select the updated excel file.
3.Click Next. The following wizard is displayed.
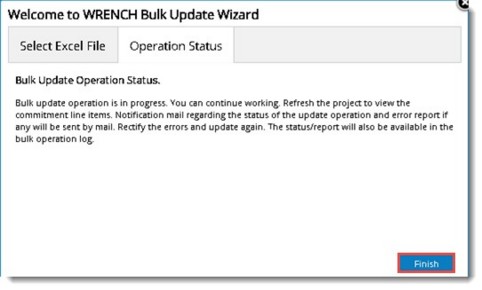
Figure: Bulk Import Wizard
4.Click Finish,
Status of the update operation is displayed in the Bulk Operations Log. Here the status is Success,
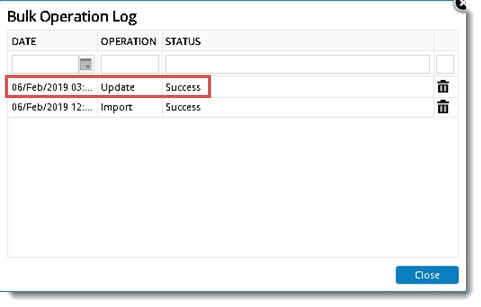
Figure: Bulk Operation Log window
|