|
All the task related properties will be available in the Task Properties window. The properties can be categorized to Basic Task Details, Document Details, Origin Details, System Details, Advanced Details, Approval Status Code Details, Receipt Details and Custom Details properties.
These properties and their classifications can be defined to a task genealogy according to the need of the organization and specific users. This operation is carried out by the administrator.
Opening the task details window
To open the task details window
1.Select a task smart folder.
2.Click a task in the folder.
Task Details window is displayed.
Task Details window
The task details window comprises of the following.
1.The button strip on the top.
2.A customizable tab strip where different operations can be displayed as tabs.
3.An area that displays different information.
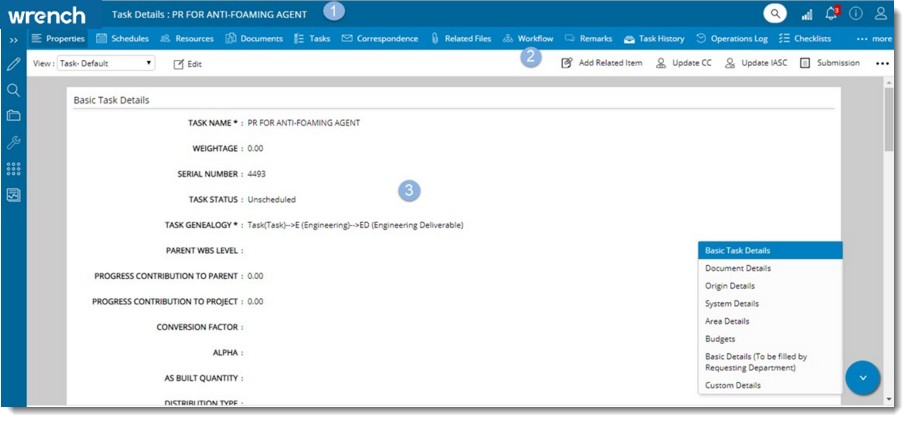
Figure: Task Details window
The menu that is displayed when you hover the mouse over the arrow button assists you in switching to different sections in the task details window.
The button strip at the top is further divided into the following sections.
Properties
Schedules
Resources
Documents
Tasks
Correspondence
Related Files
Workflow
Remarks
Task History
Operations Log
Checklists
Event Log
Operations from the tab strip
On the tab strip of the task details window, different document related operations are displayed as tabs. These tabs can be added or removed from the tab strip. Only five operations can be displayed in the tab strip at a time. The remaining operations are displayed under the more icon.
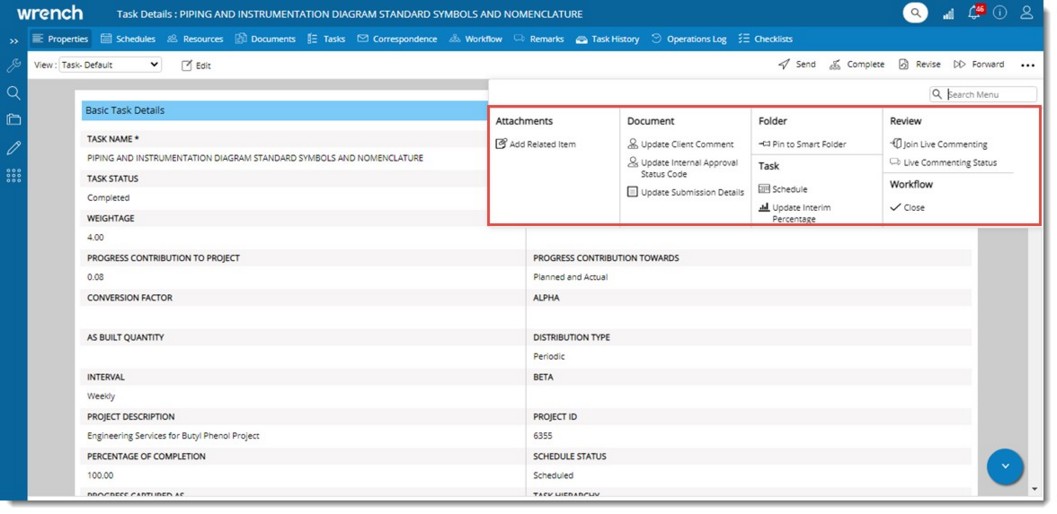
Figure: Operations from task details window
Different operations that can be carried from the task details window are explained in the following section.
Send
This option is used to send tasks to next stage after completing the work. You can send a task using a guided workflow or an unguided workflow. Since the procedure for sending documents and tasks are similar, for more information on sending tasks refer Sending Documents through a workflow.
Update
Different document properties can be updated from here. On clicking Update, a pop-menu containing different options are displayed. For more information on update operations refer to the section Working from Task smart folders>>Update
Schedule
Click this option to schedule a selected task, if it is not scheduled.
Revise
Using this option you can revise a completed task.
Pin to smart folder
Using this option you can add the task to Smart Folder. The pinned task will be available in the selected smart folder irrespective of the rules based on which the smart folder is created.
Unpin from smart folder
Select this option to remove a task from the smart folder.
Complete
Select this option to complete a task if it has gone through all workflow stages. User in the last stage of the workflow can complete the document using this option.
To complete a task
1.On the task properties window click Complete.
Complete window is displayed.
2.Enter your remarks or comments and click OK to continue.
View Specter
Click this option to view the specter files attached to the task.
Create Task
Click this option to create a task.
To create task
1.On the tab strip click Create Task.
2.Task Details window is displayed. For more information in creating a task refer Creating a task and scheduling the task.
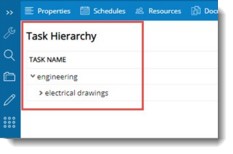
Task Hierarchy
This option will be displayed only if In the Administrative Settings, Tab Configuration window option Task Hierarchy is selected. Once the selection is made in Administrative Settings window, this option will be available under the More options, in the Task details window.
Click this option to view the hierarchical structure of task or WBS level.
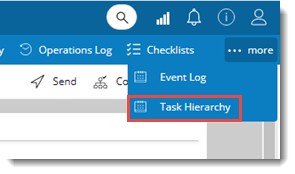
On clicking Task Hierarchy, hierarchy of the task or WBS Level is displayed.
The task hierarchy tab can be disabled from the Personal Settings of the user.
|