|
Different task related operations can be carried out from the Tasks Smart Folders. When a smart folder is selected the contents in the folder are displayed. Select a Task from the list and carry out an operation. Operation can be carried out from the Pinned items on the tab strip and options in the More menu.
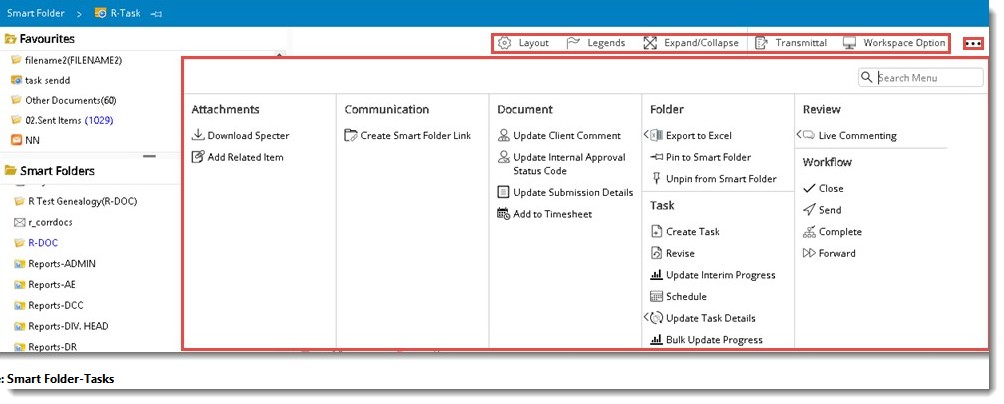
Figure: Smart Folder-Tasks
Different operations that can be carried out from the smart folders are explained in the following section.
Send
This option is used to send documents to next stage after completing the work. You can send a document using a guided workflow or an unguided workflow. For more information on sending documents refer Sending Documents through a workflow.
Update Client Comments
Client Comments: Usually the client marks their comment on the document and sends it back. This comment file is updated into Wrench along with approval status code details, received back date and other details.
To update client comments
1.Click Update Client Comment.
Update Client Comment window is displayed.
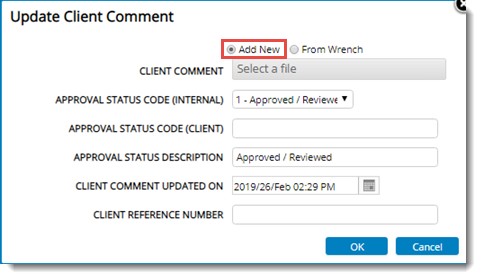
Figure: Updating Client Comment
Option to select comment file from WRENCH or from a location in your system is available. Select the respective radio button to select a comment file from your preferred location.
Select a File: Click this field to choose the comment file, if the radio button next to Add New is selected. File selection window is displayed. Select the client comment from the location where it is stored.
If the radio button next to From Wrench is selected, you can type in the client comment file number saved in WRENCH. As you type in a list of files with matching characters is displayed. Select the file from the list or enter the file name.
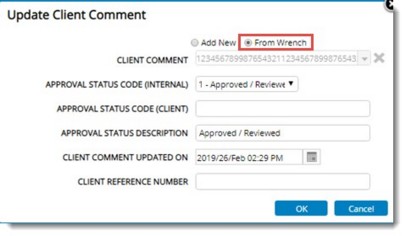
Figure: Selecting client comments stored in WRENCH
Approval Status Code (Internal): Select an internal approval code from the drop-down list where a pre-defined list of codes will be available.
Fields Approval Status Code (Client) and Approval Status Description is filled in based on the internal status code selected.
Client Comment Updated On: This is the date on which the document was received after client comments. By default current date is displayed as the receive back date. You can change the date by selecting the date from a date picker.
Client Reference Number: Enter the client reference number.
Revision Required: Define whether revision is required. Select Yes or No from a drop-down list.
2.Click OK to store changes.
Update Internal Approval Status Code
Approval Status Code: Approval status code defines the customer's response on a document that has been sent for customer approval. For Example: If a document is rejected by customer, the document will have to be revised as per suggestion and the overall percentage of progress (in creating the document) will drop considerably as it needs a lot of rework. The approval status codes are applied to each customer (in customer master). Every Client follows unique Approval Status Codes. To accommodate this Wrench saves the various Approval Codes with corresponding internal codes.
To update approval status code
1.Click Update>> Internal Approval Status.
Update Approval Status code window is displayed.
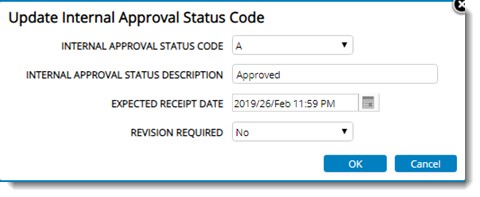
Figure: Updating approval codes
2.Select Approval Status Code from a drop-down list.
The description corresponding to the selected code is filled in.
3.Select the Expected Receipt Date from a date picker.
4.Define whether revision is required. Select Yes or No from a drop-down list.
5.Click OK to continue.
Update Submission Details
Submission Details: Documents are sent by vendors to the contractor through transmittals. For the purpose of identification these transmittals have a unique number. On receipt of these transmittals document controller updates the transmittal number and transmittal receipt date into Wrench. These details are used for future reference and communications.
To update submission details
1.Click Update Submission Details.
Update Submission Details window is displayed.
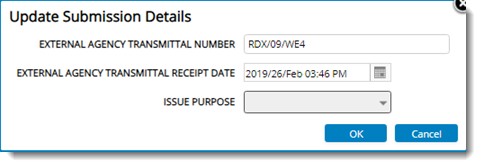
Figure: Updating submission details
2.Enter the transmittal number of the external agency. External agency could be the client, vendor etc.
3.Enter the date on which the transmittal was received.
4.Click OK to continue.
Update Interim Percentage
Interim Percentage: Update Interim Percentage is used to add an interim percentage between the earned percentage and anticipated progress percentage for the next milestone defined in the rule set window.
To update interim percentage
1.On the Task Properties, Detailed Schedule window, click the link Update Interim Percentage.
Update Interim Progress window is displayed.
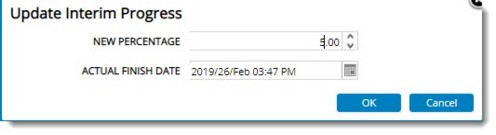
Figure: Updating Interim Progress
2.Enter the value for the following fields.
3.New Percentage: Enter the new progress percentage for the task. Only a value between the current earned and next milestone can be entered here.
4.Actual Finish Date: Select the actual finish date from the date picker.
5.Click OK to continue.
Schedule
Click this option to schedule a selected task, if it is not scheduled.
Complete
Select this option to complete a document if it has gone through all workflow stages. User in the last stage of the workflow can complete the document using this option.
To complete a document
1.On the tab strip click Complete.
Complete window is displayed.
2.Enter your remarks or comments and click OK to continue.
Forwarding for Information
With this option you can notify users about the status of a task. In addition a user who is not a part of the workflow would be able to access the object which is being sent through a workflow. Thus you can send an item to a user who is not in the workflow stage for additional comments or help.
To forward a task
1.On the task smart folder, More option menu click Forward.
Forward window is displayed.
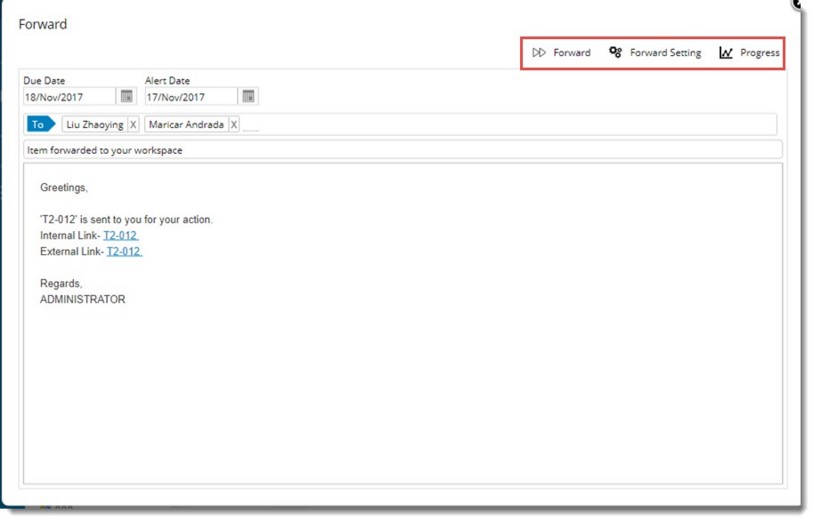
Figure: Forward window
2.Click To button to select the recipients for the document.
3.Select an End Date and Alert Date from a date picker. Due date is a date that specifies when the activity would be due. Alert date is a date on which the recipient has to be alerted.
4.Click Forward to forward the document or task to the selected users for information.
Forward Settings: You can specify who among the mentioned recipients can forward the task/document information to other users.
To define forward settings
1.On the Forward window click Forward Settings window.
Can Forward window is displayed.
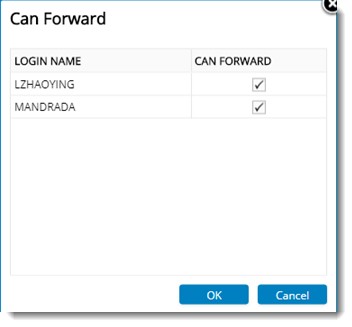
Figure: Can Forward window
2.Select the check box next to a user to specify that the user can forward the information to others.
3.Click OK to save selection.
Progress: You can define a rule for the progress of workflow here. The recipients of the object can act upon the work based on the rule defined here.
The following rules can be defined here.
To define a rule
1.Click Progress.
On the drop-down menu, the following options are available.
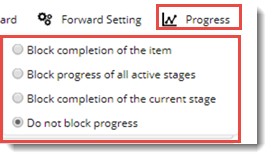
Block completion of the item: While forwarding an object or work if this option is selected, the workflow can be completed, if the recipient of the forwarded work or object has to close the work from the workspace.
Block progress of current stage: On selecting this option while forwarding, the recipient of the forwarded object has to be closed, for further processing of the object.
Block progress of all active stages: On selecting this option while forwarding, all the active stage users in the workflow are also blocked from doing any further processing of the object, until the recipient of the forwarded object sends the object back to you.
The selected users will be able to forward the received task or document to another user.
Revise
Using this option you can revise a completed document.
To revise a document
1.Select the document and in the menu click Revise.
Revise window is displayed.
2.On the Revise window enter values for different properties.
3.After entering the values click Revise.
Pin to smart folder
Using this option you can add the documents to Smart Folder. The pinned document will be available in the selected smart folder irrespective of the rules based on which the smart folder is created. It is also possible to unpin documents from the smart folder.
Unpin from smart folder
Select this option to remove a document from the smart folder.
View Specter
Click this option to view the specter files attached to the task.
Create Task
You can create a task from this menu.
To create a task
1.On the tab strip click Create Task.
2.Task Details window is displayed. For more information in creating a task refer Creating a task and scheduling the task.
Download Specter
Using this option specter files attached to a document can be downloaded. If there are multiple specter files attached to document they are listed in the Download Specter window. Select the files that you want to download from the window and click OK.
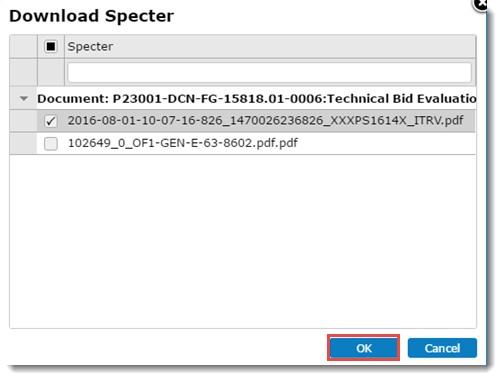
Figure: Downloading Specter files
Export to Excel
In most Project sites the vendors does not have rights to work on WBS. Hence the administrator will publish Task smart folders of the respective discipline to vendors so that, vendors can update details like Vendor document number etc. Instead of updating the details one by one the values can be updated uusing MS Excel template.
After selecting a task, on hovering the mouse above the option Export To Excel, a pop-up menu is displayed.
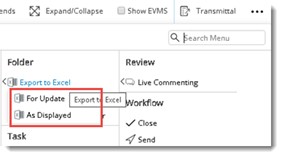
On the menu two options For Update and As Displayed are available.
On clicking As Displayed after selecting a single item or without selecting any items, the following alert message export is displayed.
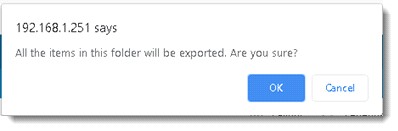
Click OK to export all the items in the smartfolder.
On clicking As Displayed after selecting multiple items, the selected items are exported to MS Excel.
In case you want to modify data in the exported file and import it back to update task details, click the option For Update.
Bulk Export Wizard is displayed.
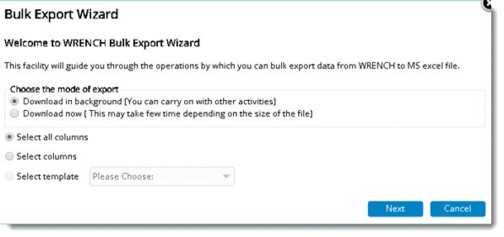
The following options are available.
Select all columns: If the radio button next to this option is selected, pre-defined set of columns are exported to excel.
Select Columns: If the radio button next to this option is selected, column selection wizard is displayed. User can select the columns that are to be exported.
Select templates: if the radio button next to this option is selected, system will display the export templates created in the WBS in the drop-down list. User can select one template to export data.
Update Task Details
On clicking Update Task Details from Task Smart Folder, a pop-up menu is displayed.
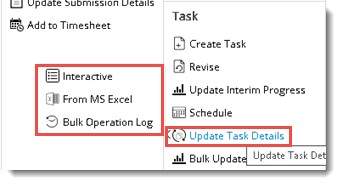
The following options are available in the menu.
Interactive: On clicking the option ‘Interactive’, bulk update task details window is displayed. In the window, task details, schedule details, workflow and checklists can be updated. After updating the values click OK to save changs.
From MS Excel: On clicking this option, WRENCH Bulk Update Wizard window is displayed. Here the updated excel file can be selected and the data in the excel sheet can be exported.
Bulk Operations Log: Once the Update process is completed, the user can view the status of the update process in the ‘Bulk Operation Log window.
Bulk Update Progress
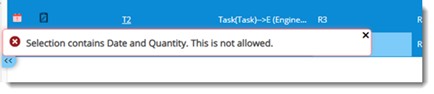
In a typical construction project, there will be multiple activities happening at the same time. It would be very difficult for the users to open each task to update progress. To handle this, facility to update progress in bulk is available. Progress can be updated for multiple leave level tasks and multiple parent level task combination or multiple parent level task. Progress can be updated in bulk for quantity based tasks and date based tasks.
Progress can be updated in bulk for quantity based tasks and date based tasks. If Bulk Update Progress option is selected for quantity-based tasks window for updating quantity-based tasks is displayed. If the selected tasks are date-based tasks, window for updating date-based tasks is displayed. If the selection contains both quantity and date type tasks the following warning message is displayed.
For more information on bulk updating progress see Managing WBS>>WBS Level/Task Operations>>Bulk Update Progress.
Creating Smart Folder links
Smart Folder links can be created from document smart folders and task smart folders.This will help users to access documents and tasks in WRENCH smart folders from external locations.
To create smart folder link
1.Select a smart folder.
2.On the list of options click Create Smart Folder Link.
External and Internal links are generated as shown in the following figure.
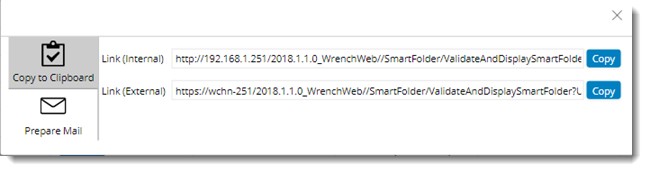
Figure: Creating Smart Folder Links
3.Click Copy to copy the link to clipboard.
Generated links can be send through mail.
4.Click Prepare Mail.
Mail window is displayed. External and Internal links are displayed in the window.

5.Enter the recipients and click Send Mail.
|