|
Live commenting sessions can be managed using Wrench Viewer and Bluebeam. Since there are organizations that use Bluebeam application for online commenting, online commenting procedure using Bluebeam and Wrenchviewer is explained. The IDC process of commenting is done after uploading the physical file into Bluebeam cloud and opening a session for commenting by inviting the users.
Live commenting using Bluebeam
An integration gateway is created from WRENCH. After creating the gateway, the following activities can be carried out.
•Creating a Live Commenting Session.
•Joining a Live Commenting Session.
•Closing a Live Commenting Session.
•Re-sending invitations
•Viewing an active session
•Modifying details of active session
Creating a Live Commenting Session
A Live Commenting session can be created from Document Smart Folders, Task Smart Folders and Transmittals.
To create a session from document/task smart folder
1.Open the document/task smart folder.
2.Select single or multiple documents or tasks.
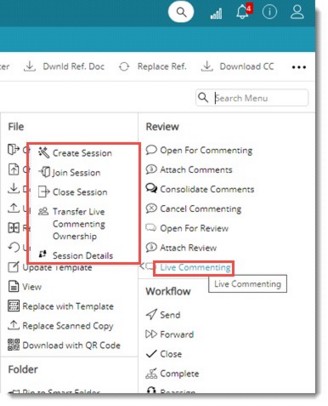
3.On the list of operations click Live Commenting.
4.On the pop-up menu click Create Session.
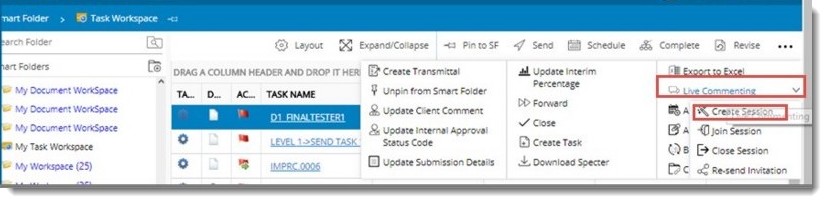
Figure: Opening Live Commenting Session
Create Bluebeam Session window is displayed. On the window. Session name will be generated automatically based on a common logic, that contains Login Name, Discipline/Origin Name, Server date and time. The session name can be edited by a user.
By default, all specter files are selected for creating the session and all the current stage users are selected for inviting them to the session. Apart from the current stage users, option to add external or internal (WRENCH) users is also available. External Users can be added by entering the emaild and clicking the Add button.
NOTE: The option for adding external users is available only if the setting is enabled while creating integration gateway from Administrative Settings>>Plug In Configuration.
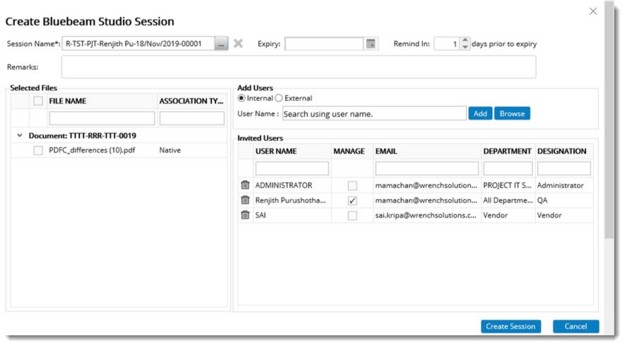
Figure: Creating a Live Commenting Session
1.Enter an Expiry Date.
The expiry date is passed to Bluebeam session properties, and based on this date the Bluebeam session expires automatically.
In the Add Users section, two option Internal and External will be available. The option can be selected by clicking the radio button next to it. By default, radio button next to Internal will be selected.
To add internal users
1.Select the radio button next to the option Internal.
2.Type in the required user name in the text box User Name. Matching names will be listed.
3.Select the user name from the list.
4.Press enter key or click Add to add the user to the invitee list.
To add external users
1.Select the radio button next to the option External.
NOTE: This button will be enabled only when the option ‘Allow addition of external users’ is checked in the Plug-in Configuration of Administrative settings.
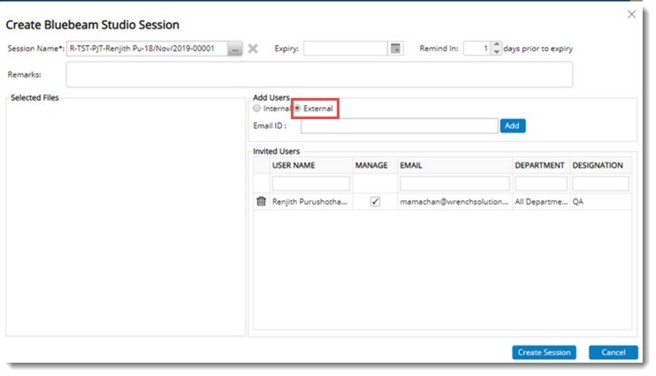
Figure: Adding External Resources
2.Type in the complete email address of the person in the text box.
3.Press the enter key or click ‘Add’ to add the person to the list. If a valid email address is not available in the text box when pressing enter, it will not be added.
To grant manage permission to users
A column, Manage is available in the User List section.
1.Click the checkbox under the column Manage, corresponding to the user who is to be assigned manage rights.
To remove users
1.Select the required row from the list of users.
2.Click on the ‘Delete’ icon or press DEL key to remove the selected row. An alert message is displayed.
3.Click OK to continue the operation and click Cancel to abort the operation.
4.After entering the details click Create Session.
All the specter files are uploaded to Bluebeam cloud and selected users are invited through a default notification mail from WRENCH. For the external users, the URL to join the session will be automatically inserted in the invitation email. For internal users, this will be inserted based on the control setting ‘‘Allow sending session invitation link through default mail’ (See configuration for details).
After creating the session and sending the emails, a message “Session created successfully” is displayed.
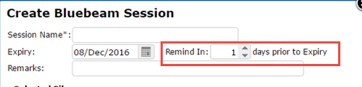
In the Create Bluebeam Session an option to set reminder prior to expiry date is available. Here number of days can be set. A reminder is send to the session users based on the set days.
To create a session from the transmittal window
1.On the document transmittal window select the documents.
2.On the tool bar click Live Commenting.

Figure: Creating Live Commenting session from transmittal window
Create Bluebeam Session window is displayed.
Transmittal documents PDF (Specter) are picked up for creating the session. Transmittal ‘To’ and ‘Cc’, ‘Distribution’ users are picked up for creating the session in Bluebeam.
When a user clicks the option Create Session for the first time from Smart Folder or Transmittal for the first time, Bluebeam Gateway window is displayed.
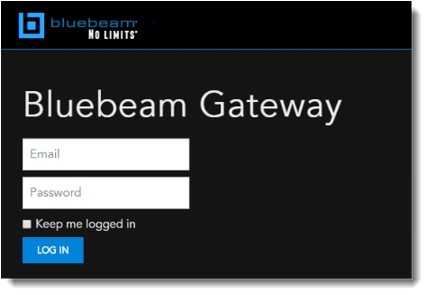
1.Enter the Email Id and Password of the user and Click LOG IN.
Following window is displayed.
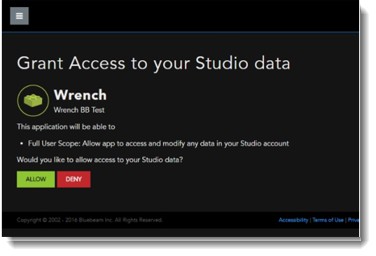
2.Click Allow to complete the configuration.
This is a onetime activity for a user to configure the BDN user and password, to show the configured id while creating session. This will expire in 80 days and the activity has to be done once again after 80 days by following the preceding steps.
Joining a Live Commenting Session
A user can join a Live Commenting session from Smart Folders, Task and Document details window and Transmittal window.
To join a live commenting session
1.On the options menu click Live Commenting>>Join Session.
Bluebeam Sessions window is displayed. On the window list of Bluebeam sessions to which current user is invited is displayed.
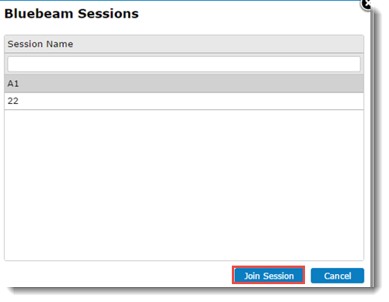
Figure: Bluebeam Sessions window
2.Select a session from the list and click Join Session.
Documents under that session are opened in Bluebeam for commenting.
NOTE: If there is only one open session for the user, instead of displaying an intermediate window to show the open sessions, directly Bluebeam application would be launched with the selected document ready for commenting.
Closing a Live Commenting Session
After completing the commenting, Live Commenting session is closed.
To close a live commenting session
1.Click Live Commenting>>Close Session. Close Bluebeam Sessions window is displayed.
The system will raise a request to Bluebeam for closing the selected session, generating the Consolidated file and Comment Summary File.
Once the request to close session is issued successfully, several activities are performed by Bluebeam as part of session closure such as creation of a consolidated comment file and a comment summary file.
Status of the snapshot will be checked in an interval of 3 seconds.
Once the status is Complete for all files, Attach button is enabled and user is allowed to close the session.
2.Select a association type from the drop-down list.
3.Click the ‘Attach’ button to attach the consolidated files to the respective document. When all files are successfully completed, they are attached to the respective documents.
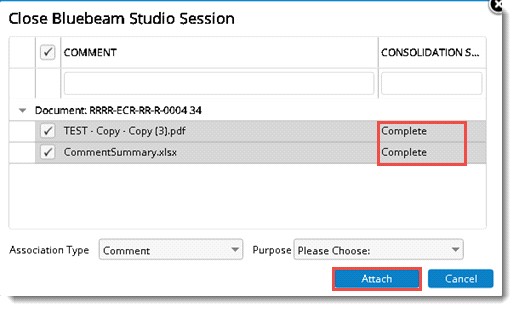
Figure: Attaching comment files
In case of any failure, Attach button will not be enabled and user will not be able to attach the consolidated file.
1.Select the association type from a drop-down list.
2.After selecting the association type, click ‘Attach’ button.
Files are attached to the main document in WRENCH under the specified attachment type.
After attaching the files, Live Commenting session is closed automatically.
NOTE: In the case of IDC (Approve by All) using blue beam session, only the final user will be able to view Close Session option. When the administrator or originator close a blue beam session, if all the current stage users have not closed the document from their stage, a pop up message indicating the same is displayed.
Re-sending invitations
In case the email notification fails, there is an option to re-send the invitation mail from smart folders.
To re-send invitation
1.In the smart folder, under Live Commenting options click Live Commenting>>Re-Send Invitation.
If there is no open session for the selected document, a message “There are no active sessions for the selected documents, please try again” is displayed.
Once the invitation mail is send, “Mail Sent Successfully” message is displayed.
Viewing an active blue beam session
Active blue beam sessions can be viewed from smart folders and document details window.
On the smart folder grid a column Commenting Session Status is available.
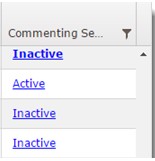
On clicking the hyperlink Active, Bluebeam Sessions window is displayed.
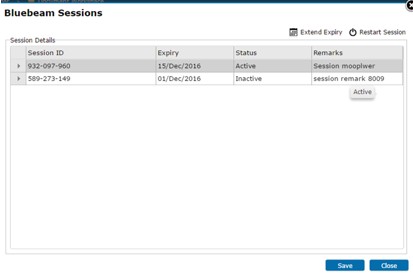
Figure: Active Bluebeam session
Here details related to active sessions are displayed.
To view an active session from document details window
1.On the list of options click Live Commenting Status.
2.On clicking this option Bluebeam Sessions window is displayed.

Figure: Bluebeam Sessions window
In the window sessions that are currently live are displayed. Following options are available in the window.
Extend Expiry: After selecting a session on clicking this option date picker is displayed. You can select a future date and extend the expiry date of the session.
Restart Session: Click this option to restart an inactive session.
NOTE: When user tries to extend or restart the Blue Beam session, if the creator of the session is disabled in WRENCH, an alert message indicating the creator of the session is disabled in WRENCH is displayed. User can proceed after changing the session owner in blue beam and WRENCH.
Modifying details of active sessions
Session invitees with ‘MANAGE’ permission can add and remove invitees in the active commenting session.
To modify details of active commenting sessions
1.Select one document from the smart folder and select the ‘Session Details’ option from the live commenting menu Or, click on the ‘Session Details’ menu without selecting any documents.
When a single document is selected and the option Session Details is clicked, its active session name and session details is displayed in the window.
When no documents are selected, list of active sessions where the current user has ‘Manage’ permission is displayed in the ‘combo box.
If all selected documents have active commenting sessions, window same as ‘Create Bluebeam Studio Session’ will be displayed. In the window, instead of the button Create Session, Save button will be available.
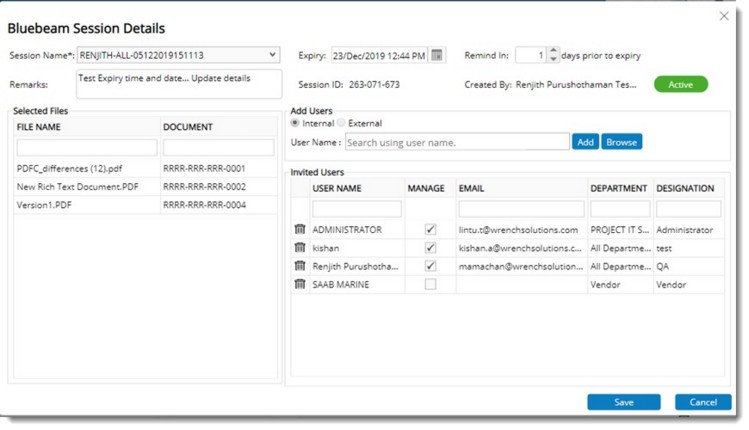
Figure: Bluebeam Session Details window
The list of session invitee's of the selected document will be displayed in the list on the right to the documents list. User may add or remove invitee's as required (procedure is specified in the preceding sections). Details like expiry date, remarks and the reminder period can be edited as required.
2.Click ‘Save’ to store the altered session information. Email notifications will be sent to the new invitees. When session detail such as the ‘Expiry date’ is changed, email notifications will be sent to all invitee's.
NOTE: In the Commenting Session Status Column, if the displayed status is Active, on clicking the displayed status, Bluebeam Session Details window is displayed.
Live Commenting using Wrench PDF Viewer
Live commenting sessions can be created from the following areas,
•Document Smart folder
•Task Smart Folder
•Transmittal Window
•Document Search
•Task Search
•Document Details
•Task Details
In the document smart folder and task smart folder the menu items shown in the following figure are available in Live Commenting menu.
To create a live commenting session
1.Open the document or task smart folder.
2.Select the documents or tasks for live commenting session and in the menu click Create Session.
Live Commenting Session Details window is displayed.
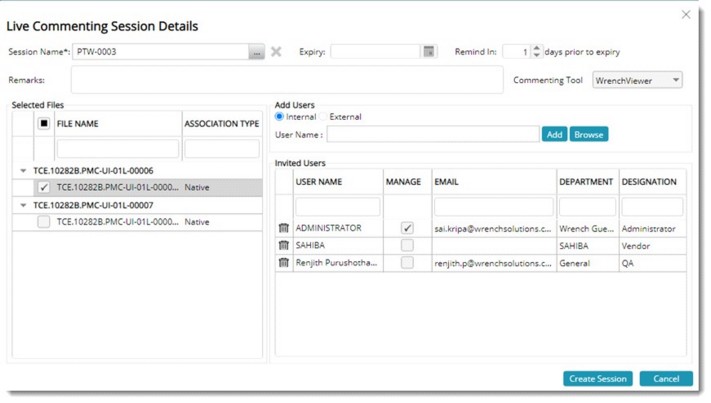
Figure: Live Commenting Session Details window
Session name will be generated automatically based on a common logic, that contains Login Name, Discipline/Origin Name, Server date and time. The session name can be edited by a user.
By default, all specter files are selected for creating the session and all the current stage users are selected for inviting them to the session. Apart from the current stage users, option to add external or internal (WRENCH) users is also available. External Users can be added by entering the Email Id and clicking the Add button.
1.Enter an Expiry Date and Time for the session.
An option to set reminder prior to expiry date is available. Here number of days can be set. A reminder is send to the session users based on the set days.
2.After entering the values click Create Session.
All the specter files are uploaded to Bluebeam cloud and selected users are invited through a default notification mail from WRENCH. For the external users, the URL to join the session will be automatically inserted in the invitation email. For internal users, this will be inserted based on the control setting ‘‘Allow sending session invitation link through default mail’ (See configuration for details).
After creating the session and sending the emails, a message “Session created successfully” is displayed.
Joining Live Commenting Session
A user can join a Live Commenting session from Smart Folders, Task and Document details window, Transmittal window and global menu.
To join a live commenting session
1.On the options menu click Live Commenting>>Join Session.
The Live Commenting window is opened and the document for commenting is displayed in the window. The file name is displayed below the heading FILES.
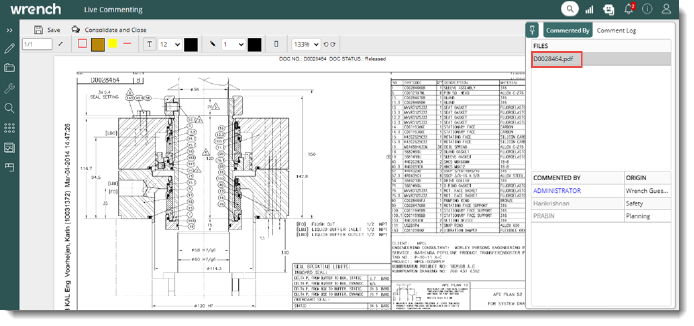
Figure: Live Commenting window
On the top left-hand side of the window, two tabs are displayed. The tab Commented By is selected by default. A list of users who have joined the session is displayed in the column COMMENTED BY and their origin is displayed in the column ORIGIN. The name of the user who is currently commenting on the document is displayed in blue color in the column COMMENTED BY.
If the tab Comment Log is clicked, a log of comments marked by different users is displayed.
.png)
Figure: Comment Log window
Comments can be marked on the document and the comments are saved. This is explained in the following section.
Adding comments to a drawing
Comments are added to the drawing using different commenting tools. On the document comments marked by other users are displayed. These comments cannot be edited directly.
To add a comment
1.Select the required commenting tool and insert the comment on the document. If the text commenting tool is selected, a box to enter the comment is displayed on the drawing as shown in the following figure.
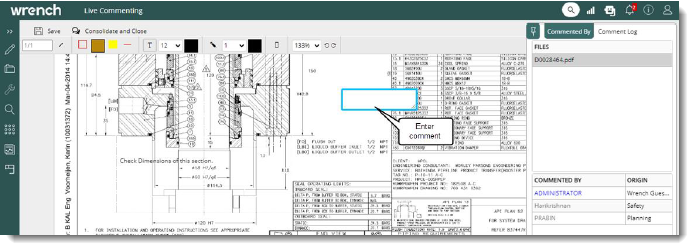
Figure: Inserting text comment
2.Enter the comment in the box.
3.Click Save to save the inserted comment.
A message Comments saved successfully is displayed. The saved comment is displayed on the document.
Importing comments for editing
Comments inserted by other users in the session can be imported and edited.
To import comments
1.Select single or multiple users from the Commented By column.
2.Place the mouse pointer over the option Consolidate and Close. A pop-up menu is displayed.
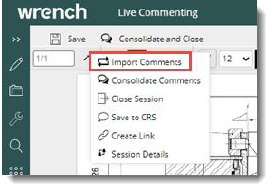
Figure: Importing comments for editing
3.On the menu click Import Comments.
The comments of the selected users are imported and displayed in edit mode.
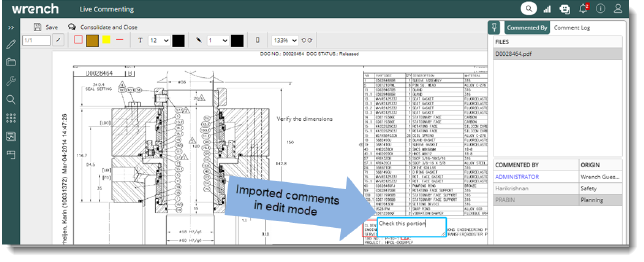
Figure: Editing imported comments
4.Edit the imported comment and save the comment.
Consolidating Comments
Once all users complete the review and mark their review comments, the session creator joins the session and consolidates the comments.
To consolidate comments
1.On the Consolidate and Close menu click the option Consolidate Comments.

The consolidated Files window is displayed. The file where all the comments are consolidated is displayed on the window.
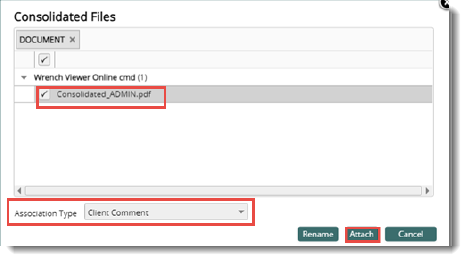
Figure: Consolidated Files window
2.Select the checkbox next to the consolidated file.
3.Select the Association Type from a drop-down list.
4.Click Attach to attach the consolidated file. On clicking Attach, the document addition window is displayed.
5.Enter values for different properties in the window and click Add to add the consolidated file.
Importing comments to CRS
Selected comments can be imported to the CRS (Comment Resolution Sheet) of the current document.
To import comments to CRS
1.On the Consolidate and Close menu click the option Save to CRS.
The import Comments window is displayed.
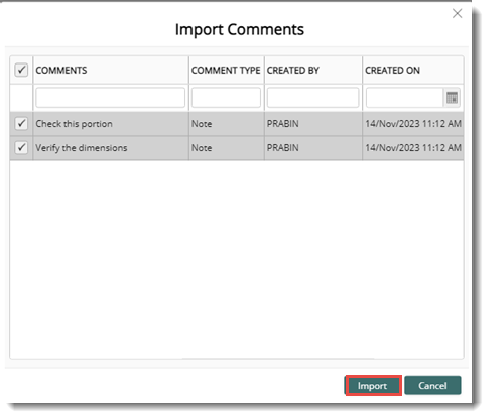
Figure: Import Comments window
2.Select the comments that are to be imported to CRS.
3.Click Import to save the comments to CRS.
A message Comments Imported Successfully is displayed. The selected comments are imported to CRS.
Creating a link to join a commenting session
When the session participants miss the invitation to join a session or fail to join using the link, a link can be created for the live commenting session and forwarded to the participant, so that the participant can join the session by opening the link.
To create a link
1.On the Consolidate and Close menu click the option Create Link.
The Create Link window is displayed.
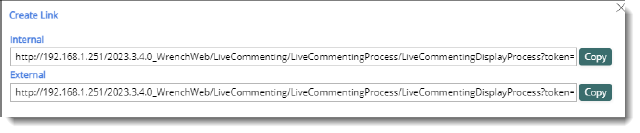
Figure: Create a Link window
2.On the window internal and external links are available.
3.Click Copy to copy the required link.
The copied link can be forwarded the link to the session participant.
Viewing session details
Details of the live commenting session can be viewed.
To view the details of the live commenting session
1.On the Consolidate and Close menu click the option Session Details.
The live Commenting Session Details window is displayed.
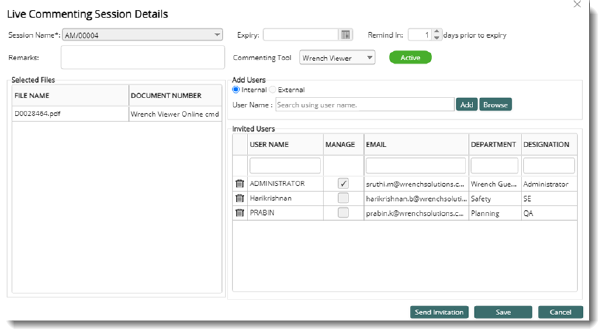
Figure: Live Commenting Session Details window
Here details of the commenting session are displayed.
Closing the session
After the comments are consolidated, the commenting session can be closed.
To close the commenting session
1.Consolidate all the review comments.
2.On the Consolidate and Close menu click the option Close Session.
If any review comments are not consolidated a warning message Consolidate all review comments to continue is displayed. In such cases consolidate the review comments and close the session again.
The closing of a Live Commenting session is controlled by the setting Allow Live Commenting session closure without completing the workflow stage which is enabled/disabled from the Administrative Settings window. By default, this setting is enabled. The working of this setting is explained below.
If the sending rule is configured as Approve by All for the stage, and if the setting is enabled, the creator or users with manage permission is permitted to close the session based on the workflow stage status of the resources.
When all the session invitees except session creator or user with manage permission attending the session has still not closed the document from their workspace, and creator or user with manage permission try to close the session, a message Do you wish to close the session? Yes/No is displayed.
If the user clicks ‘Yes’, the session is closed with comment file attached as existing. If the user clicks ‘No’, the operation is cancelled.
When the creator or user with manage permission try to close the session with more than one invitee pending to complete their session, and if the setting is enabled, a message Commenting session is pending with more than one user. Do you wish to close the session? is displayed.
When the creator or user with manage permission try to close the session with any invitee pending to complete the session, and if the setting is disabled, an alert message is displayed and the session closing operation is cancelled.
Live commenting using Rasterex Viewer
Live commenting can be carried out using Rasterex Viewer also. The procedure for carrying out a live commenting session using Rasterex viewer is explained in the following session. Since details of managing session is explained eariler, only the procedure for managing commenting using Rasterex viewer is explained here.
Joining the session from the global menu
A live commenting session can be joined from the global menu also.
To join a live commenting session from global menu
1.On the Global menu click Live Commenting.
Live Commenting Sessions window is displayed.
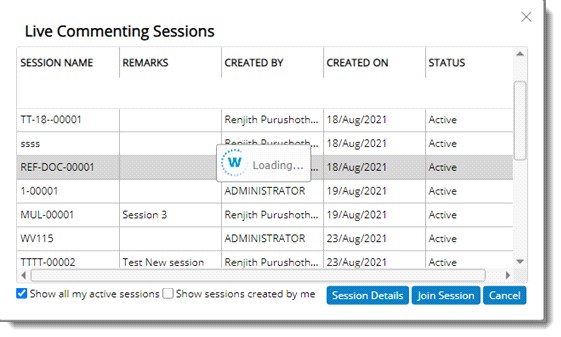
Figure: Live Commenting Sessions window
In the window different sessions are displayed. Details like Session Name, Created By, Created On and Status of the session are displayed here.
2.Click Session Details to view the details about a session.
3.Click Join session to join the selected active session.
4.Click Cancel to close the window.
Adding comments to a drawing
Comments are added to the drawing using different commenting tools
To add comments
1.Click the tab Annotate. Commenting tool bar is displayed. Different commenting tools are available here.

Figure: Commenting tools
2.Add a comment using the required tool. For Example: In the following illustration a text comment is inserted using the tool Text.
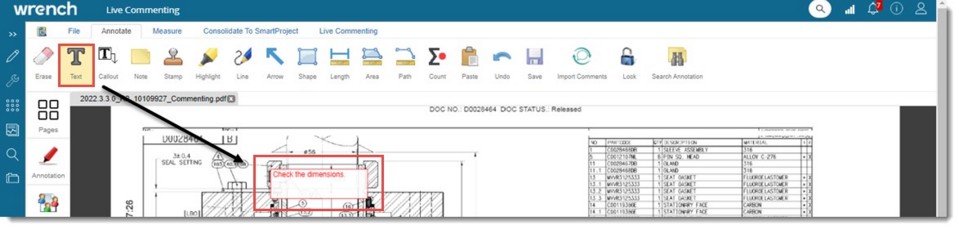
Figure: Adding a comment
NOTE: In addition to adding a text comment, Notes, Callouts, Highlights and Stamps can be added as comment.
In the right pane a box to change the properties of the comment and view details of the comment is available. Properties tab is selected by default. Here you can manage the properties of the comment.
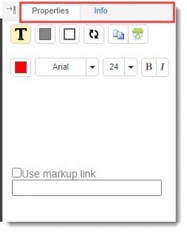
Figure: Properties box
Under the tab Info, details of the comments are displayed.
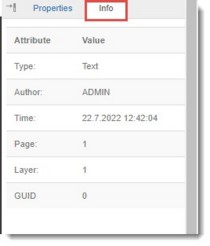
Figure: Info box
3.After adding comments click Save to save the added comments. A message Comments added successfully is displayed.
Consolidating comments to SmartProject
Once different reviewers add their comments to the drawing, the comments are consolidated and added to SmartProject. Consolidated file can be added as Comment, Markup, Specter, Client Comment and Related File.
To consolidate comments
1.Open the drawing file.
File containing comments added by different reviewers is displayed.
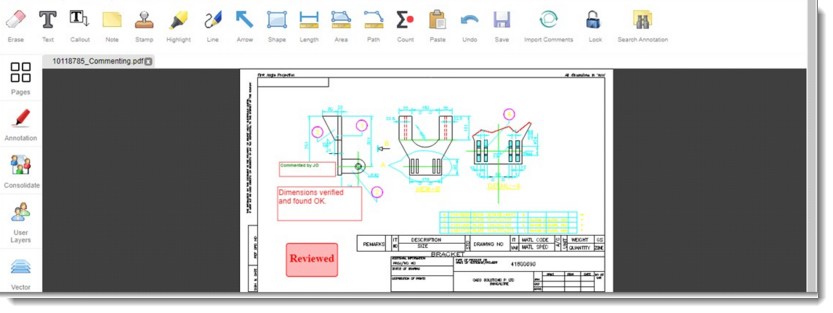
Figure: Drawing file for consolidation
2.On the left pane click User Layers, to view the details of different reviewers. Username of Reviewers is displayed. By default, the checkbox next to Username is selected. Comments added by the users is displayed on the drawing. If the checkbox next to a user is cleared, comments added by that user is not displayed on the drawing.
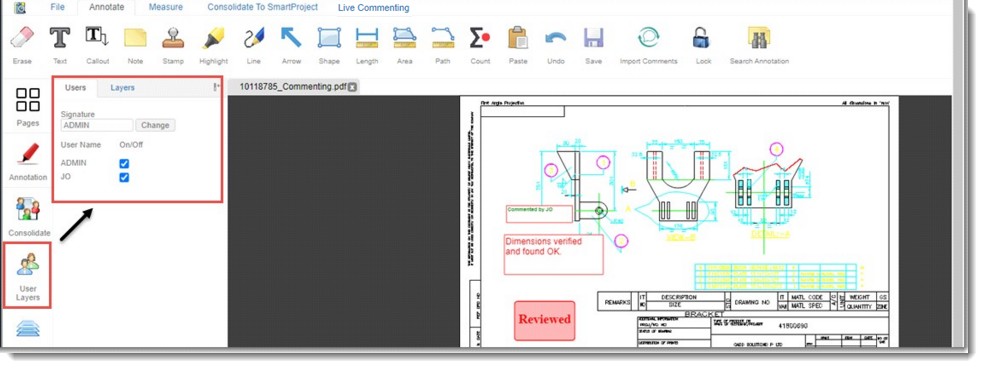
Figure: Viewing reviewer details
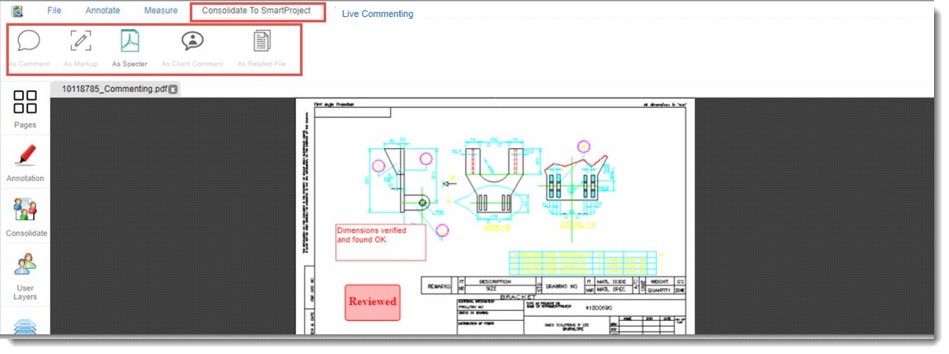
3.On the window click the tab Consolidate to SmartProject.
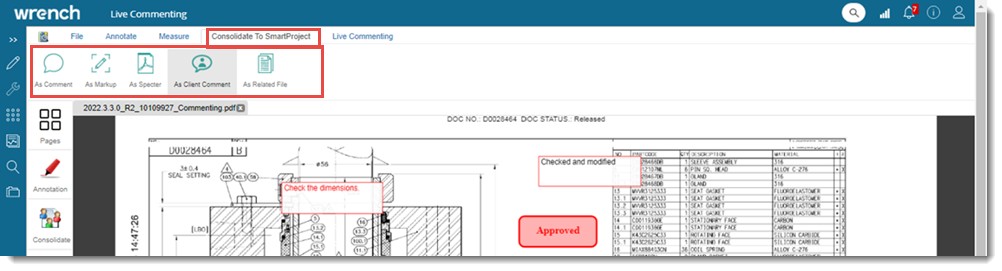
Figure: Consolidating to SmartProject
Different consolidate file options are displayed.
4.Click a file type from the list.
A message Consolidated file attached successfully is displayed.
5.Click OK to continue.
The consolidated file saved as Specter is displayed in the document details window.
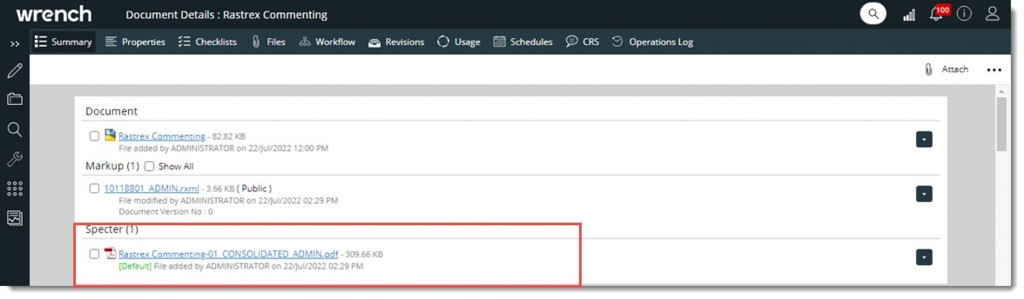
Figure: Consolidated file
If consolidated file is already attached to a drawing, on selecting the Consolidated to SmartProject option, only the file type attached earlier is enabled in the file type tool bar.
Managing Live Commenting
When a user joins a live commenting session, the session is opened in an external Rasterex viewer. In the Viewer toolbar, a tab Live Commenting is displayed.
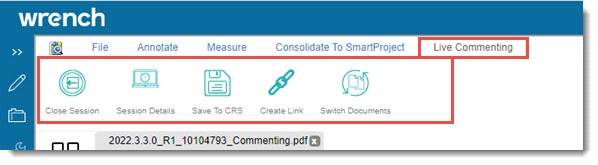
On clicking the tab Live Commenting the following options are displayed.
Close Session
Session Details
Save to CRS
Create Link
Switch Documents
Closing a Session
Participants with manage permission can close the session.
To close a session
1.On the toolbar click Close Session.
Close Session window is displayed.
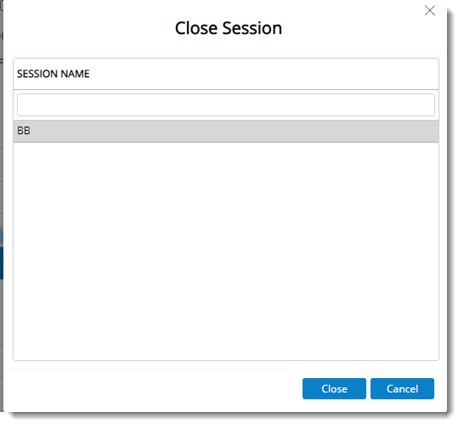
Figure: Close Session window
On the window Session Name is displayed.
2.Select the session for closing and click Close.
Session Closed Successfully message is displayed.
Viewing Session Details
Details of a session can be viewed and user with Manage rights can make modification to the session details.
To view session details
1.On the toolbar click Session Details.
Live Commenting Session Details window is displayed.
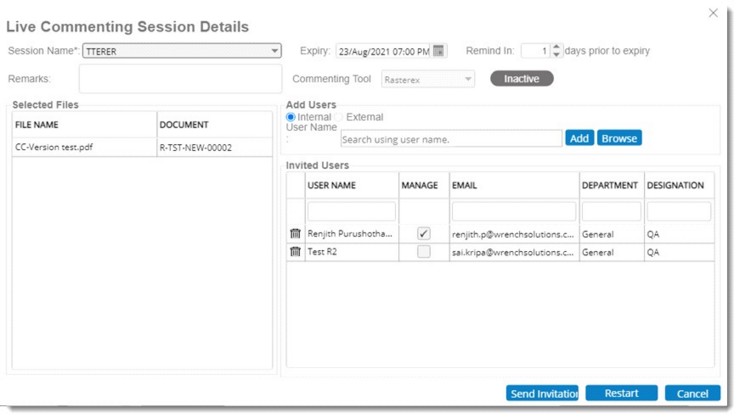
Figure: Live Commenting Session Details window
Here details of the live commenting session are displayed. Since the session is inactive, status is displayed as Inactive. User with manage permission in the session can add new users, send invitation to users, and restart the session.
Saving to CRS
The comments can be exported to CRS.
To save to CRS
1.On the toolbar click Save to CRS.
Import Comments window is displayed.
2.Here Comments and details like Comment Type, Created On and Created By are displayed.
3.Select the required comments and click Import. Comments imported successfully message is displayed.
Comments available in the current view (not for all documents) will be exported to the CRS of the current version of the document.
Creating Link
When the session participants missed the invitation or failed to join the link, a link can be created for the live commenting session and forwarded to the participant, so that the participant can join the session by opening the link.
To create link
1.On the toolbar click Create Link.
Create Link window is displayed.
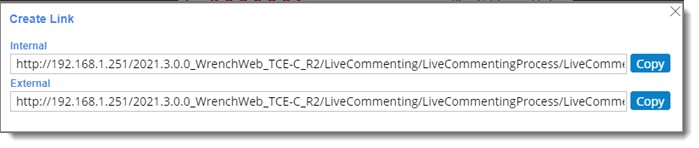
On the window Internal and External links are available.
2.Copy the required link and forward it to the session participant.
Switching Documents
In a live commenting session, it is possible to switch between documents available in the session. The option to switch documents is displayed in the live commenting window, only if multiple documents are available in the current session.
To switch documents
1.On the toolbar click Switch Documents.
A file selection window is displayed. Documents in the session are listed inside.
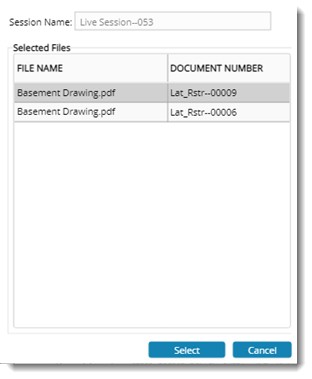
Figure: File Selection window
2. On the window choose the required file and click Select to switch the file. The selected file is displayed in the live commenting window.
|