Identification, Analysis, Mitigation and Monitoring of risks are key to success of projects. Risk management practices help identify potential risks and assess them so that they can be understood clearly and mitigated effectively. Use the following navigation table to access different topics.
Opening Risk module
Risk module can be opened from global menu.
 To open risk module
- In the Module menu click Risk Management or in the Project Properties window click Show RBS.
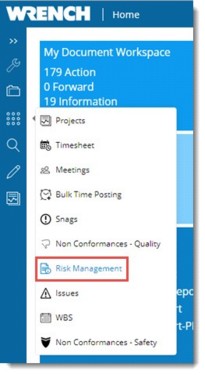
Figure: Opening Risk Management window
RBS window is displayed.

Figure: RBS window
In the RBS window different information on the risk will be available. Information like Project ID, Description, Start Date, Finish Date are displayed in the window. A different project can be selected by clicking the browse button. On selecting a different Project, project details displayed also changes. Following details are displayed in the window.
RBS Details: RBS details displays the risk mitigation status. The following information will be available here.
- RBS Status: Status of the RBS is displayed here.
- Total Risks: Sum of all risk items in the project is displayed here.
- Mitigated: Sum of all mitigated (closed) risk items in the project is displayed here.
- Open: Sum of all risk items yet to be mitigated (open) in the project is displayed here.
Before risks are handled, a set of configurations are to be made. Risk categories, causes, sources, consequences and probability can be configured, and Security rights can be assigned to users. This can be done from the Risk Management Administration window.
To open risk management administration window
- In the RBS window, click the configuration icon.
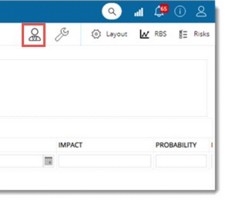
Figure: Opening Risk Management window
Risk Management Administration window is displayed. Here different risk related configurations can be carried out. Different configurations are explained in the succeeding sections.
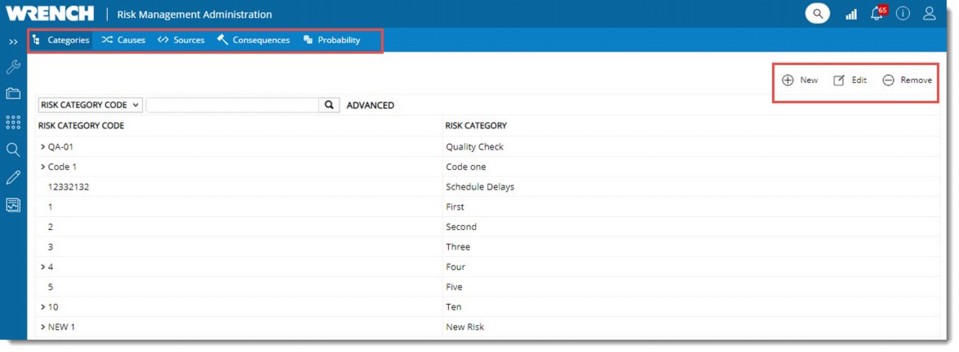
Figure: Risk Management Administration window
Creating and managing risk category
When risks are identified, it helps in assessment if they are categorized based on certain common factors such as Financial Risks, Legal Risks, Safety Risks etc. This facility help defines the list of such risk categories. Risk categories are hierarchical to cover a broad spectrum of risks, to finer accuracy.
Categories are created from the Categories tab. This tab is selected by default.
 To create a risk category
- In the Categories window click New.
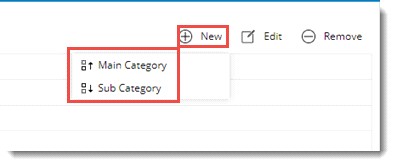
Figure: Creating a risk category
A pop-up menu is displayed. Options to create Main Category and Sub Category will be available in the window. “Main Category” helps to create a new risk category at the first level of the hierarchy and the Sub Category can be used to create a sub category under a selected category.
- In the menu click Main Category, Risk Category window is displayed.
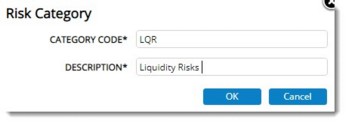
Figure: Risk Category window
- Enter a Category Code and Description.
- Click OK to save changes. Risk Category Saved message is displayed.
You can edit the created risk category and remove a risk category provided it is not used in any Projects.
Creating and managing Cause Category
Each potential risk happens due to specific causes. Identifying the causes is important in preventing the risk. It is also important to standardize the causes so that standard remedial actions can be created for known families of causes. This facility helps define the list of such risk causes.
 To create a cause category
- Click the tab Causes.
- In the tool bar click New.
Risk Cause window is displayed.
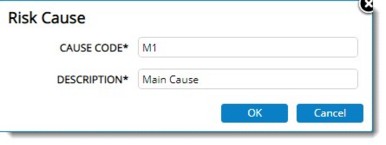
Figure: Risk Cause window
- Enter a Cause Code and Description.
- Click OK to save changes. Risk Cause Saved message is displayed.
New Risk Cause is displayed in the grid. You can edit the created risk cause and remove a risk cause provided it is not used in any Projects.
Creating and Managing Risk Sources
Identifying the possible sources of risks is an important part of Risk Analysis. Risk sources are fundamental drivers that cause risks in a project or organization. There are many sources of risks, both internal and external. Risk sources identify where risks can originate. Some examples are: Incident, Audit, PHA (Process Hazard Analysis) etc.
 To create a source category
- In the window click the tab Sources.
- In the tool bar click New.
Risk Source window is displayed.
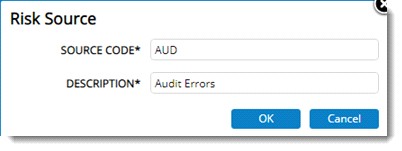
Figure: Risk Source window
- In the window enter a Source Code and Description. Click OK to continue.
Risk source saved message is displayed.
New Risk Source is displayed in the grid. You can edit the created risk source and remove a risk source provided it is not used in any Projects.
Creating and Managing Risk Consequences
Each risk when occurred will have consequences on environment, health and safety, Public Relations etc. Computing the risk score depends heavily on the risk’s consequence. A risk may have multiple consequences.
 To create a consequence category
- In the window click the tab Consequences.
- In the tool bar click New.
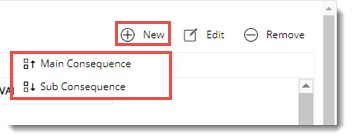
Figure: Opening risk consequence window
In the pop-up menu two items Main Consequence and Sub Consequence will be available. Main Consequence can be used to create a new risk consequence at the first level of the hierarchy and Sub Consequence can be used to create a sub consequence under a selected consequence.
- On clicking Main Consequence, Risk Consequence window is displayed.
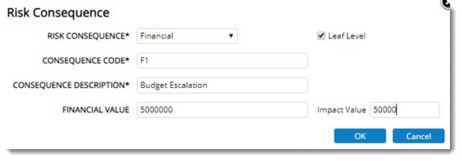
Figure: Risk Consequence window
- In the window enter values for different properties explained in the following table.
|
#
|
Property
|
Description
|
|
1
|
Consequence Type
|
Select a type from the drop-down list. Types available are Financial and Non-Financial. The field Financial Value will be enabled only if type selected is Financial.
|
|
2
|
Consequence Code
|
Enter a unique code.
|
|
3
|
Consequence Description
|
Enter a description.
|
|
4
|
Leaf Level
|
Select the checkbox next to this item to identify items at the leaf level (under which sub items cannot be added). The financial value and impact value are applicable only to leaf level items. For others, this field will be disabled.
|
|
5
|
Financial Value
|
Enter the financial impact in terms of amount. This is optional.
|
|
6
|
Impact Value
|
Enter the net impact value of the risk due to this consequence.
|
- Click OK to save changes. Consequence saved message is displayed.
You can edit the created main consequence and remove a main Consequence provided it is not used in any Projects.
In the pop-up menu if the option Sub Consequence is clicked, the following window is displayed.
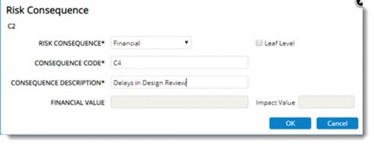
Figure: Risk Consequence window (Sub-Consequence)
This option can be selected only after selecting a consequence. Sub Consequence cannot be added under a leaf level.
After entering the values click OK. New Sub Consequence is displayed in the grid. You can edit the created Sub Consequence and remove a Sub Consequence provided it is not used in any Projects.
Managing Risk Probability
Risk Probability is the probability of a risk occurring. This is an important risk parameter in computing risk score.
 To add a risk probability
- In the window click Probability.
- In the tool bar click New.
Risk Probability window is displayed.
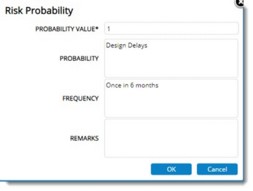
Figure: Risk Probability window
- Enter values for the fields mentioned in the following table.
|
#
|
Property
|
Description
|
|
1
|
Probability Value
|
Enter a value. The risk score is a product of this and the Impact value as defined in the consequence categories.
|
|
2
|
Probability
|
Enter a description of the probability as specified by user. For Example: ‘Yearly’, ‘In a decade’ etc.
|
|
3
|
Frequency
|
Enter the frequency of occurrence of a risk within the specified probability. For Example: ‘2 times a year’, ‘Once in a decade’ etc.
|
|
4
|
Remarks
|
Enter additional details if there are any.
|
- After entering the values click OK. Probability value saved message is displayed.
You can edit the created Probability values and remove probability values, provided it is not used in any Projects.


 To create a consequence category