|
Documents and drawings can be added as attachments and send along with the correspondence. Documents existing in Wrench and documents stored in different locations can be added as attachments to Wrench. Attachments are added from the attachments panes in the correspondence window.
A template can be attached to the correspondence. Templates are created in the server master. A template can be assigned to single or multiple genealogies. When a template is attached, values for the fields in the template are mapped automatically. A template with mapped values can also be replaced and updated.
In addition HTML templates can be edited and this template can be inserted in the correspondence. A separate option to insert HTML templates is available in the correspondence window. The values for the fields in the template is mapped when you insert the template.
When documents saved in Wrench are searched and retrieved, in the Search Documents field you can type in a file name. Auto complete option is also available by which you can find information quickly by seeing searches that might be similar to the one you're typing.
To add documents existing in wrench
1.Click Attach and in the menu click From Wrench.
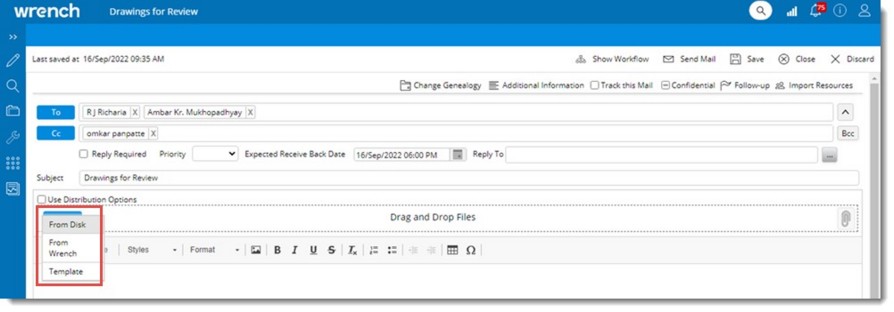
Figure: Adding documents existing in Wrench
Document Advanced Search window is displayed.
2.Search and retrieve the document you want to add as an attachment.
3.From the search results select the documents you want to attach.
For more information on searching documents refer Search Operations>>Searching for Documents.
4.After selecting the documents click Attach button.
The document is attached to the drawing.
Options Download and Show Details are available in a drop-down list that is displayed on clicking the down-arrow next to the document that is attached from WRENCH. In the case of WRENCH correspondence with files and templates as attachments, only option Download will be available in the drop-down. Size of the attached file is displayed below the file name.

To add documents from disk
1.Click Attach and in the menu click From Disk .
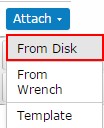
Figure: Adding documents from disk
Open File window is displayed.
2.Select the document from the location where it is saved.
3.Click Open.
The selected document is attached to the correspondence.
NOTE: You can select multiple documents at a time and add them as attachments.
To attach templates
1.After entering the values in the correspondence window click Attach and in the menu click Template.
Document Template window is displayed.
2.Templates assigned to the genealogy are displayed in the window by default. If the check box next to Show all templates is selected, entire list of templates are displayed.
3.Select a template from the list and click OK.
The template attached is displayed below Search Documents field.
To update the template
1.Hover the mouse above the attached template and right-click.
2.On the right-click menu click Update Template.
Template Mapping completed window is displayed.
3.Here you can select an option to edit the document or continue without editing.
4.Click Yes to edit the document. Click No to continue without editing.
5.On case you click Yes, the document is opened for editing.
To replace template
1.Hover the mouse over the attached template and right-click.
2.On the right-click menu click Replace Template.
Open File window is displayed.
3.Select the file from a list of files and click Open.
Template Replaced successfully message is displayed.
Defining distribution options
Sometimes it is required to attach associated files such specters or related files of the selected documents to the correspondence.
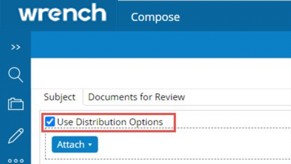
When attachments are added using From Wrench option, if the setting ‘Use Distribution Options’ is selected, files as per the distribution option defined in the genealogy gets attached to the correspondence. For Example: If ‘main document’ is not specified in the distribution options but the specter is specified, only the specter is displayed in the attachments area.
In the case of files attached from disk, always the selected file gets attached.
After selecting this option, when attachments are added, an option to manage distribution option will be enabled.

On clicking this option Distribution Options window is displayed.
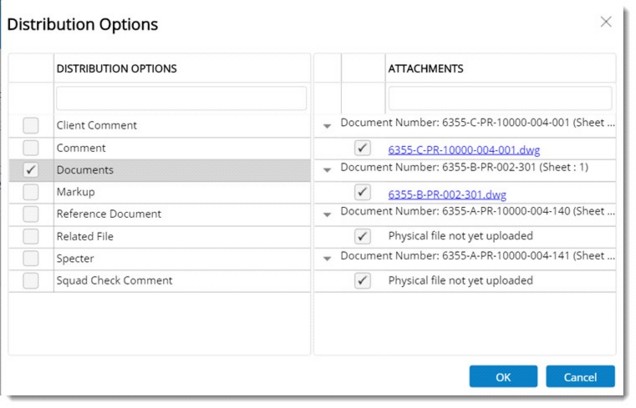
Figure: Distribution Options window
The list of current attachments (main documents) and all their attachments (of the type currently selected in the ‘Distribution Options’) are displayed in the ‘Attachments’ list. The list is grouped based on the main document number, below each group the list of attachments file names are displayed.
Those file names as specified in the distribution options will be selected and the others are not selected.
If distribution option is not defined in the correspondence genealogy then the attachment type, ‘Document’ will be selected by default and no files under the main document will be selected.
The attachment files can be excluded or included in the list, by selecting or deselecting the checkbox next to it.
Click on the file name hyperlink to view or download the file. If viewer is configured against the selected file type, system will display that file in the viewer otherwise file is downloaded to the disk.
Attaching HTML templates
In addition to attaching normal correspondence templates, HTML templates edited by the user, using HTML editor can also be attached to the correspondence. HTML templates are edited and customised from the Administrative Settings section.
To attach HTML templates
1.On the correspondence window click Insert Template.
A list of HTML templates is displayed.
2.Select a template from the list.
Selected template is displayed in the editor, and you can start preparing the correspondence in the template.
NOTE: Since correspondence properties can be mapped to the template, there can be only one template attached to a correspondence. If a template is inserted, another one cannot be attached and vice versa.
Drag and drop files
In the Compose window, a space to drag and drop files is available. Instead of selecting files to add as attachments, files can be dragged to the correspondence from the location where it is saved.

Figure: Dragging and dropping files
Inserting images
Images can be pasted to the WRENCH Correspondence Mail body
Viewing Attachments
Since an option to preview the attachment instead of downloading the file each time for the purpose of viewing it like in outlook will save time for the user, a facility to preview the attachment whenever the user clicks on the attachment is available.
In the WRENCH Correspondence window, on clicking the attachment, based on the viewer configuration, system will open the attachment in the viewer. If viewer is not configured against the selected file type, system will download the file. The preview is opened in the same window as a pop-up. Facility to download, close and open the preview in a different tab will be available in the window.

Figure: Viewing Attachments
|