|
One or more group of users specifically identified as “Time Sheet Approvers” are responsible for approving the Time Sheets of a selected list of other users. When a Time Sheet entry is made for a particular project, if an approver has been set for a specific user in the project, the time sheet entry will be sent to the approver once the user submits the time log.
Time logs sent for approval will be available to the respective approvers.
You can access the different topics in this section using the following navigation table.
Opening the time sheet approval window
Time Sheet approval is made from the time sheet approval window. When a user submits a time log the approver will get a mail. A hyperlink to directly access the approval tab will be available in mail.
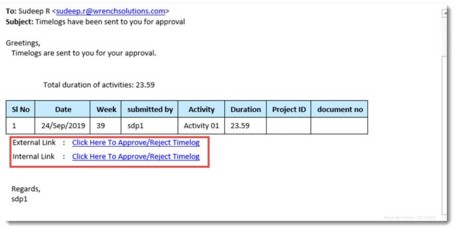
Figure: Opening timesheet approval window
External and Internal link to approve or reject time sheet will be available in the mail. On clicking the hyperlink Timesheet Approver tab is opened and user can approve or reject the time log.
To open time sheet approval window
1.On the Time Sheet window click Approval tab.
Approve Time sheet window is displayed.
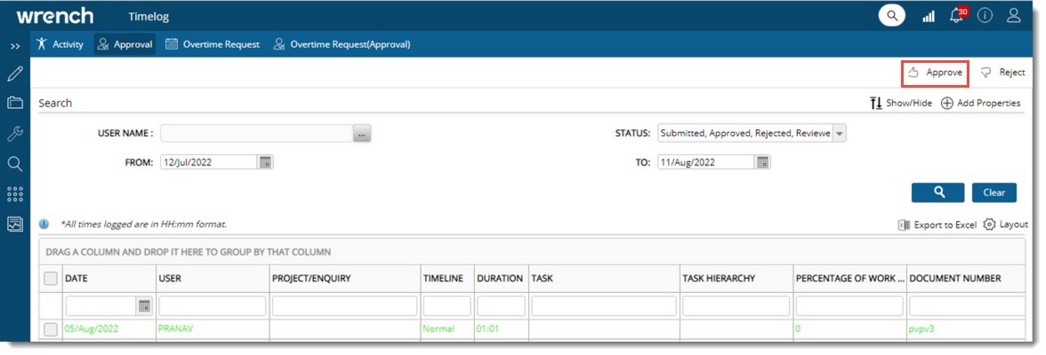
Figure: Time sheet approval window
Time sheet entries sent for approval are displayed in the window. Here you can carry out the following operations:
Approve a Timesheet
Reject a Timesheet
Search for Timesheet entries
Approving a time sheet
A time sheet approver verifies the time log entries send to them for approval and then approves it. If the approver needs to view the role against which the time log creator has logged the time, column ROLE can be selected from the column selection window.
To approve a time sheet entry
1.On the Approve Timesheet window select the check box next to the time sheet entries that you want to approve.
2.Click the Approve button.
Approved Successfully message is displayed.
 Tip Tip
•Only time sheet entries in Submitted status can be approved.
NOTE: If the number of approval stages are defined in the Project, on submitting the timeshee, the timesheet is send to the intermediate approver. The intermediate approver may click on the ‘Approve’ or ‘Reject’ option. On clicking the ‘Approve’ option, system checks the current level of the approver. If it is an intermediate level, time log status changes to ‘Reviewed’. If it is a final level, then the status changes to ‘Approved’.
Rejecting a timesheet
The approver rejects the timesheet if there are specific reasons for rejection. Once rejected the creator of the time log rectify the errors and re-submit the time log.
To reject a timesheet
1.On the Approve Timesheet window select the check box next to the time log entries that you want to reject.
2.Click Reject.
Reject Timelogs window is displayed
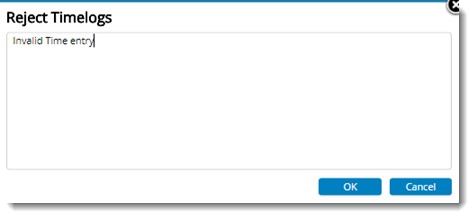
Figure: Reject Timelogs window
3.Enter a rejection comment and click OK.
Rejected Successfully message is displayed.
NOTE: Rejection comments entered is displayed in the column COMMENTS ON REJECTION in the grid.
User who submitted the time log can view the comment in the activity tab of the timesheet. Reason for Rejection is displayed on placing the mouse pointer over the rejected time log entry as shown in the following figure.
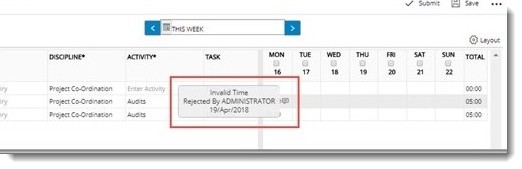
Figure: Viewing rejection comments
Searching for timesheet entries
On the timesheet approval window, timesheets submitted for approval are displayed. Once the time sheet is approved it is no more displayed here. Timesheets in Submitted, Reviewed and Rejected status are displayed here. Most recently submitted time sheet entries are displayed on the top. You can search and retrieve specific timesheets you are looking for.
To search for timesheet entries
A basic search operation can be carried out based on various search criteria.
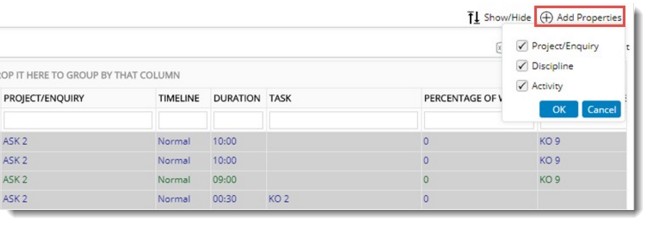
Figure: Adding search criteria
1.To view additional search criteria click Add Properties.
2.Select the criteria displayed under this button.
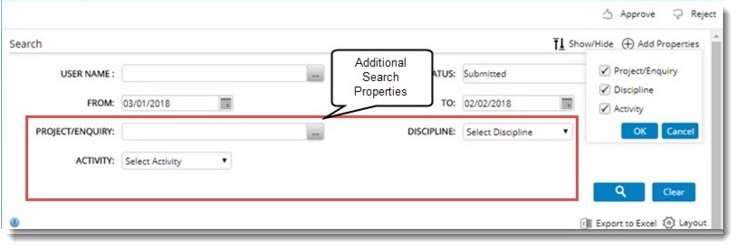
Figure: Additional search properties
2.Click Clear to switch to the basic properties view.
You can carry out a search operation using the following search criteria.
|
#
|
Property
|
Description
|
|
1
|
Project:
|
Click the browse button to select the project. Timelog entries related to this project will be displayed in the search results.
|
|
2
|
Discipline
|
Select the discipline of the resource. This can be selected from a drop-down list.
|
|
3
|
Activity
|
Select an activity. Time log entries against this activity will be displayed in the search result.
|
|
4
|
From and To dates
|
Select From and To dates from the date picker. All time log entries between the selected dates will be displayed.
|
|
5
|
Task
|
Click the browse button to select a task if you want to filter the search results based on a specific task of the project.
|
|
6
|
Document Number
|
Click the browse button to select a document number, if you want to filter the search results based on a specific document.
|
|
7
|
Status
|
Select a status from the drop-down list. The search result will be filtered based on the selected status.
|
|
8
|
Billable
|
Select this check box next to this option if you want to view only the billable timelog entries in your search result.
|
1.After entering the required search criteria, click Search button.
Search results are displayed based on the search conditions you have defined.
Exporting to MS Excel
Time sheet entries sent for approval can be exported to an MS Excel file.
To export to MS Excel
1.Select the time logs that are to be imported.
2.On the Approval window click Export to Excel.
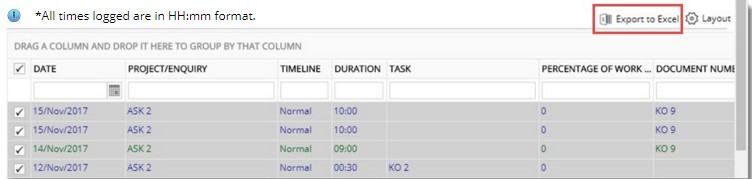
An MS Excel file is generated and is populated with a list of time logs sent for approval.
|