|
Activity view is capable of handling bulk time log entries. For Example: When time logs are created weekly, most of the activities remain the same. Hence it is ideal to post the time logs in bulk.
Different operations that can be carried out from the activity window is mentioned in the following navigation table.
Navigating through the activity view window
The activity view window is divided into a left and right pane. On the left pane you can enter time logs. On the right pane where days of a week are listed, duration of work can be entered for each day. There is a button strip in the top of the window. Different operations can be carried out from this button strip.
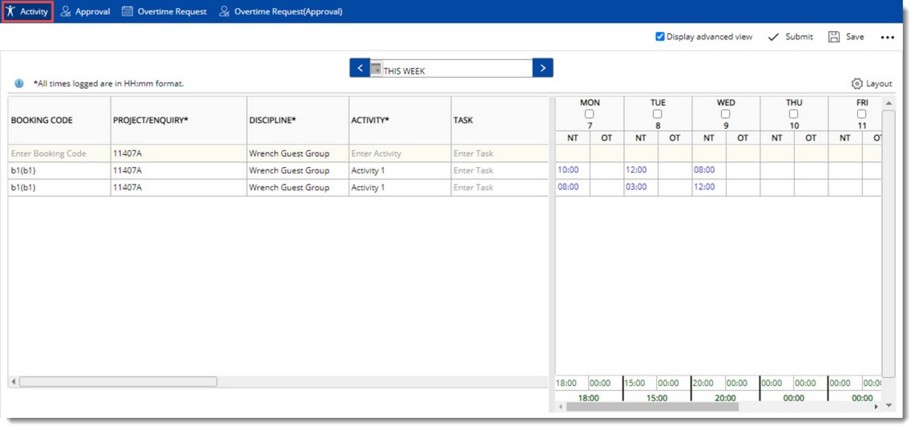
Figure: Activity View
You can move between time logs entered on different dates using the period scroll bar.

Figure: Period scroll bar
By default time log entries made for the current week is displayed. Click back arrow to view the time log entries for the previous week.
Entering a time log
To enter a time log
1.Enter values for the fields in the following table.
|
#
|
Property
|
Description
|
|
1
|
ROLES
|
Select the role of the user in the project. Click the browse button to select a role. This field is mandatory if time booking is already made for a Role/Resource. Actual Hours that is displayed in Distribute Time Booking window is calculated only if a role is selected here.
|
|
2
|
BOOKING CODE
|
If booking codes are assigned to an activity, it can be selected from the drop-down list.
|
|
3
|
Project/ Enquiry
|
Usually timesheet entries are made for activities related to a project or enquiry. Entering a project is not mandatory. Click the browse button to select a project or enquiry.
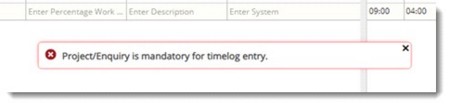
There are scenarios where a user might miss out entering the Project ID during timelog entry. In such cases, when a timelog report is generated against a project, the data shown may be inaccurate. This leads to wrong data interpretation. As a solution to this, field ‘Project ID’ in timesheet can be made a mandatory field when it is required.
This field will be marked as mandatory only if the setting Project/Enquiry is mandatory for timelogs is selected in Control Settings>>Utility.
If this option is selected and Project/Enquiry is not selected, when time log entries are made, the following warning message is displayed.
|
|
4
|
Discipline
|
Usually a resource is a member of a discipline or department. Select discipline of the resource from a list. This field is mandatory.
NOTE: When a logged in user enters the time log, the 'Activity' column filters the list of activities based on the combination of discipline and project type for each user. Hence user of a specific discipline need not go through all activities relevant for other discipline users and hence selection will be easier.
|
|
5
|
Activity
|
Select an activity for which the timesheet entry is made. Values configured in the activity master are displayed in the drop-down list. This is a mandatory field.
Activity column filters the list of activities based on the combination of discipline and project type for each user. Hence user of a specific discipline need not go through all activities relevant for other discipline users and hence selection will be easier.
|
|
6
|
Task
|
Select a task if the timesheet entry is being made for a specific task. Tasks which are completed or work in progress can be selected. Click the browse button to select a task from the task search window.
|
|
7
|
Document Number
|
Click the browse button to search and select a document. If a project is selected only documents under this project is displayed.
|
|
8
|
Timeline
|
Time log entry can be for normal working hours or overtime. You can specify whether your work is carried out in normal working hours or overtime here.
|
|
9
|
Billable
|
Select the check box if the time is billable.
|
NOTE: Custom properties defined for a document / task is inherited to the timelog. This is displayed based on settings in WRENCH Enterprise server. In the time log entry if the user selects any LOV values for the custom characteristic in timesheet that are not selected in the inheriting task, then an error message is displayed. You can either remove the unselected values from the time log entry or add the additional entry in the timesheet custom property. In the time log entry if the user has selected LOV values for the timesheet custom characteristics that are already selected for the inheriting task, then all the values selected in the timesheet custom characteristics will be displayed in the time log entry. If the user wants to add any new values to the time log entry then it should be first added in the character defined in the task which is inherited in the timesheet. For more information on inheriting custom properties refer Administrative Settings>>Timesheet>>Assigning custom properties to the timesheet.
2.On the right pane under the date enter the duration of work. Total time is calculated based on the time entered here.
3.Click Save to store changes. Once the time log is saved a new blank row is appended above.
NOTE: it is possible to copy and paste time log entries using keyboard short cut options CTRL + C and CTRL+V. This operation is possible for rows and columns.
To submit a timelog
1.Select the saved timelog entry that you want to submit.
2.Select the check box in the time column also as shown in the following figure.
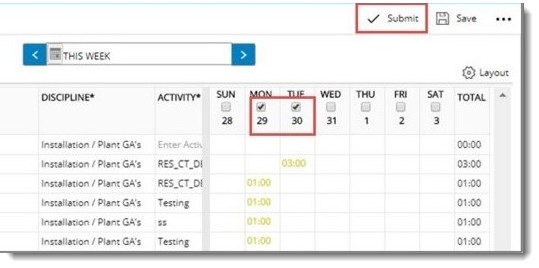
Figure: Selecting time log for submission
3.Click Submit to submit the timelog entry for approval.
While saving the timesheet when time logs created exceeds the calendar hours warning message is displayed.
If the Timesheet settings in control panel, Daily Lock for timesheet submission and Restrict time logs more than calendar hours are selected, following warning message is displayed. Modify the existing time log entries and then save the new time log to continue.
If the Timesheet settings Timesheet submission based on weeks and Daily Lock for timesheet submission are not selected and the setting Restrict time logs more than calendar hours are selected, same warning message is displayed. Modify the existing time log entries and then save the new time log to continue.
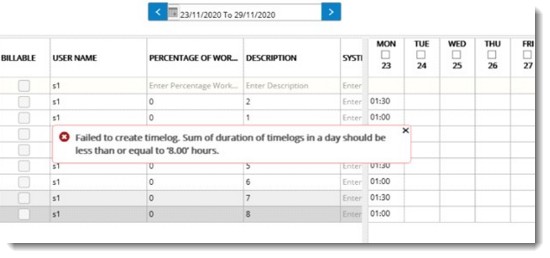
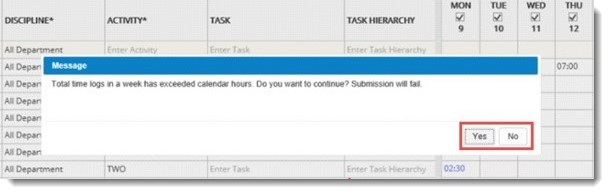
When the timesheet settings ‘Timesheet submission based on weeks’ and ‘Restrict time logs more than calendar hours’ are enabled, when logged time for the week exceeds the calendar hours, the following warning message is displayed.
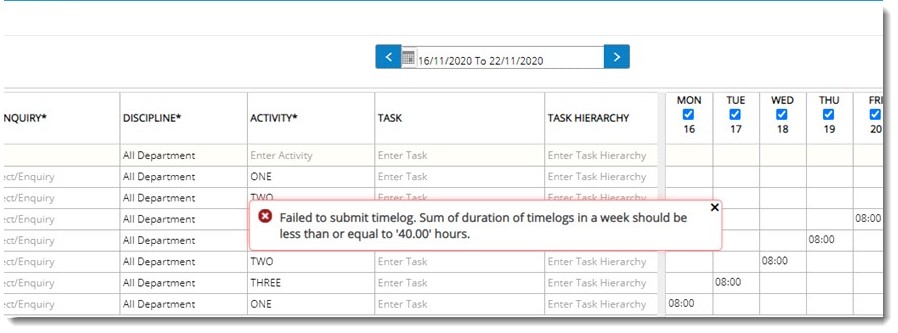
When the user submits the time logs with entries greater than calendar hours, system restricts from entering the time log and the following warning message is displayed.
NOTE: In organisations where people are not allowed to work on holidays, people may post time logs by mistake on holidays. To prevent such mistakes On Control Settings>>Utilities a setting Disallow time log on holidays is available. If this option is selected, and user enters the timelog for a holiday, a warning message Timelogs cannot be entered for holidays will pop-up and timelog entry operation is aborted. When user tries to create new time logs using the generated excel in which time logs for holidays are present, during import operation, user is notified. When user tries to update the exported time logs in which time logs for holidays are present, during import operation, user will be notified.
Copying time logs
You can copy single or multiple time log entry rows and paste it as a new entry. After pasting you can edit the values in the copied time log entry.
To copy time log entries
1.Select the time log entries that you want to copy.
2.Click the More button and in the menu click Copy.
3.Place the mouse pointer on the column where you want to insert the time sheet entry.
4.Click the Paste button.
Timesheet entry is inserted successfully.
Removing time logs
Creator of the time log can remove the time log before it is submitted.
To remove time log
1.Select the timelog entry that you want to delete.
2.Click the More button and in the menu click Delete.
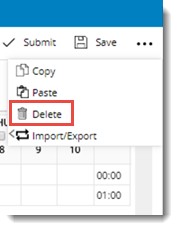
Figure: Removing timelog
Importing, Exporting and updating time log entry of others
Time log entries can be imported and updated using an MS Excel template. Also entries can be exported to an MS Excel template for modifications. Options to generate an import template and import other users time log entry is available in the Activity Log section of time sheet entry window.
Only user with the setting Create Timelog for Other Users enabled in Project can carry out this operation.
To generate an import template
1.On the Timelog window under Activity tab click … icon. A pop-up menu is displayed.
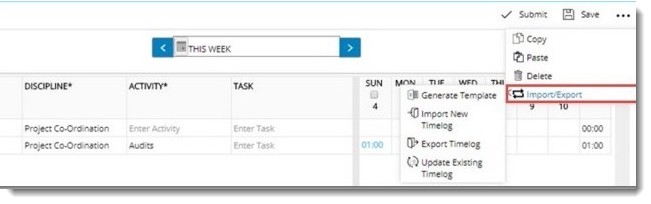
2.On the menu click Generate Template.
A Timelog template is generated and downloaded.
3.Enter values for different columns in the template and save the file.
To import time log entries
1.On the menu click Import New Timelog.
Open File window is displayed.
2.Select the Timelog template.
Timelog values are imported.
To export time log entries
1.On the menu click Export Timelog.
Timelog entries are exported to an MS Excel template.
To update existing timelog
1.On the menu click Update Existing Timelog.
File selection window is displayed.
2.Select the MS Excel file that contains the updated timelog entries.
Timelog entries are updated with the values in the MS Excel template.
Managing time log window
Operations like creating search views, adding columns and removing columns can be carried out from the operations menu.
To open operations menu
1.On the time log window click Layout.
Operations menu is displayed.
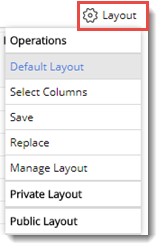
On the menu different options are available which is explained in the following section.
Default View
Select this option to load the default view for the time log window.
Select Columns
Using this option you can add columns to the time log window and remove columns from the window. On selecting this option column selection window is displayed.
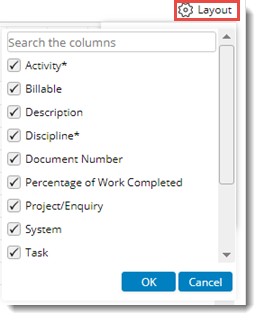
Figure: Selecting Columns
1.Select the columns you want to display in the time log window or clear the check box next to the columns that you want to remove from the time log window.
2.Click OK to save the selection.
Save
Click this option to save the current view of the time log window. On clicking this option Save View window is displayed.
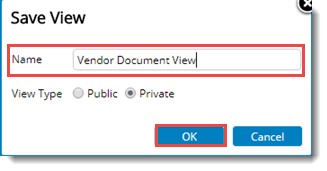
1.On the Save View window enter a View Name.
2.Select a View Type. You can choose between Public and Private views.
3.Click OK to continue.
Replace
Click this option to replace the existing view with the current layout of the time log window.
Manage Layout
Click this option to manage a saved view. On clicking this option Manage View window is displayed.
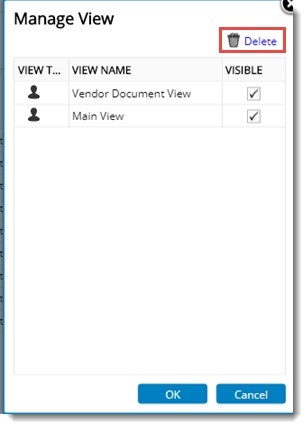
1.Select a view and click Delete to remove a view.
2.You can hide the view name from the operations menu by selecting the checkbox under the column Visible.
3.You can unhide the view name from the operations menu by clearing the checkbox under the column Visible.
4.Click OK to save changes.
|