|
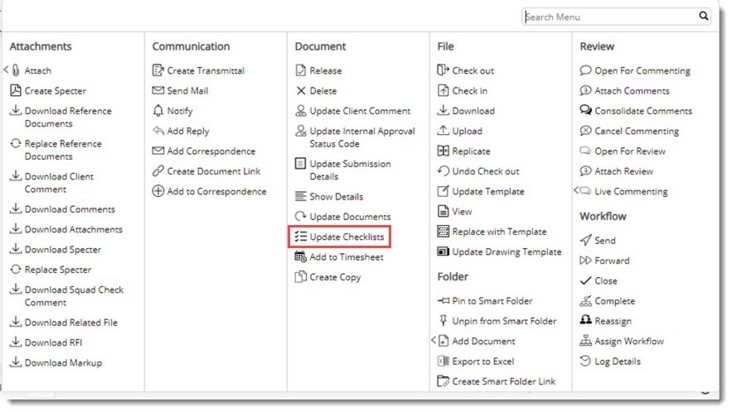
Completion of deliverables may need a set of pre-requisites. These pre-requisites can be a set of actions that are to be accomplished before an activity can be considered as complete. Without an alert system, such pre-requisites are often forgotten. Checklists serves to fill this gap. Checklists can be associated with various events in WRENCH and the system will ensure that each item in the checklist is addressed, before the event can be completed.
Checklists are a set of conditions that can be assigned to either a Document or Task. It can be used to ensure whether a deliverable has gone through the required processes. If a checklist has been assigned to a document then it will be routed to the next step only after all the conditions have been checked.
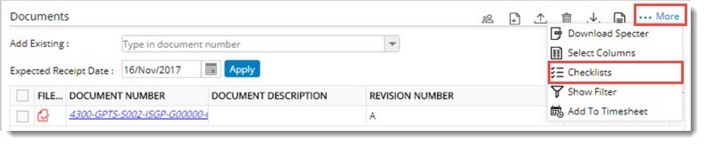
Checklists assigned to the document that are in the active stage and are not closed are displayed here. If there are multiple checklists assigned to a workflow stage they are displayed one below the other.
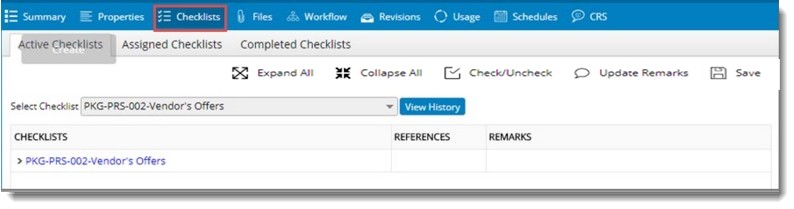
Figure: Checklist assigned to the document
The “Checklists” tab is further divided into three tabs. They are:
Active Checklists
Assigned Checklists
Completed Checklists
Active Checklists
The “Active Checklists” tab that is selected by default will display the list of checklists that are currently active (the workflow stage in the trigger criteria defined in the masters is active).
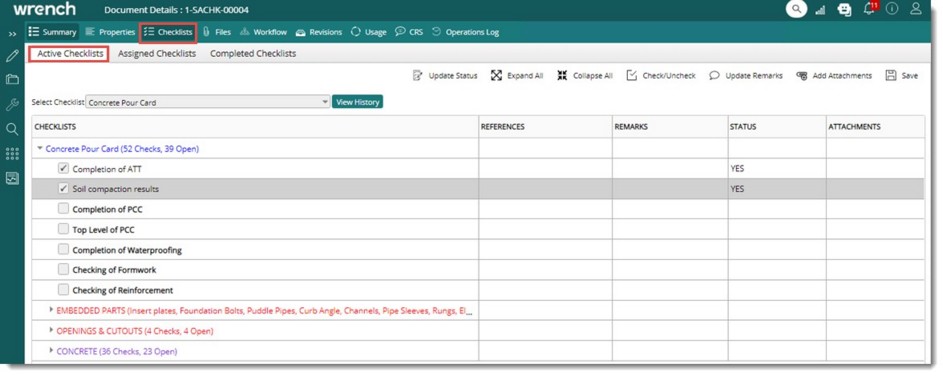
Figure: Active Checklists
On expanding the checklist, list of checkpoints is displayed below them. On selecting a checkpoint, status will change to PASS by default. If user wishes to change the status, then user can select either PASS/FAIL from the drop-down list.
Checkpoints assigned to the checklist are completed by entering a remark and clicking Save and Close button.
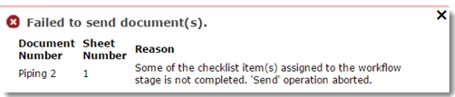
If there are checklists assigned to a workflow stage, while sending, a warning message is displayed asking you to update the checklist. The checklists are updated from the document details window.
The following options are available On the tool bar.
Update Status: The status of a checkpoint can be updated easily using this option. On clicking this option, a drop-down menu with items YES, NO, and N/A is displayed.

Figure: Updating Status of checkpoints
For a checkpoint, if the status selected is YES or NO, the checkbox next to the checkpoint is selected automatically. When the user updates the status against the checkpoints, the checkpoints are considered as attended. When the status selected is NA, the checkbox next to the checkpoint is not selected, but the checkpoint is considered as attended.
When the user selects multiple checkpoints and selects a status from this drop-down list, the selected status is displayed on the status column of the selected checkpoints also.
When the user updates the checklist of multiple documents from the smart folder, search results window, or while sending documents, the new option ‘Update status’ is displayed in the active checklist window toolbar. Only users with permission to update multiple checklists in the task and document genealogy are permitted to update checklist for multiple documents.
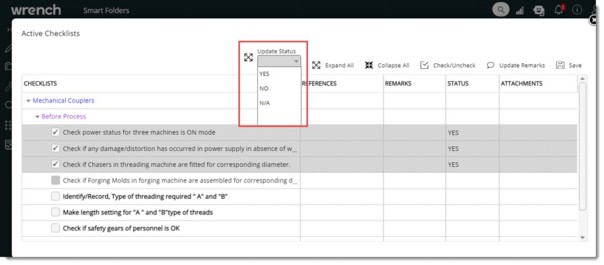
Figure: Updated checkpoints
The label on the checklist group will display the total count of checkpoints under the group and the number of checkpoints that are left unticked. If the user updates the status, then the count of checkpoints is considered as attended/closed checkpoints and is not listed in the count of open points.
Expand All: Click this option to expand all the checklists and display the checkpoints.
Collapse All: Click this option to collapse all the checklists and hide the checkpoints.
Check / Uncheck: After highlighting a check point click this option to select the check point. The selection can also be removed by clicking this button. In short this button acts as a toggle that helps in selecting and de-selecting a checkpoint.
Update Remarks: On clicking this option after selecting a checklist Remarks box is displayed.
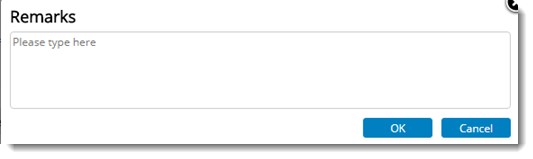
Enter the remarks in this box.
Add attachments: Click this option add photos or attachments to checkpoints for the purpose of reference. User can add various types of files as attachment which are allowed by the administrator as per configurations in control panel.
If user tries to attach any files which are restricted against the module “Checklist”, warning message is displayed, and the operation is cancelled.
To add attachments to checkpoints
1.On the Active Checklists window select a checkpoint.
2.On the tool bar click Add Attachments.
Attachments window is displayed.
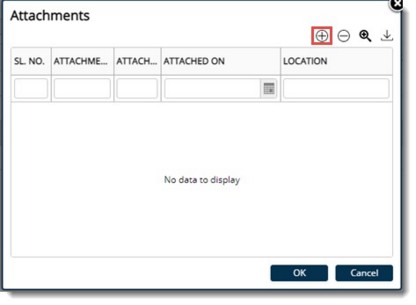
Figure: Adding Attachments
3.On the window click the plus sign. File selection window is displayed.
4.Select the file from the window. Selected file is displayed in the window.
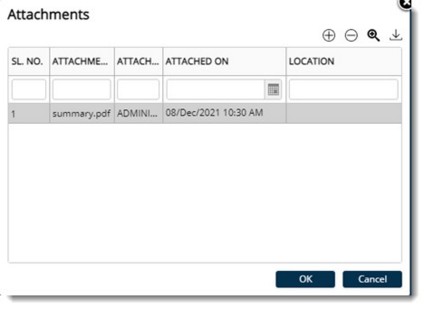
Figure: Previewing attachments
On the column Location, description of the location is displayed.
NOTE: When user upload an attachment against a checkpoint from Mobile / SmartProject, if the device is capable of reading geo-coordinates, such coordinates can also be supplied along with the attachment. If location is available, system will automatically capture the location and the location description will be displayed in the Location field as a hyperlink.
5.After selecting the file, click on preview button to view a preview of the image.
Once an attachment is added, in the Attachments column of the checkpoints grid, a hyperlink to view attachments will be displayed. On clicking the link View Attachments, the attachment is displayed.

Save: Click this option to save the comments entered for the checklist.
View History: On the drop-down list, after selecting a Checklist, when View History button is clicked, entire details of the checklist is displayed as in the following figure. Click Hide History to hide the checklist details.
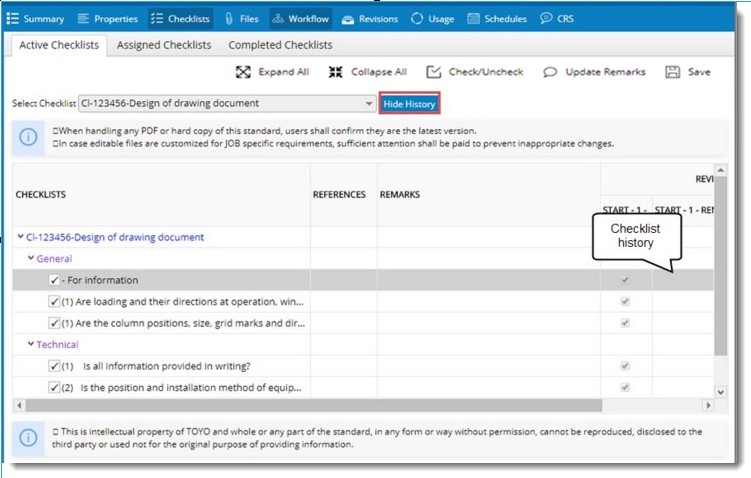
Figure: Viewing checklist history
History will be displayed only for a specific checklist. If the option All is selected and View History button is clicked, the following message is displayed.

To Update checklists from workspace
1.Select the document from your wokspace.
2.On the more options menu click Update Checklist.
Active Checklists window is displayed with a list of checklists that has to be updated.
3.Expand the checklist and select the checkpoints that has to be closed or updated.
4.Click Update Remarks.
5.Remarks box is displayed. Enter remarks and click OK.
6.After entering the remarks click Save and Close to close the checklist.
Checkpoint saved successfully message is displayed.
NOTE: Multiple documents can be selected and checklists can be updated from the workspace.
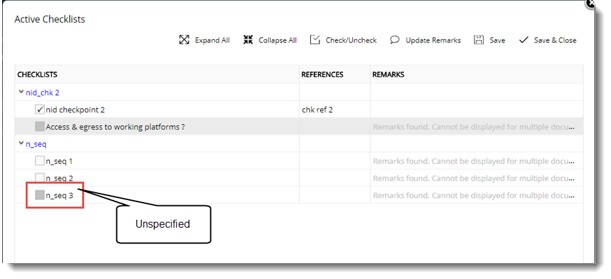
While updating checklists for multiple documents, if the documents selected contains same checkpoints, in the update checklist window, they are displayed with the checkbox next to them as selected, unselected or unspecified based on the following discussion.
When checklists are displayed the following conventions are followed.
•If a check point is ticked in all selected documents, in the update checklist window, checkbox against the checkpoints are displayed as selected.
•If a check point is not selected in all selected documents, in the update checklist window, checkbox against the checkbox is displayed as not selected.
•If a check point is selected in some documents and not selected in some others, in the update checklist window, checkbox against the checkpoint is displayed as unspecified.
This can be explained based on the following scenario.
Consider two document DOC 1 and DOC 2. DOC 1 have checklists A and B assigned.
For checklist A, checkpoints 1 and 2 are selected. For checklist B, checkpoint 1 and 2 is not selected.
DOC 2 also have checklists A and B assigned. For checklist A both checkpoints are selected. For checklist B one checkpoint is selected.
Now when a user selects these documents together and click Update Checklists;
Both the checklists are displayed in the window. For checklist A both checkpoints will be selected.
For checklist B the one checkpoint will be not selected and other will be unspecified as shown in the following figure.
If a checkpoint has remarks updated in at least one document, in the remarks cell the following text is displayed.
“<<Remarks found. Cannot be displayed for multiple documents>>”

If a checkpoint has remarks not updated in any of the documents, the column will be empty.
User can select check boxes in any status and update remarks for any checkpoints, even if warning text is displayed in the REMARKS column. Latest Remarks are saved.
When multiple documents are selected and Update Checklists option is clicked from the menu, if selected documents contains different checklists the following warning message is displayed.
While sending workflows from one stage to another, if the setting ‘Checklist must be completed’ is ON (control panel), and there are unclosed checklists existing for the item being sent, the following alert message is displayed.
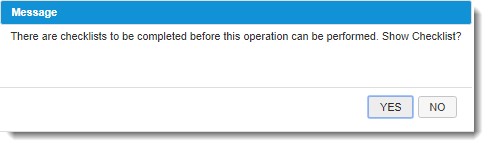
On clicking YES, Active Checklist window is displayed in a different tab. Checklists to be handled before closing the current stage will be displayed.
Update the checklists and save the changes. After saving close the tab. After closing the checklist, you send the objects to the next stage of the workflow.
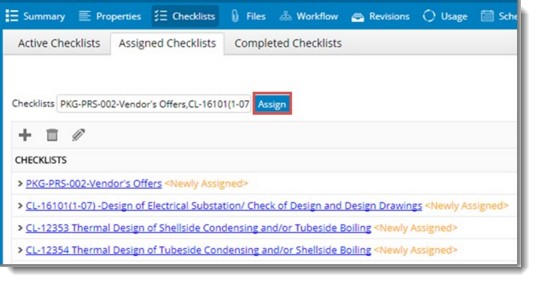
Assigned Checklists
The “Assigned Checklists” will display the list of checklists that are assigned to the current object (automatically/ manually).
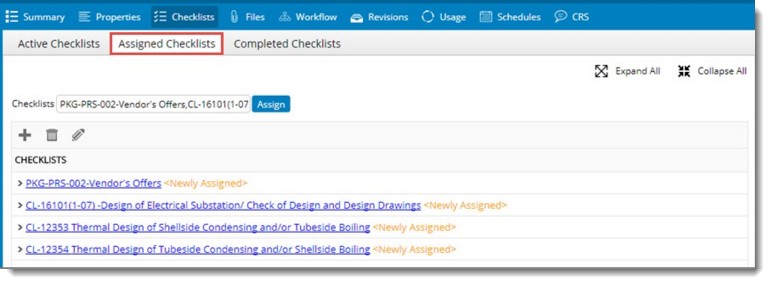
Figure: Assigned Checklists
To add a checkpoint
1.Select the checklist.
2.Click the add symbol.
3.New Checkpoint window is displayed. Enter the checkpoint in the box and click OK.
New Checkpoint is added to the checklist.
A manually added checkpoint can be edited.
To edit a checkpoint
1.Select the manually added checkpoint and click the add symbol.
Checkpoint window is displayed where you can edit the checkpoint.
2.After editing the checkpoint click OK.
To remove a selected checkpoint
1.Select the checklist that you want to delete.
2.Click the delete icon.
Option to manage checklists is available in the Document Transmittal window also. On the document transmittals window Documents pane under More options, click Checklists.
Assigning checklists manually
Checklists can be assigned manually from the Assigned Checklists tab.
To assign checklists manually
1.On this tab click the Assign button.
Check List Master window is displayed. On the window select single or multiple checklists.
2.Click OK.
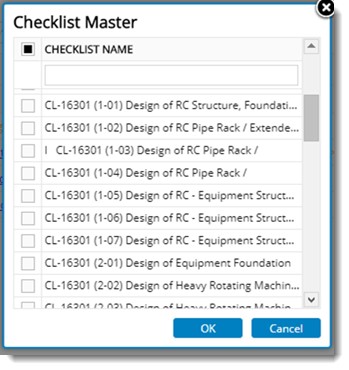
Figure: Checklist Master window
Selected checklists are assigned to the document.
NOTE: Only a user with Assign Checklist permission can add or remove a checkpoint.
Completed Checklists
The Completed Checklists tab will display all the checklists that are completed for a specific revision of a document.
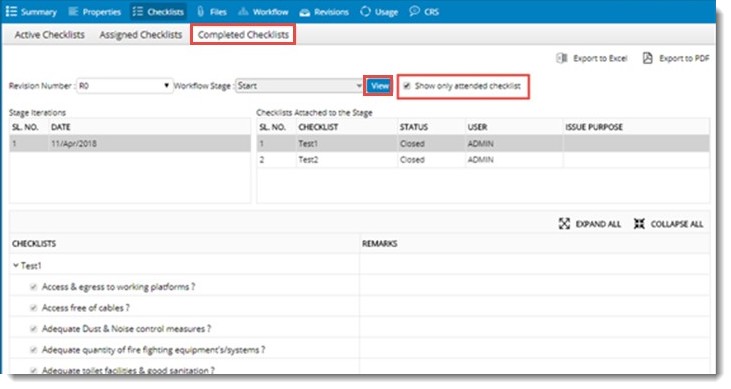
Figure: Completed Checklists
After selecting a revision number and a workflow stage, on clicking View, checklists that are completed for a specific revision of the document on completion of the stage is displayed. Following options are available to export the details of completed checklists.
Export to Excel: Click this option to export completed checklists details to an MS Excel file.
Export to PDF: Click this option to export completed checklists details as a pdf file.
Show only attended checklist: On selecting the checkbox next to this option only checklists that are attended is displayed.
A facility to view rules assigned to the checklist is available.
Click the checklist hyperlink to view the rules assigned to the checklist. On clicking the hyperlink, Checklist Rule window is displayed.
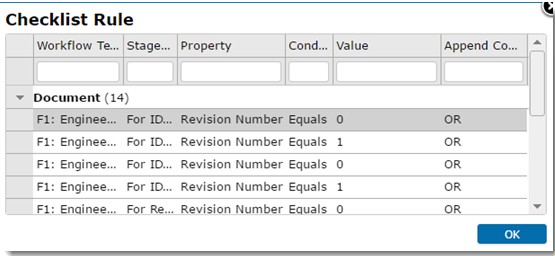
Figure: Checklist Rule window
|