|
Authorisation packages are used for submitting a set of documents together to agencies like chartered engineers for their approval.
To create an authorisation package
1.On the package manager window click Create Package>>Authorisation.
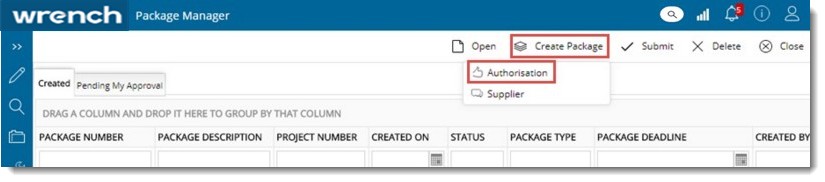
Or
1.On the Global menu click Create>>Package>>Authorisation.
Package Type window is displayed.
2.From the list of packages choose a package type and click OK button.
Package Details window is displayed with the package type field populated.
The following navigation table will help you in navigating to details on different activities that has to be carried out for creating and submitting a package.
Entering package properties
On the package details window enter values for the properties mentioned in the following table.
|
#
|
Property
|
Description
|
|
1
|
Type
|
Click the browse button to select a package type.
|
|
2
|
Number
|
Click the browse button to generate a package number. Number Generation window is displayed. Generate a number for the package using the pre-defined template. For more information on generating numbers automatically refer Number Generation.
|
|
3
|
Project ID
|
Click the browse button to select the project to which this package is associated.
|
|
4
|
Package Deadline
|
Select the date by which the package has to be completed. You can make a selection from the date picker.
|
|
5
|
Description
|
Enter a description for the package.
|
|
6
|
Status
|
This value in this field is updated automatically depending on the status of the package.
|
Adding documents to the package
Since the purpose of creating a package is to handle documents, you can add a set of documents to a package. All selected documents will be added to the package on confirmation. Following are the constraints to be adhered to while adding documents to the package.
 Tip Tip
•Only those documents which are in WIP status can be added to packages.
•Documents should be of the same project for which the package has been created.
To add documents to the package
1.On the Package Details window click the Documents tab.
2.Click the Add Document icon.

Document Search window is displayed.
3.Search and retrieve the documents and in the Search window click Add.
The selected documents are added to the package.
To remove documents from the package
1.Click More>>Remove Documents.
Document is removed from the package.
Sending documents through workflow
Documents in the package can be sent through the workflow either individually or in bulk.
To send documents
1.On the gird select the required number of documents.
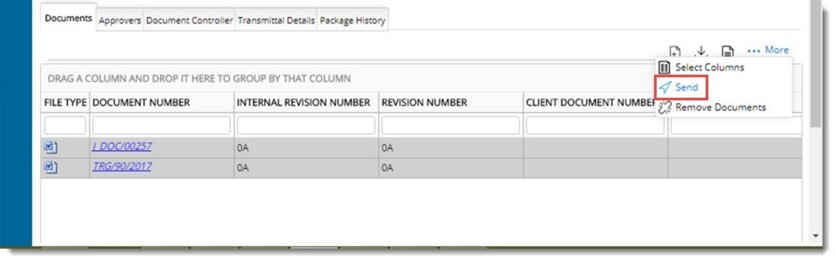
2.Click More>>Send.
If there is a workflow attached to the document, send window is displayed.
3.Click Send to sent the document. For more information on sending documents refer Sending documents and tasks through a workflow.
Adding package approvers
Documents added in the package will be reviewed and approved by single or multiple approvers. These approvers are defined from the Approvers tab.
To add approvers
1.On package details grid select the tab Approvers.
2.Click Add User.
Search User window is displayed.
3.Search and retrieve the users and select the desired approvers from the list of users.
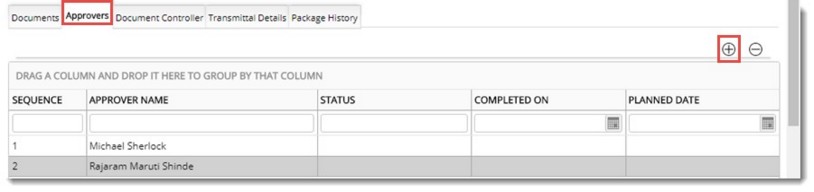
Figure: Adding Approvers
List of approvers are displayed in the grid.
4.Define a sequence for the approvers.
Tip
Each user in the list will by default have a sequence number “1”. This means, all the users will get to review / approve the documents simultaneously. You may alter this sequence number to give it a specific sequence. Once a sequence is specified, the approvers/ reviewers with higher sequences will not get the package for review / approval until those users with lower sequences number has completed their work.
Adding document controllers
Document controllers have the responsibilities of post approval processing of packages such as releasing transmittals etc. Each package can be assigned with multiple document controllers.
To add document controllers
1.On the Package Details window grid click the tab Document Controller.
2.Click Add User button.
Search User window is displayed.
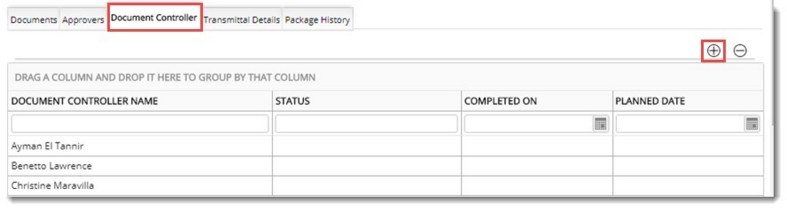
Figure: Adding Document Controller
3.Search and retrieve the users and select the desired document controllers from the list of users.
Defining transmittal details
In the case of authorization packages a transmittal is released once the package is approved. You can define the transmittal details and when a transmittal is created for the package, the transmittal details window is populated with these details.
To define transmittal details
1.Open the Package Manager.
2.Click Transmittal Details tab.
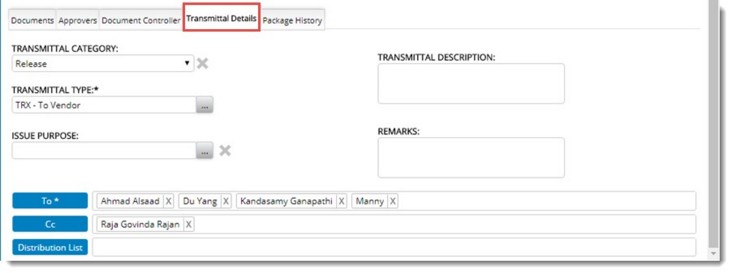
Figure: Defining transmittal properties
3.Enter values for the transmittal properties.
Saving the package
Once you complete entering the details next step is to save the package. When you save the package, the status of the package will change to CREATED.
To save the package
1.On the package details window click the button Save.
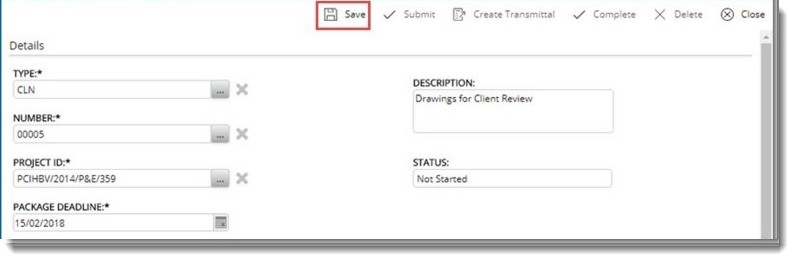
The package is saved and will be listed in the grid.
Submitting the package
After entering properties, adding documents and selecting approvers and document controllers you can submit the package for approval. Submitted package will be listed in the Pending My Approval tab of the selected approvers.
Tip
If approvers / reviewers are not defined, package cannot be submitted. Package can be submitted by any user who has appropriate security privileges. There can be one or more approvers/ reviewers for a package. Once submitted, in serial approval mode, the package will be available in the workspace of the approvers having the lowest approval sequence. In parallel mode, all approvers will get the package in their workspace for review.
To submit the package
1.On the Package Details window grid select the package you want to submit.
2.On the button strip click Submit button.
Selected packages are submitted successfully.
|