|
Completion of certain activities and tasks may need a set of pre-requisites. These pre-requisites can be a set of actions that are to be accomplished before an activity can be considered as complete. Without an alert system, such pre-requisites are often forgotten. Checklists serves to fill this gap. Checklists can be associated with various events in WRENCH SmartProject and the system will ensure that each item in the checklist is addressed before the event can be completed.
Checklists are a set of conditions that can be assigned to either a document, task, change process or a workflow. It can be used to ensure whether a particular module has gone through the required processes. For Example: If a checklist has been assigned to a document, then it will be routed to the next step only after all the conditions have been checked.
The following checklist related options are available.
Creating a Checklist,
Creating a Checklist Group
Creating a Checkpoint
Assign checklist to a user group
Assigning and activating checklist rules
Defining destination stage for triggering workflow based checklists
Importing/Updating Checklists
Bulk Operation Log
Opening the checklist master
To open the checklist master
1.On the Masters window toolbar click Checklist. Checklists window is displayed.
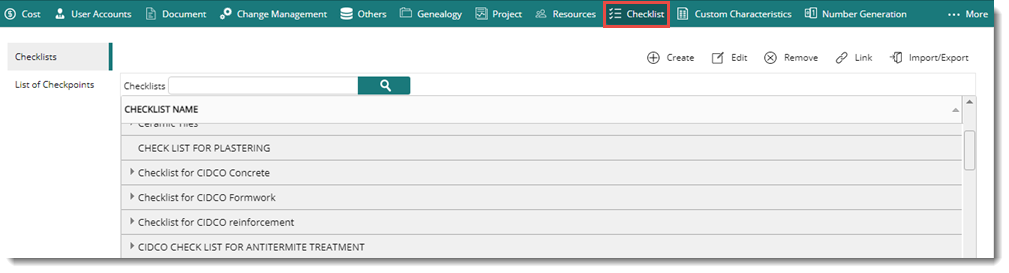
Figure: Checklists window
On the window all the created checklists are displayed. Options to create and manage checklists and checkpoints are avilable on the toolbar.
Creating a Checklist
A checklist is created from the checklist master window.
To create a checklist
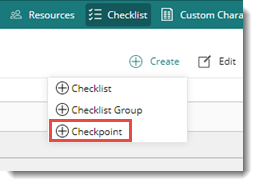
1.On the Checklist window, place the mouse pointer over the option Create. A pop-up menu is displayed.
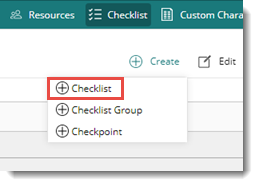
2.On the menu click Checklist.
The Add Checklist window is displayed.
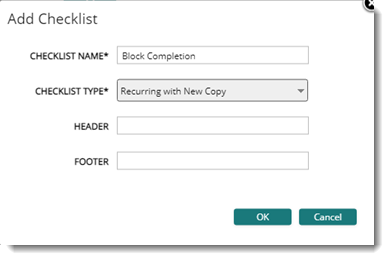
Figure: Add Checklist window
3.Enter the Checklist Name.
4.Choose the Checklist Type from the drop-down list. The different checklist types available are the listed below.
Recurring with Previous Copy: On selecting this option, for each iteration of a workflow, user will be able to modify the same checklist.
Recurring with New Copy: On selecting this option, user will be able to update a fresh copy of the checklist during each iteration of the workflow.
Non-Recurring: On selecting this option, checklist is accepted only when the checklist is triggered for the first time during the workflow.
5.After selecting the checklist type, enter the Header and Footer.
6.Click OK to create the checklist.
The checklist is created and is displayed on the checklist window grid.
Assigning checklists to a user group
After creating a checklist, the checklist can be assigned to a user group.
To assign a checklist to user group
1.Select the checklist.
2.On the tool bar click Edit.
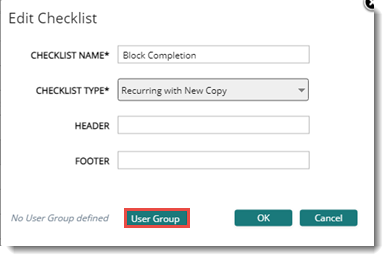
Figure: Assigning user group
Edit Checklist window is displayed.
3.On the window click User Group. User Groups window is displayed.
4.Select the checkbox next to the groups to which the checklist is to be assingned.
5.Click OK to assign the checklist to the selected user groups
Creating checklist groups
Checklists groups can be created below a selected checklist. After creating a checklist group, user groups can be assigned to the checklist group. This helps in assigning security and creating a group hirearchy.
To create a checklist group
1.Select a checklist.
2.On the Checklist window, place the mouse pointer over the option Create. A pop-up menu is displayed.
3.On the menu click Checklist Group. Add Checklist Group window is displayed.
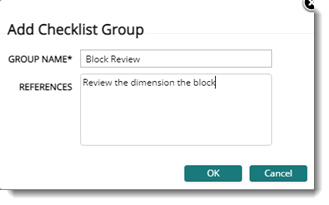
Figure: Add checklist group
4.Enter the group name and references.
5.Click OK to save the entered values and create the group.
A group is created below the selected checklist.
To assign groups to checklist group
1.Select the checklist group.
2.On the toolbar click Edit.
Edit Checklist Group window is displayed.
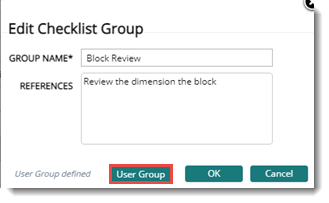
Figure: Edit checklist group window
3.Click the button User Group. User Group window is displayed.
4.Select the checkbox next to the required groups.
5.Click OK to assign the groups to the checklist group.
Creating a list of checkpoints
List of Checkpoints are a set of conditions that has to be checked in a project. Checkpoints are created and the checkpoints are assigned to a checklist.
To create a checkpoint
1.On the checklist window left navigation bar, click List of Checkpoints. Checkpoints window is displayed.
2.On the toolbar click Create.
Add Checkpoint window is displayed.
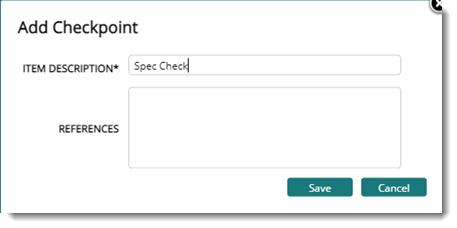
Figure: Add Checkpoint window
3.Enter a description for the checkpoint and references if any.
4.Click Save to create the checkpoint.
Created checkpoint is displayed on the grid.
Options to edit or remove a selected checkpoint is also available on the toolbar.
Addigning checkpoints to checklists
After creating the checkpoints, they can be assigned to a checklist.
To add checkpoints to a checklist
1.On the checklists window select a checklist.
2.On the options menu click Checkpoint.
Add Checkpoint window is displayed.
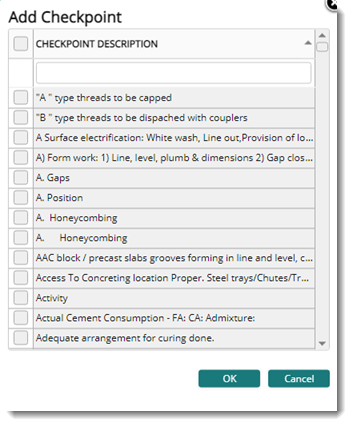
Figure: Add checkpoint window
3.Select the checkpoints that are to be added to the checklist and click OK.
4.Selected checkpoints are added to the selected checklist.
Assigning and Activating Checklist Rules
Rules can be defined for assigning checklists to documents and tasks at different instances. Rules are created based on a set of criteria, which are document or task properties and their expected values. When the object (task and document) properties have the desired value, checklists are assigned automatically.
A primary rule is created by adding a workflow stage into the list. A checkpoint can be selected as a filter. Once a filter is selected only the selected checkpoints are displayed for an active Checklist in the Active Checklists window.
After selecting the workflow stage, additional rules are added. The stage names in the primary rule is to be unique. This means, one stage name cannot be used in multiple rules.
When the workflow stage is activated, system will check whether the additional rules (if any) are satisfied. If additional rules are satisfied, the checklist will be activated.
Checklist rules are assigned to documents or tasks and when the rule conditions are satisfied, these rules are activated.
Assigning Rule
To add rules,
1.On the checklist window, select a checklist and click Link.
Checklist Rule window is displayed.
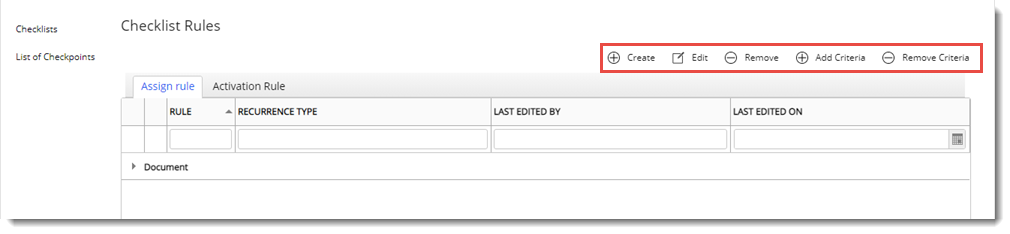
Figure: Checklist Rule window
2.On the checklist rule window, in the assign rule section, click Create.
Create Checklist Rule window is displayed.
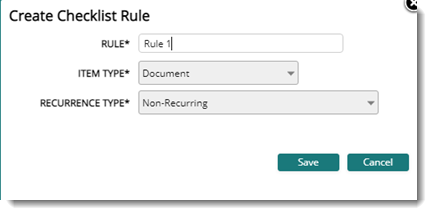
Figure: Create Checklist Rule window
3.Enter a name for the Rule.
4.Select an Item Type from a drop-down list. Options available are Document and Task.
5.Choose a Recurrence Type from the drop-down list. The available options are Recurring with New Copy, Non-Recurring, Recurring with Previous Copy.
6.Click Save to save the rule.
After creating rule, criteria can be added to this rule.
To add criteria,
1.Select the rule and click Add Criteria.
Add Criteria widnow is displayed. On the different properties and property is listed.
.png)
Figure: Add Criteria
2.Select a Property and click OK. The criterion added is displayed on the rule window grid.
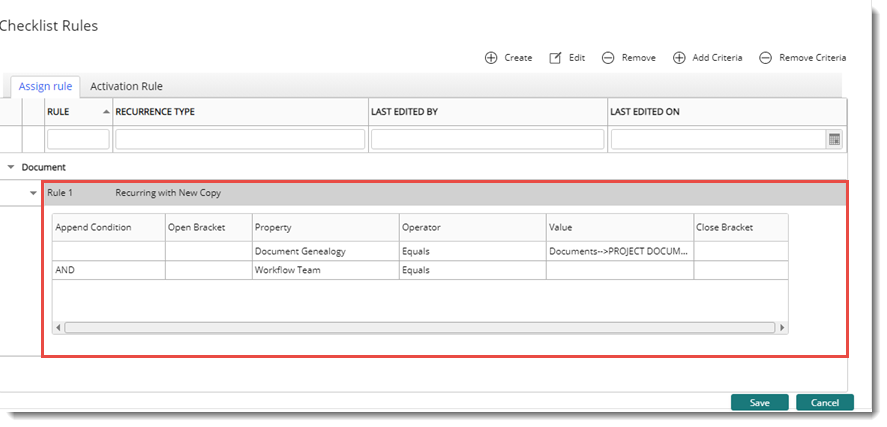
Figure: Rule window
The following columns are displayed on the rule window grid.
Append Condition: There can be instances when multiple rules are to be defined and a relation is to be created between the rules. In such instances a condition can, be defined here. Options available are AND, OR.
Open Bracket: Select an opening bracket to create combination of multiple rules. Bracket types available are (and ((.
Property: Property selected from the Add Criteria window is displayed here.
Operator: Here an operator for the rule can be selected from a drop-down list. The operator selected links the property and the value. For Example: Suppose the property selected is Workflow and the workflow that is assigned is an Engineering Workflow, then the condition selected is EQUALS.
Value: The rule value is selected here. Value will be different for different properties.
Close Bracket: Select a closing bracket to create combination of multiple rules. Bracket types available are) and )).
Once rules are added, conditions are defined for activating the checklists automatically so that the user updates the checklist before proceeding. Different rules are created, and criteria can be assigned to the rules to trigger or activate the checklist rules. Workflow Stage is a mandatory property to activate the checklist rule.
Activating Rule
To activate rule,
1.On the Checklist rule window, click the tab Activation Rule.
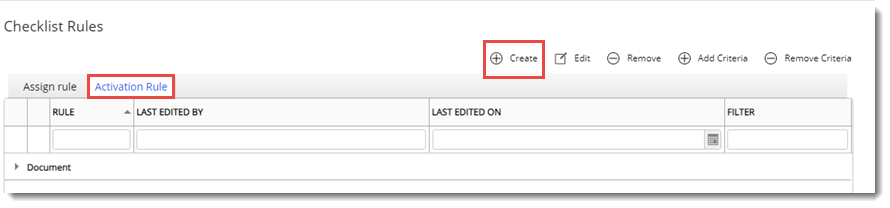
Figure: Activating a rule
2.On the toolbar click Create.
Create Checklist Rule window is displayed.
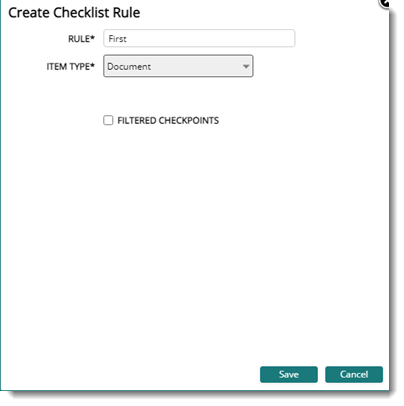
Figure: Create Checklist Rule
3.Enter the name for Rule.
4.Select an Item Type from a drop-down list. Options available are Document and Task.
5.If the checkbox next to the option ‘Enable Filtering’ is selected, the checklist is displayed on the grid. On expanding the checklist, all the checkpoints is displayed.
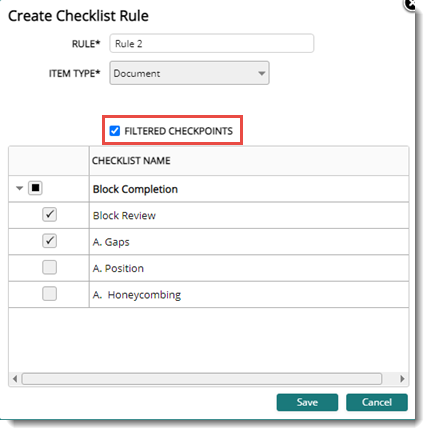
Figure: Filtered Checkpoints
1.Select the checkpoints to be filtered.
2.Click Save to continue.
After creating rule, criteria can be added to this rule.
To add criteria,
1.Select a rule and click Add Criteria.
Add Criteria window is displayed.
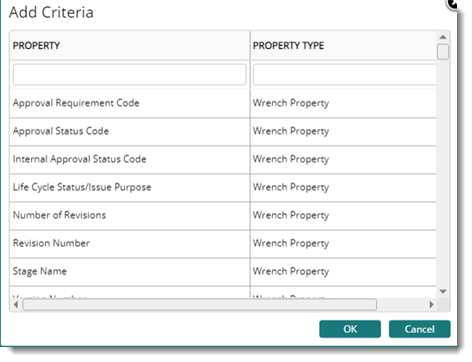
Figure: Add Criteria
2.Select a Property and click OK.
3.Enter values for different columns on the grid.
4.Click Save to save the rule.
A message Rule Criteria saved successfully is displayed.
The checklist will be activated when the rule criteria are satisfied.
Defining destination stage for triggering workflow based checklists
In some organizations, the checklist is assigned to engineering lead's stage. From this stage, the document could be routed to IDC stage or to Approver's stage depending on the type of document. If the document is to be routed to IDC stage, checklist shouldn’t be activated. Only if the movement of document is from Lead stage to Approver's stage, checklist needs to be activated.
For Example: Consider the following workflow.
.svg)
Consider that the stage ‘CHECK’ has checklists assigned and activated. Ideally these checklists are to be attended when sending to stage ‘APPROVE’; not when sending to stage ‘DRAFT’. But currently, when sending from stage CHECK in either direction, the checklists are validated for closure.
As a solution to this checklist can be configured based on the Source-Destination combination. While creating checklists and linking the check lists, Source-Destination combination can be defined.
When property ‘Stage Name’ is selected as a criterion for triggering checklist, option to select the Destination stage is available. On the column Value, on clicking the more option next to the source stage, in the Select Workflow Stage window, Destination Stage can be selected from a drop-down list. By default, value ANY is displayed in the column.
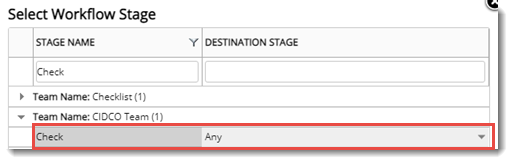
Figure: Selecting destination stage
Importing, exporting and updating checklists
Checklists can be specified in an MS Excel template and the values can be imported to the system. Also, checklist values can be exported to an MS Excel file, the values can be edited and the edited values can be updated in the system. All these operations can be carried out from the Import/Export menu on the Checklists window.
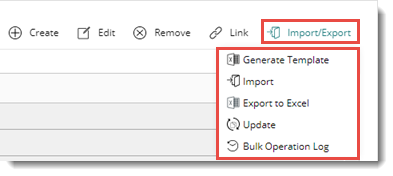
Figure: Import/Export/Update operations
Importing checklists
An MS Excel template is generated, values for checklist properties are entered and saved, and the saved values are imported.
To generate an import template
1.On the Import/Export menu click Generate Template.
An excel template is generated and downloaded automatically.
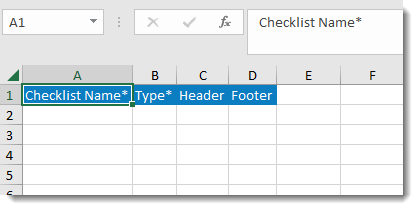
Figure: Generated template
2.Enter the Checklist Name.
3.Select the Type from a drop-down list.
4.Save the template.
After specifying the values for the checklist, the details can be imported to SmartProject.
To import the values to smart project
1.On the Import/Export menu click Import.
A file selection window is displayed.
2.Select the saved excel file. The checklist values are imported to the system.
Exporting and Updating checklists
Values of multiple checklists can be updated using the Update option. Checklist values are exported to an MS Excel template, the values are modified, and the modified values are updated back to SmartProject.
To export checklists to MS Excel
1.On the Checklists window select the checklist that is to be updated.
2.On the Import/Export menu click Export to Excel.
Bulk Export Wizard window is displayed.
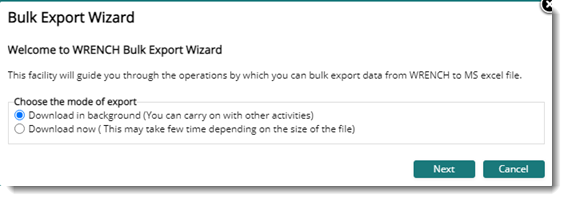
Figure: Bulk Export Wizard
3.Choose the mode of export. Available options are Download in background and Download now.
4.Click Next to start the download.
If the option Download now is selected and the download is successful, the following message is displayed.
5.Click OK to continue. The excel file with the exported values is downloaded.

The values in the excel template can be edited and saved. The saved values is then updated in SmartProject.
To update the values
1.On the Import/Export menu click Update.
Bulk Export Wizard window is displayed.

Figure: Bulk Update Wizard
2.Click Choose file to select the updated excel file from the stored location.
3.Options to ignore blank cells in excel file and clear the existing data in smart project, when corresponding cells in the Excel file is blank is available. Select the required option.
4.Click Next to continue.
The values are updated.
Viewing log of operations
Details of the import and update operations can be viewed
To view the log of operations
1.On the Import/Export menu click Bulk Operation Log.
Bulk Operation Log window is displayed. Here the details of the operations is listed.
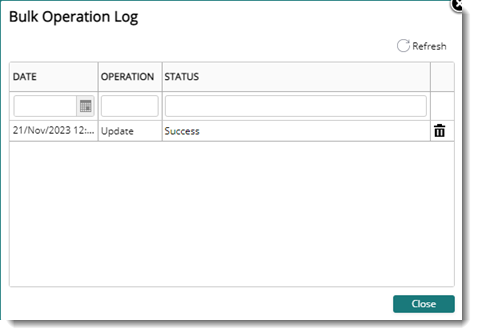
Figure: Bulk Operation Log window
Here date of the operation, the operation name and status of the operation is displayed.
|