|
Class consists of a set of characteristics. By linking a Characteristic to a class, the user groups a specific set of features under the same Class. Objects linked to a particular Class causes a predefined set of Characteristics under a Class to be inherited.
To create an Object – Class Link,
1.On the left pane click Object-Class Link. Object Description window is displayed.
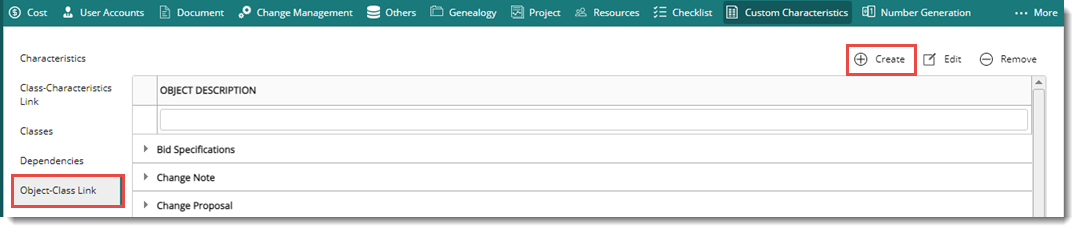
Figure: Object-Class Link
2.On the window click Create.
Object-Class Link window is displayed.
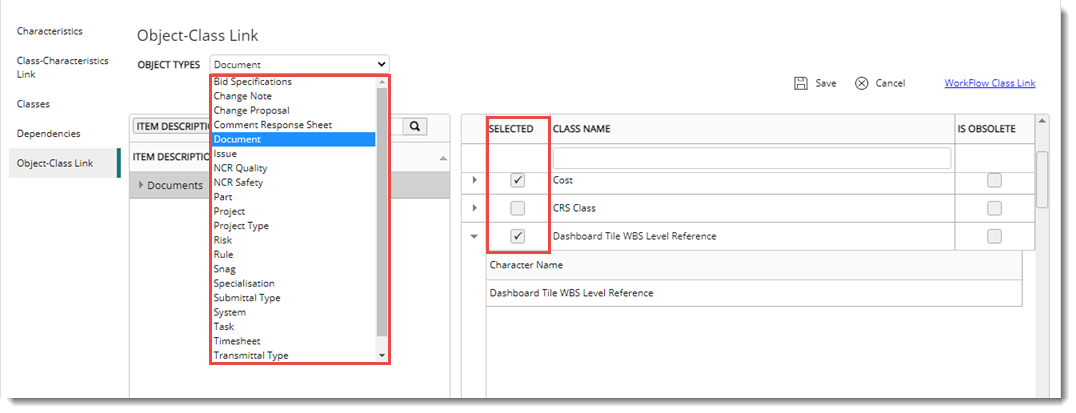
Figure: Object Class – Link Creation
3.On the window, select the “Object Type” from the drop-down list.
When an object is selected, on the right pane, available Class names are displayed.
4.Select the checkbox against next to the classes that are available.
5.Click "Save" button to link the object to a class.
Work Flow Class Link
While assigning Custom Characteristics to documents, you can assign custom properties for workflow stages. You can also define the assigned custom properties as mandatory for completion of the stage.
To assign custom properties to workflow stages,
1.On the Object Class Link window select a Class Name.
2.Click the hyperlink “Workflow Class Link”.
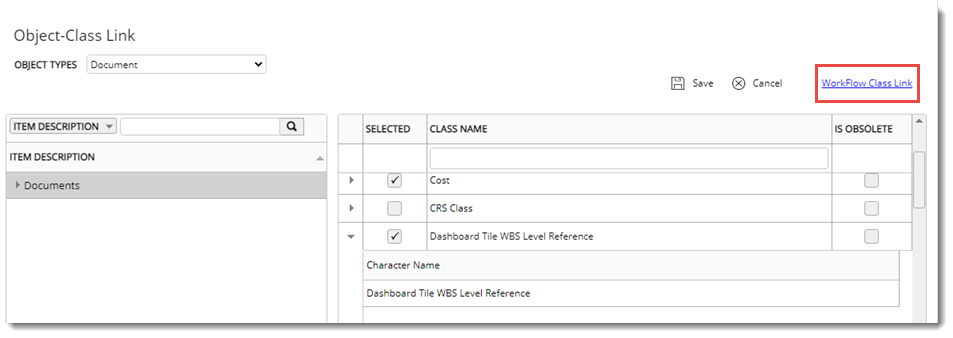
Figure: Workflow Class Link
The Workflow Stage Class Window is displayed.
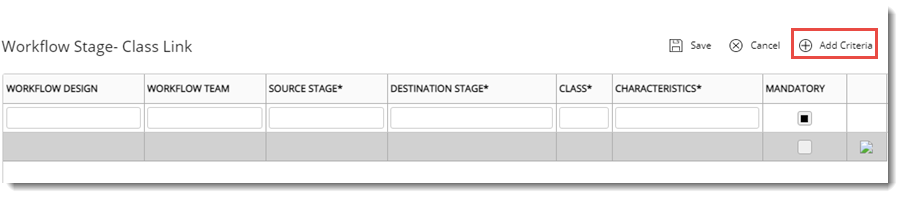
Figure: Workflow Stage-Class Link window
3.On the window click Add Criteria. A blank row is inserted on the window.
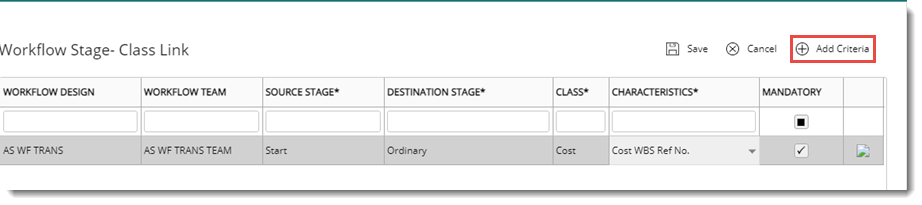
Figure: Creating a link
2.Enter values for the different columns displayed on the window. The columns are explained in the following table.
|
#
|
Column Name
|
Description
|
|
1
|
Workflow
|
Select the browse button to select the workflow for which custom characteristics are be assigned.
|
|
2
|
Workflow team
|
Select a workflow team.
|
|
3
|
Source Stage
|
Select the stage to which custom characteristics has to be assigned from a drop-down list.
|
|
4
|
Destination Stage
|
Select the destination stage from a drop down. Default value will be ‘Any’. Based on the Source-Destination stage combination, while sending, the defined custom properties are displayed.
|
|
5
|
Class
|
Select the class that is to be assigned to the stage.
|
|
6
|
Characteristics
|
Select a characteristic from a drop-down list.
|
|
7
|
Mandatory
|
Select the check box for making updating of custom characteristics as mandatory.
|
3.Once the values are assigned click Save to store the created link.
|