|
To start working with the contents in the smart folder, you have to open the smart folder.
To open the smart folder
1.On the Global menu click Smart Folder.
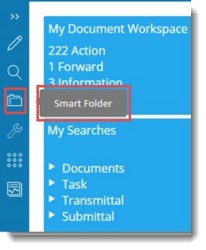
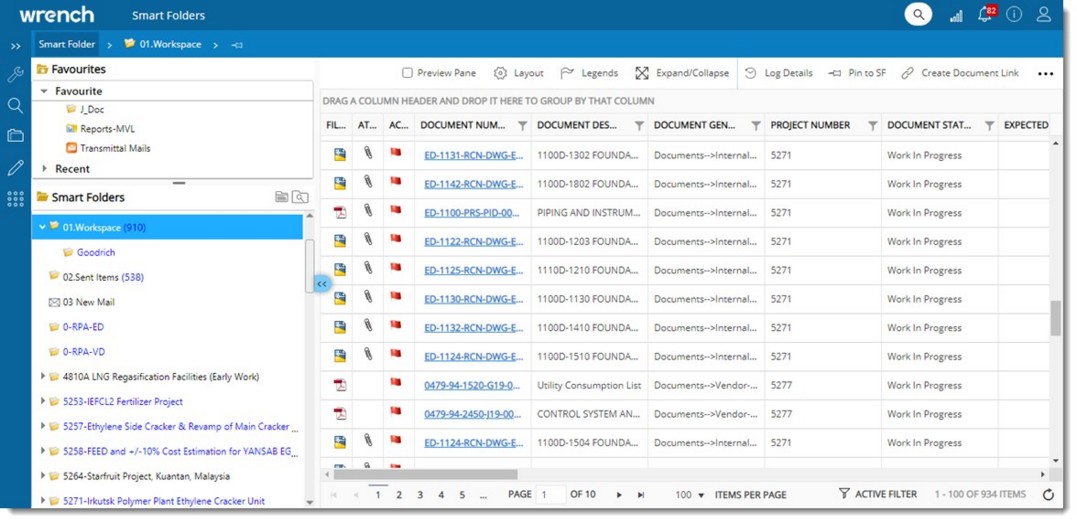
Smart Folder window is displayed. Folders are listed in the left pane.
2.Select a Smart Folder in the left pane.
3.On selecting a folder the objects in the folder are displayed in the right-pane.
NOTE: A hyperlink on the Client/Vendor document number in smartfolder grid is available so that user can access the main document from ‘Client/vendor document number’ link.
A button that acts as a toggle to hide and display the smart folders is available in the grid.
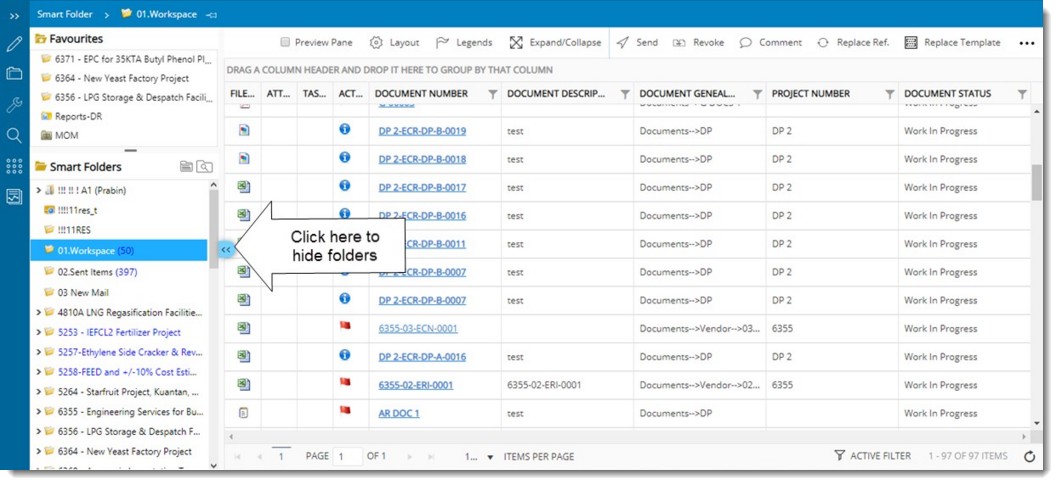
Figure: Hiding the folders.
Once you hide the folders by clicking the button, the grid looks as displayed in the following figure.
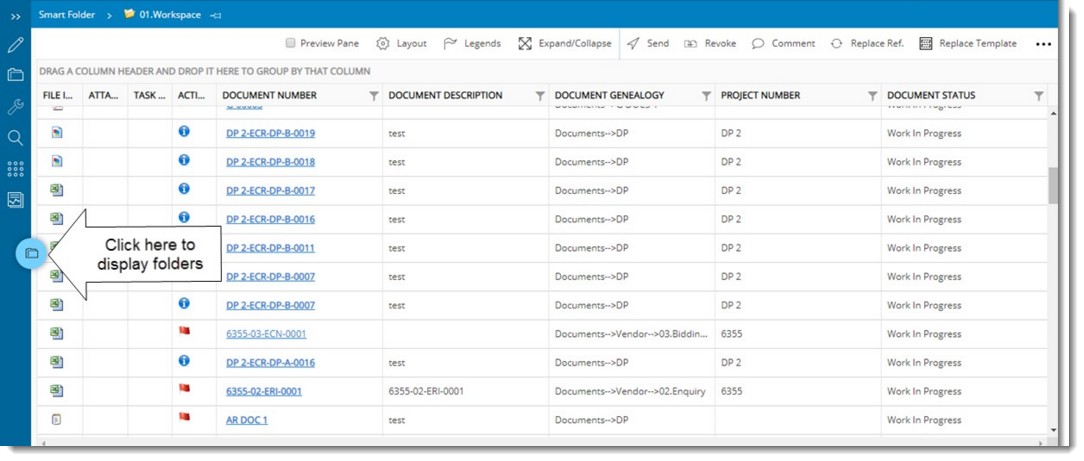
Figure: Displaying the hidden folders
4.Click the folder button to display the smart folders.
NOTE: On the Document Smart folder window, there is a column Task Delayed that indicates the delay of task. Different instances of delay of task are indicated by different colour icons against the respective linked document.
5.Click the Expand/Collapse button again to hide the smart folders.
NOTE: While working with smart folders if the user log out by closing the browser, next time the user log in, user is automatically directed to the previously opened folder.
Different operations that can be carried out from the smart folders are described in the sections Working from Document smart folders and Working from Task smart folders.
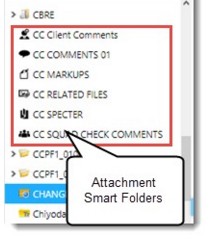
Attachment Type Smart Folders
Smart Folders for different attachments are indicated by different folder icons or legends as displayed in the following figure. This helps in organizing and managing different types of attachments easily,
Transmittal Smart Folders
Transmittals can be managed using the transmittal type smart folders. Transmittals in the folder are displayed in the grid with its details. Entire data in a selected smart folder grid can be exported to Microsoft Excel using the option ‘Export to Excel.’
On placing the mouse pointer over the option Download, a pop-up menu is displayed. On the pop-up menu options Download Documents, Download Coversheet, and Download Both are available.
NOTE: The menu items are configured from the Navigation option in the Administrative Settings.
On clicking the option Download Documents, if the setting "Limit transmittal accessibility to sender and recipient origin" is selected for the transmittal type and the user has no accessibility to the transmittal a warning message is displayed, and downloading the document is restricted. If multiple transmittals are selected, only documents from the transmittal for which the user has access permission are downloaded.
On clicking the option Download Coversheet, if the user has access to the selected transmittals, the coversheet of the selected transmittals is downloaded as a compressed file. When the file is decompressed, the cover sheet of each transmittal is available as a single file.
On clicking the option Download Both, Coversheet and attachments are downloaded.
Recent folders
Smart folders which are recently visited by the user but not set as favourites are listed under the Recent folder.
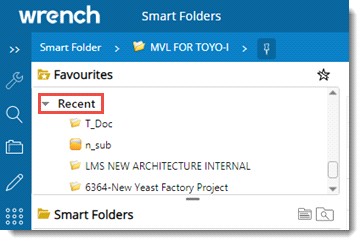
Recently accessed smart folders are listed based on the count defined for the setting Number of items in recently opened lists’, in WRENCH Desktop version.
Navigating using bread crumbs
Bread crumb navigation allows users to retrace their steps, or go back to a parent smart folder. In cases where there are a lot of child smart folders arranged one inside the other, bread crumb navigation can greatly enhance the way users find their way around.
Bread crumbs typically appear horizontally across the top of the page, below title bars or headers. They provide links back to each previous folder the user navigated through to get to the current folder. Bread crumbs provide a trail for the user to follow back to the starting or entry point. A greater-than sign (>) serves as hierarchy separator.
A bread crumb trail or path based on smart folder selection history is as displayed in the following figure.
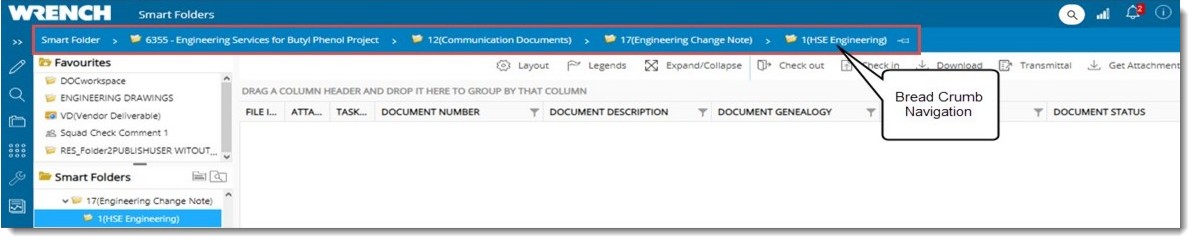
Figure: Bread crumb Navigation
When the name of a folder hierarchy is larger than the horizontal space available, name of folders from the left is removed except the name of last smart folders in the hierarchy. In place of removed folders, “<<” is displayed.
Downloading attachments
Document attachments can be downloaded directly from the smart folder. Documents with attachments are indicated using the attachment icon as shown in the following figure.
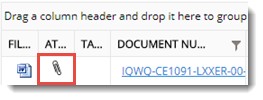
1.Click the attachment icon to download the attachment.
Document Attachments window is displayed.
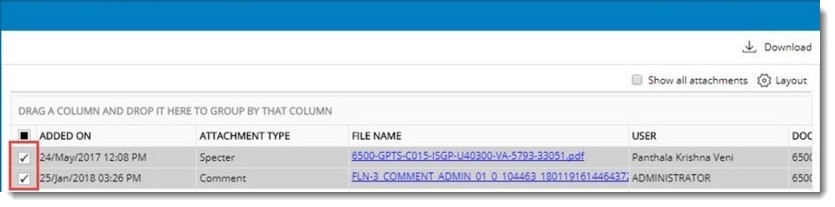
Figure: Document Attachments window
1.Select the attachment that you want to download and click Download.
Attachment is downloaded.
Filtering smart folder items
Items that are displayed in the smart folder grid can be filtered by applying filters on column headers. Once filters are applied, items based on the filters are only displayed in the grid.
To apply filters
1.On the smart folder grid click the filter icon next to a column header.
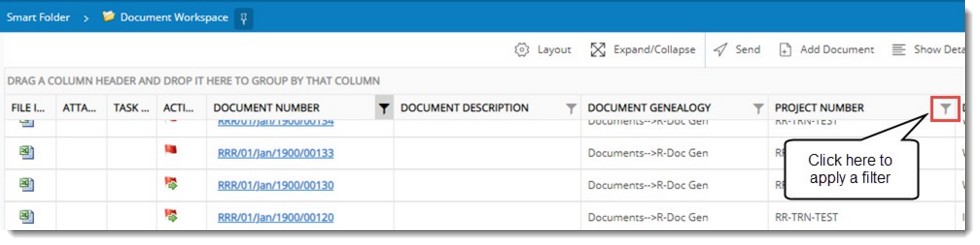
Figure: Applying filters
2.Select a filter condition from the drop-down list. Values listed in the drop-down list are Contains, Equal and Starts With.
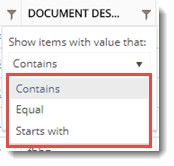
3.Enter a filter value and click Filter.
Items are displayed in the grid based on the filter value entered.
For Example: On the filter window if the Condition selected is Contains and filter value selected is 2, all Projects containing 2 is displayed in the grid.
NOTE: For narrowing down the filtering of items in the grid, filters can be applied for different columns in the grid.
Clearing filters
Once content in smart folder are filtered, data is displayed in the grid as required. When the user starts working on the documents at some point of time there are chances the user searches a document and will be unable to find it. User may not be sure about the multiple filters applied in the smart folder. User has to move through multiple column headers and check the filters. This is confusing and time consuming. To handle such situation option to view and clear the applied filters is available.
To clear filters
1.Click the option Active Filters in the bottom options bar.

Active Filters window is displayed.
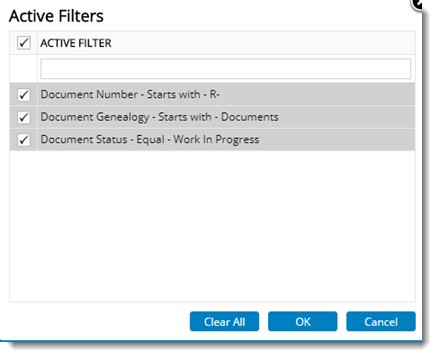
Figure: Active Filters window
By default all the available filters will be selected.
2.Clear the checkbox to remove a filter and click OK.
3.Click Clear All to remove all the filters.
4.Click OK to save changes.
Advanced filtering
Though it is possible to filter the columns that are displayed in the grid, If there are addition columns available in the grid, instead of scrolling to the right side to view the columns and filter the documents, the advanced filtering option can be used. User can easily search using different parameters from that filter window.
To apply the advanced filter
1.On the smart folder grid click the filer icon.
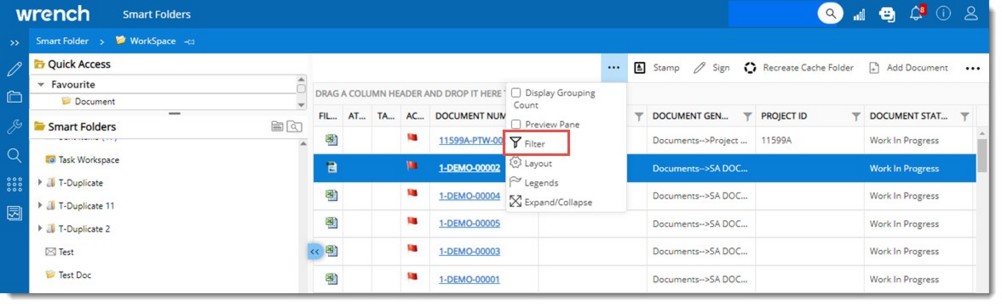
Figure: Selecting the advanced filter option
Filter items window is displayed.
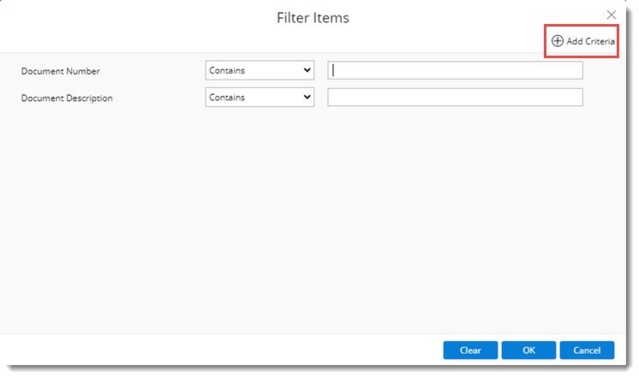
Figure: Filter items window
On the window, filtering parameters Document Number and Document Description is displayed by default.
2.Click Add Criteria to include additional filter parameters.
A set of filter parameters including custom properties are displayed.
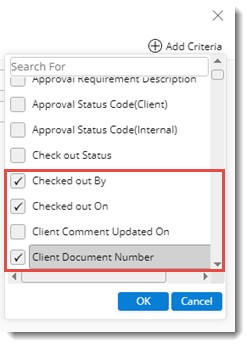
Figure: Selecting Filter Criteria
3.Select the checkbox next to the required parameters and click OK. Selected parameters are displayed in the Filter Items window.
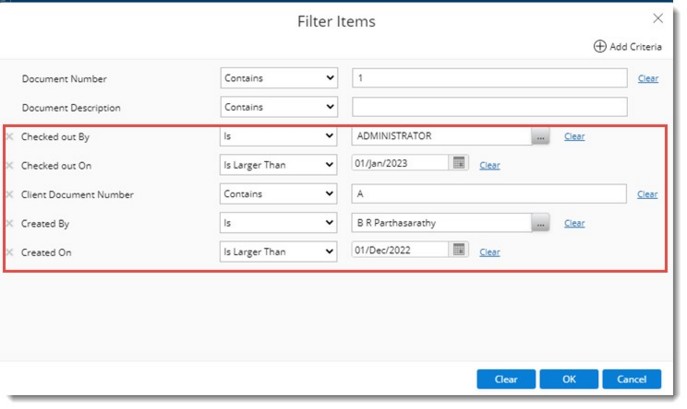
Figure: Selected filter items
4.Click Clear to remove the values entered for a filter parameter.
All the filter parameters except the default parameters can be removed by clicking the cross sign next to the filter parameter.
5.Click OK to apply the filters.
Documents in the smart folder is filtered based on the filter parameters.
Viewing transmittal released documents
Only latest transmittal released documents can be displayed in a separate Smart Folder. To make this possible while creating personal folders in WRENCH ENT server, option to create personal folders exclusively to display transmittal released documents is selected.
From the smart folder on clicking download, latest transmittal released revision and version of the document will be downloaded.
On clicking the document link, document details of latest transmittal released document revision will be displayed.
When user view or download the document, the latest transmittal released revision and version of the document will be downloaded.
When user perform the following operations, system download/view /print the respective attachment, attached to the transmittal released revision and version of the document.
•Download Client Comment
•Download Comment
•View Specter
•Print
Grouping smart folder information
Content in the smart folder can be grouped based on the column header. Grouping can be done for document, task and correspondence smart folders.
To group based on columns
1.Select the smart folder.
2.Drag the column to the to the top part of the grid marked as DRAG A COLUMN HEADER AND DROP IT HERE TO GROUP BY THAT COLUMN.

Figure: Grouping smart folder grid information
Information in the grid will be grouped based on the column header selected for grouping.

Figure: Information grouped based on column header
NOTE: On the correspondence smart folders, grouping the correspondence based on the TO and CC resources is possible.
Grouping Correspondences
It is possible to group correspondence smart folder data in the grid using columns where the mail status is represented by images. Also confidential mails can also be grouped.
To group correspondence by mail status
1.Drag MAIL STATUS column to the grid header.
The mails in the grid are grouped based on the status images of the drag-and-dropped column. These images will be displayed on the header row of each group.

Figure: Grouping mails based on status
On hovering the mouse pointer over the icons, a text displaying the status of correspondence is displayed.
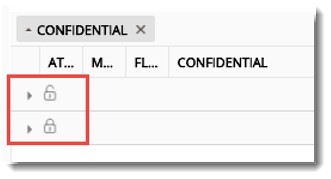
To group confidential and non-confidential mails
1.Drag the column CONFIDENTIAL to the grid header.
The mails in the grid are grouped based on whether they are Confidential or Non-Confidential.
Right-click menu operations
A right-click menu is available for smart folder, which displays only the operations that can be carried out for the current selection.
On the right-click menu of a single smart folder the following menu is displayed.
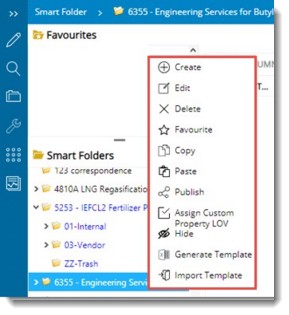
Figure: Right-click menu operations
Create: Click this option to create a smart folder. For more information see Creating Smart Folder.
Edit: After selecting a smart folder click this option to edit the smart folder details and smart folder rules.
Delete: Click this option to remove a selected folder and its sub-folders. On clicking this option an alert message Are you sure to delete selected folders and sub folders is displayed. On clicking folders are deleted and a confirmation message Folders are deleted successfully is displayed.
Favourite: Click this option to add a folder to the Favourite folder. For more information see Adding folders to favourites.
Copy: Click this option after selecting a folder to copy the folder and its contents. When a new project is created, user will copy the existing smart folder and paste it to the new project being created and rename the folder.
Paste: After selecting a folder and copying it click Paste to paste the contents of the folder to the desired location. When smart folders are copied and pasted, rules and views published in the source smart folder are also copied to the target folder.
Publish: Click this option to share the selected folder to users or user groups. For more information see Publishing Smart Folder.
Assign Custom Property LOV: Click this option to assign LOV values of a custom property to the selected folder. On clicking this option Select Custom Property LOV window is displayed. In the window different characters are listed. On selecting a character, values assigned to the character are displayed. Select the required value.
Hide: Click this option to hide the selected folder. For more information see Hiding and Unhiding folders.
Generate Template: Click this option to create an MS Excel template using which folder structures can be imported in bulk. On the generated folder enter the hierarchy of the folders, name of the folder and save the file.
Import Folder: On clicking this option Bulk Import Wizard is displayed. Click Choose File to select the MS Excel file that contains smart folder details for import and click Next button.
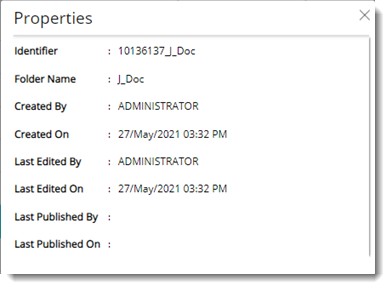
Properties: On clicking this option after selecting a folder details of the folder is displayed.
On clicking the operations icon after selecting a single folder the same menu is displayed. If a user right-clicks on a smart folder directly, operations menu is displayed.
On the right-click menu for multiple smart folders the following items will be displayed.
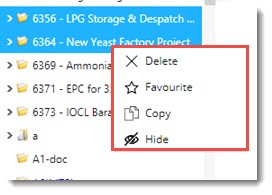
The same menu is displayed when multiple folders are selected and smart folders operation icon is clicked.

On the right-click menu that is displayed for single or multiple folder selection from Favourites section only option Remove from favourites will be displayed.
|