The workflow assigned to the document is displayed here. If a workflow is not assigned to the document, a workflow can be assigned to the document. In addition you can carry out different operations from the workflow window.
NOTE: Only a user with Assign/Start/Flush Workflow permission will be able to Assign workflow to a document, Start an assigned workflow and Remove workflow assigned to a document.
STEP 1: View the workflow assigned to a document
- In the left navigation pane click Workflow
Workflow assigned to the document is displayed
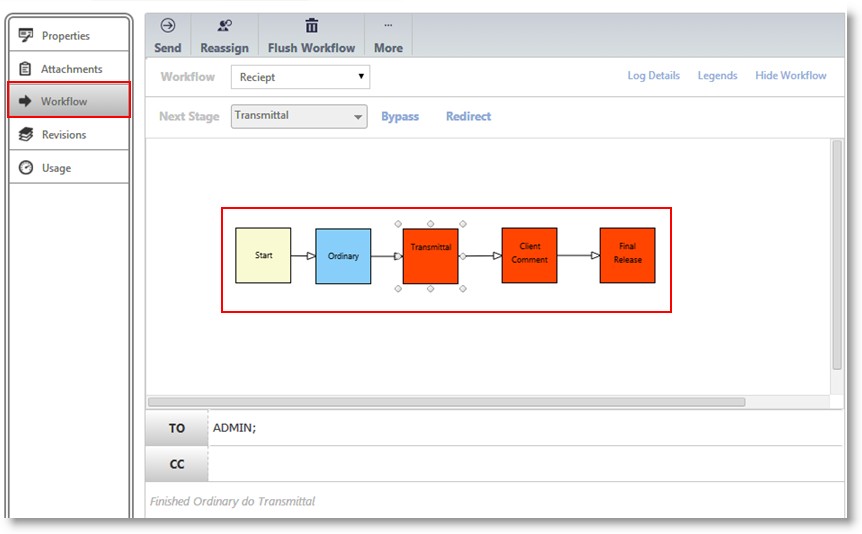
Figure: Document Details - Workflow
STEP 2: Selecting and starting a workflow
In case a workflow is not assigned to the added document, workflow window is displayed with the Start Workflow button
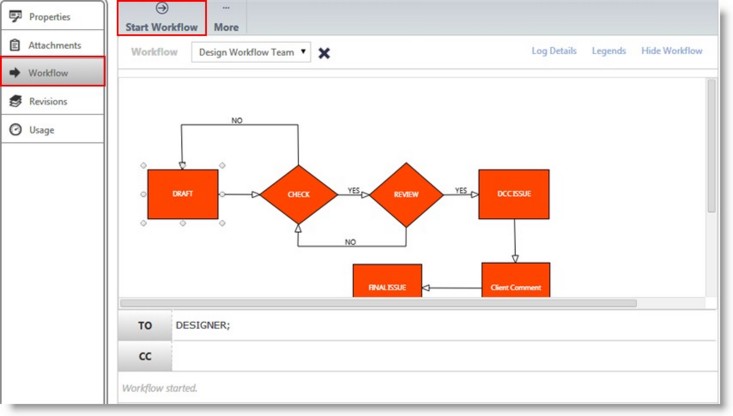
Figure: Starting a workflow
- Select a workflow from the drop-down list
- Click To..to select resources for the workflow stage
- Click Start Workflow
STEP 3: Sending a document
- Click To..to select the stage resources
- Click Send to send the workflow assigned to the document
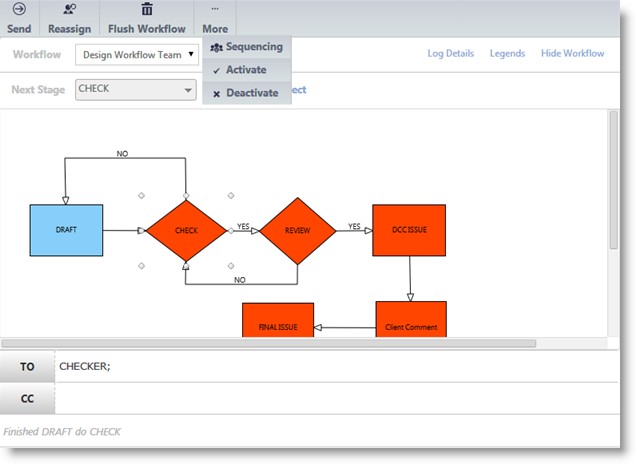
Figure: Sending the document
Operations from the Workflow window
The following operations can be carried out from the Workflow window.
Reassign: Existing resources in a stage can be changed using this option. You can add more resources to existing resources in a workflow stage, remove some resources from a stage or completely change the resources in a stage.
NOTE: User should have reassign rights in the security centre to reassign the resources of a workflow
 To reassign resources
- In the workflow window select the stage for which you want to reassign resources, and in the tab strip click Reassign
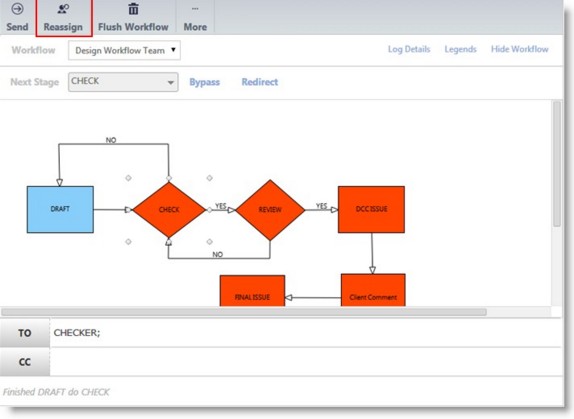
Figure: Reassigning stage resources
Reassign tab disappears and Save and Cancel tabs are displayed in the tab strip, To and Cc fields will be editable. Instead of subject and message field an area to enter reassign comment is displayed.
- In the To and Cc fields enter the new resources for the stage. As you type in a list of resources is displayed and you can select the stage resources from this list.
- Click Save to store changes
Stage resources are successfully reassigned.
Flush Workflow: Click this option to roll back a workflow that has been already started to its initial stage. On clicking this option the object is flushed or removed from the workspace of the stage users and the message object has been successfully flushed is displayed.
Activate/Deactivate: In workflows with parallel stages you can deactivate a parallel stage. By deactivating one of the parallel stages an action by the resource in that stage can be avoided. Usually a workflow with parallel stages is used in organizations if a document or drawing requires action by two authorities. In some cases if approval of just a single authority is only necessary then the stage allocated in the Workflow for the other authorities can be deactivated. You can also activate a deactivated stage.
Sequencing: Interdepartmental or Intra departmental Squad Checks can be performed in Wrench by defining a stage as a Sequenced stage in Work flow Designer. "Sequenced Sending" is a feature in sending, which follows a predefined pattern within a stage. If a sequence has been defined and locked in the workflow the sequence is displayed here. This pre-defined sequence cannot be changed.
If a sequence is not defined in the workflow stage, you can define a sequence here. If a sequence is defined in the workflow and it is not locked, the sequenced can be altered here.
 To view/change a sequence
- Click the More>>Sequencing
Sequencing window is displayed. In case a sequence is defined it is displayed here.
- Click the arrows to enter a new sequence or to change the sequence
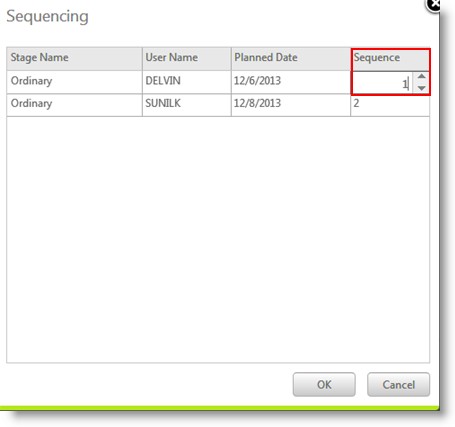
Figure: Sequencing window
- Click OK to save changes and continue
NOTE: Only the user who is in the active sequence of the stage will be able to do any operation in that stage.
Assigning an unguided workflow
While sending of objects are to be carried out in the absence of a pre-defined work flow the manual routing operation or an unguided workflow is used. Here a set of users to whom the objects are to be sent are defined.
 To start a workflow
- In the left navigation pane click Workflow
Workflow window is displayed
In case a workflow is not assigned to the added document, workflow window is displayed with the Start Workflow button
- In the drop-down list select Unguided Workflow
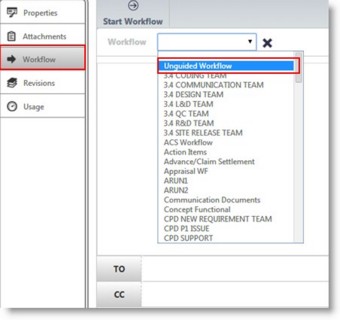
Figure: Selecting the unguided workflow
Once you select the workflow the following window is displayed
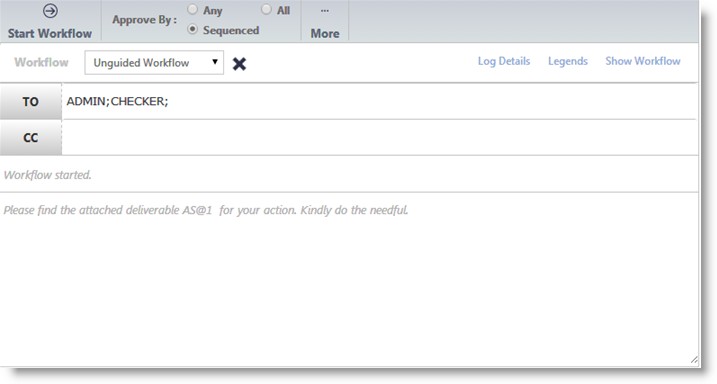
Figure: Starting a workflow
- Click To.. button to select the recipients from a user list
- Click Start Workflow
The document is sent to the next stage
When the recipient opens the document from his smart folder the following window is displayed

Figure: Sending documents - Unguided workflow
- Click To button to select the resources or recipients of the document that is being sent
- You can define an approval method under the Approve tab
- If the radio button next to Any is selected, any user among the recipients can approve the document
- If the radio button next to All is selected, all the users in the recipient list can approve the document
- If the radio button next to Sequence is selected, approval can be carried out, only based on the sequence defined.
- Click More>>Sequencing to define a sequence for completing the work
- Click Send to send the document to the recipients

